SAVE 15% OFF ON YOUR FIRST ORDER PLUS GET 3 FREE PATTERNS. SIGN UP BELOW!

0

Your Cart is Empty

Shop
  • Read our story

  • Each of our carefully researched, styled, tested and distributed collections reflects a particular aesthetic and ethos. We hope some of these speak to your own style, and help you refine and redefine your own look and style philosophy in the process.

  • See How This Bracelet Gets Its Cool Closure!

    July 14, 2025

    See How This Bracelet Gets Its Cool Closure!

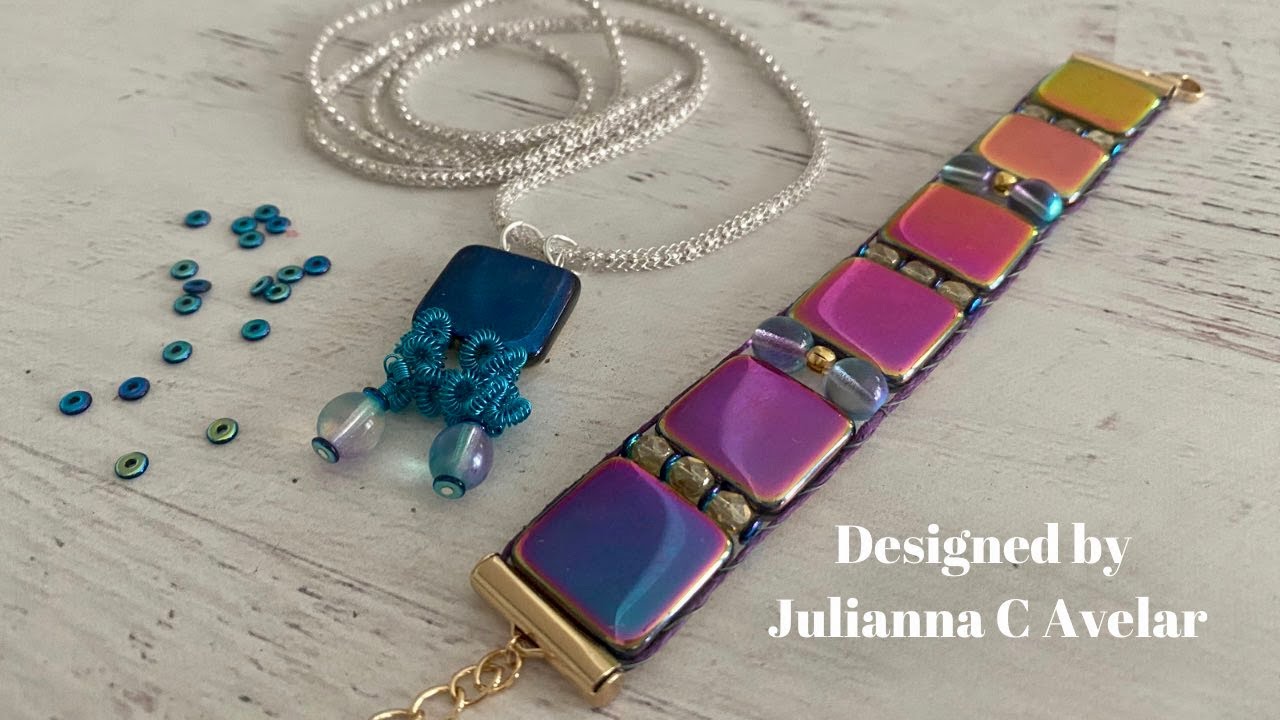
    Want to learn a quick and easy way to finish off a piece of jewelry woven on the loom? This method is also a quick way to add a clasp to your project! Join Julianna C Avelar for this quick and valuable tutorial. You can use this technique to finish off most beaded loom projects, ust by adding a row of seed beads to each end for this technique! You will find yourself using this procedure again and again! Watch the tutorial below. 

    Supplies used for this technique:

    Save 15% off your first order, plus Get 3 Free Patterns: https://jewelloom.com/pages/get-3-free-bead-patterns-and-save-15-percent-on-supplies

    Did you know Jewels has a Book? It’s true! You can get a digital copy of the Jewel Loom Inspirations book here:  https://bellacraftspublishing.com/jewel-loom-by-julianna/ 

    You can find Jewels here:


    Transcript:

    hey everyone okay so I thought it would
    be a good idea to show you how I
    actually
    did add the clasp i know at the end of
    the um or during the video um you know I
    showed you that I I sewed the row of the
    80 O's into the bracelet and that I was
    going to use a closure and where I ended
    was oh I was going to have to try to
    figure it out so I have figured it out
    um pretty simple actually you could see
    right here I I have it on and it all
    came out great and so I'll just walk you
    through and show you what I did so
    pretty simple here I have the two ends
    of um the hemp warps now I will tell you
    one of the things I experienced is that
    I was I was pulling around just a little
    too much and my warp shifted and my
    bracelet started to um curl and so just
    be careful that when you are doing this
    you don't pull your warps too tight um
    or you know tug at them because they
    will shift okay so we should be good
    because there's really nothing on this
    end now to screw up because this end is
    is dialed in and secured with the clasp
    so all I did was um I'm going to turn
    this here a little i just did two little
    knots
    and I'm going to apologize i have the
    fan off in here i can hear it wanting to
    come on i still have not figured out
    where the off button is
    so silly so I just made a little knot
    and then I'm going to make another one
    and I'm just using the chain nose to
    kind of walk that knot down so that it
    gets as close to the beads as possible
    we don't want it like we want it really
    snug against the beads so let me show
    you let me see yeah this one this one's
    okay i'm not going to worry about that
    um and then
    what I did and I always like to match so
    here's here's the end and here's the
    little cap that I had to flip over so I
    always like to match that and go in the
    same direction
    so before I cut the hemp and by the way
    I do use my pliers to kind of open these
    sliders up a little bit more sometimes
    they're not exactly round and you could
    see that I I just opened it up a little
    bit so I'm going to slide that on
    and then I'm just going to push that in
    oops
    okay
    and just make sure everything is okay
    still here and now I am going to go
    ahead and turn it towards me so that I
    could see what the heck I'm doing okay
    cool and now I can see yep good so what
    I'm going to do is I'm just going to
    bring in my little scissors and now I'm
    going to nip these so I actually have
    a layer of hemp in there which I like
    because I feel like it's giving um it's
    taking up space
    and I I like that one is still attached
    it feels feels like a good idea so I'm
    just going to cut above the knot there
    and yeah I have to cut off a little bit
    more
    i love these scissors okay and then I'm
    just going to scooch this in
    this is just one of those Fumbina kind
    of
    things and my fingers are not strong
    enough so I just bring in
    the flats
    and Whoopsie
    yeah so it looks like I might have to
    trim this little piece off here
    and then I'm just going to make sure
    this is really nice and tight so yay
    so yeah it's pretty simple i stinking
    love this cuff i mean so unique so
    different um you know we put it together
    last night and I was really kind of
    focused on showing you different beads
    that equaled you know the tile and so I
    I just love all of it i love the
    dimension of it i love the end result
    and what's super cool about these
    vintage tiles is that if you wanted you
    could probably buff up the gold side and
    reverse it so now you have two in one
    pretty stinking cool huh i'm not really
    good at doing this on my own but let's
    see i don't want to get locked in here
    but the cool thing about the slider is
    that you know you can you can gain some
    length right so like if you needed a
    little bit more room
    but yeah ain't this great oh I'm so
    stinking excited so I hope that helps
    you i thought for sure I needed to show
    you
    excuse me how I did that because we just
    kind of left it in the last video undone
    and I said "Oh now I got to figure it
    out." So pretty simple um just you know
    like I said be careful with your warps
    and there we go so yay all righty i'm
    going to finish those earrings too
    because those are too stinking cute they
    need to be in my ears all right hope
    this helped