Your Cart is Empty
How to Loom a SilverSilk Fire & Diamonds Bracelet -Jewel Loom School with Joan
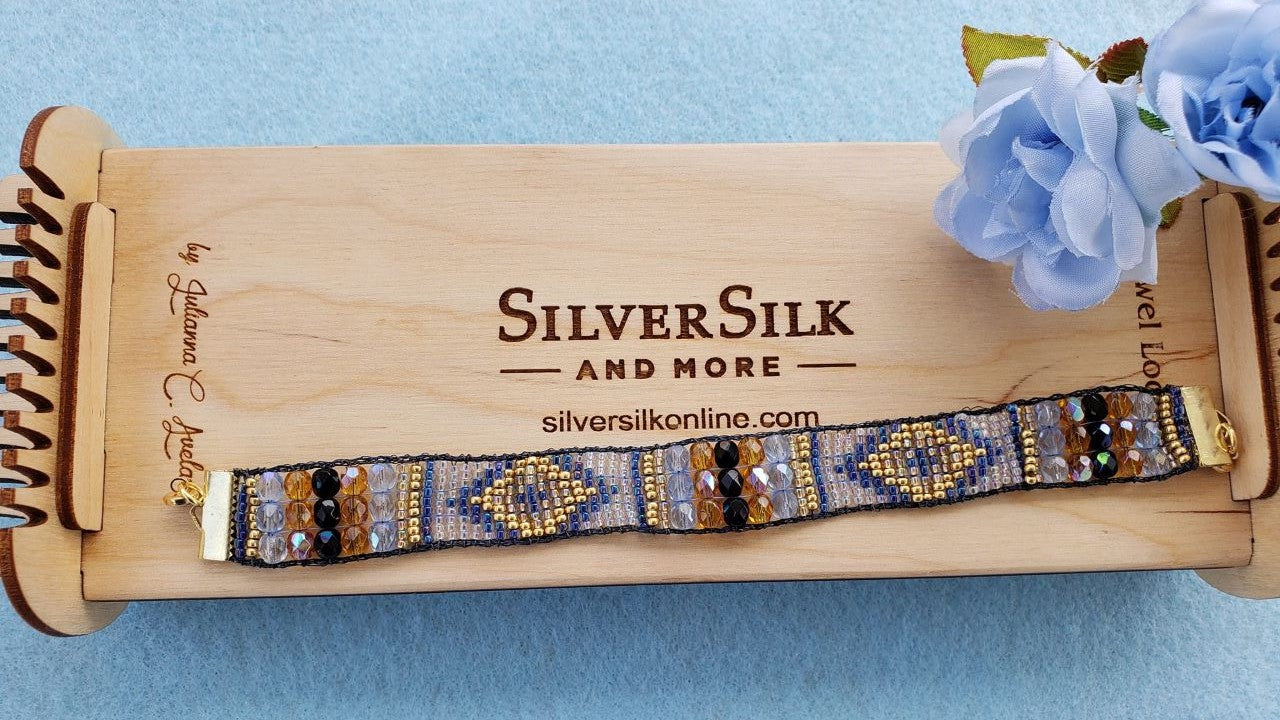

Learn how to use SilverSilk 3-Needle Chain to outline a bracelet to make the design pop out, besides learning to combine a seed bead pattern & Fire Polish beads into the same cuff. Joan Dice teaches how to use both SilverSilk & Wildfire together as warps, plus how to loom a seed bead pattern as a smaller section of a bracelet. This is a great tutorial to learn combining a couple of loom techniques on the sustainable Baltic Birch Wood loom to end up with a beautiful cuff.
Notice: Jewels is traveling across the country, so new orders, except for wood products, will not be fulfilled until at least August 21st. Wood products will still be shipped on their regular schedule, since they are fulfilled in Missouri.As a thank you for your patience, Jewels is giving 25% off of all products, except the wood products. This is a great time to stock up on your supplies! www.jewelloom.com?aff=11
Fire & Diamonds Pattern -https://docs.google.com/document/d/1O0Z6nRPguOz1WS7X1uzFDEW_r23WQdF6cWAj-OZPfSg/edit?usp=sharing
Supplies Used:
- SilverSilk 3-Needle Chain
- 5mm Fire Polished Beads - 3 colors
- 11/0 Seed Beads - 4 colors
- Wildfire
- ⅛” ribbon
- Ribbon ends
- Clasp
- SilverSilk Loom
- SilverSilk Bead Board
Get Your Supplies here:
- SilverSilk 3-Needle Chain -https://www.silversilkonline.com/3needle-chain
- 5mm Fire Polished Beads -https://jewelloom.com/collections/beads/5mm-fire-polish?aff=11
- 11/0 Seed Beads -https://jewelloom.com/collections/seed-beads/size-11-0?aff=11
Buy your SilverSilk Loom, SilverSilk Bead Board, & even SilverSilk Silkies pendants here: https://jewelloom.com/collections/silversilk?aff=11
How to Add A Ribbon Clasp to Your Beaded Project: https://jewelloom.com/blogs/craft-hangover/how-to-add-a-ribbon-clasp-to-your-beaded-project (this shows the easier way to put a ribbon crimp end next to your woven beads)
Please ask any questions by either replying to my comment below the video on YouTube (so I am tagged), on the Jewelry Making with Jewel Loom Facebook group page, or in the Jewel Loom School Community group (link listed below & is free to join).
Subscribe to the Jewel Loom YouTube channel to access past & current tutorials: https://www.youtube.com/c/JewelLoom
Sign up for the Jewel Loom newsletter & get 15% off your first order, plus a free pattern: https://jewelloom.com/pages/save-15-on-your-first-order-get-a-free-pattern
Receive text notifications for Jewel Loom shows & special deals by texting "Sign Up" to 1-805-768-0568
Check out the Jewel Loom Blog for past & current tutorials, plus read details on project: https://jewelloom.com/blogs/craft-hangover
Follow Jewel Loom on Instagram: https://www.instagram.com/jewelloom/
Join the Jewel Loom School Community (off Facebook) to share your loom creations, be inspired by others, & a place to ask & answer questions: https://www.juliannaavelar.com/offers/5ss8HfCp/checkout
Sign up for the Birthday club at www.jewelloom.com?aff=11 by clicking the link at the top of the page or during checkout.
Jewel Loom Facebook pages: https://www.facebook.com/Jewelloom &https://www.facebook.com/JuliannaJewelsAvelar
Jewelry Making with Jewel Loom community page: https://www.facebook.com/groups/228056324285807
Please contact Jewels with any questions you have about her looms: email - hello@jewelloom.com or text - 1-805-768-0568
Transcript:
hi I'm John Dice and I'm here to do another fun tutorial on the silver silk
loom using um the silver silk three needle chain and
um but before I get started I like to make one announcement please forgive me I'm going to be reading this so I don't forget it any parts of it
um starting yesterday which is Wednesday all new orders except for the wood
products will have delayed shipping um Jules is traveling across the country starting tomorrow Friday so only Wood
Products will ship until August 21st because they ship from a facility in
Missouri so that's a totally different facility all other orders will ship
starting August 21st that are in place between um yesterday through the 21st for your
patience Jules is offering 25 off all items except for the wood items while
she travels just remember the wood items are the bead boards the wood looms and
um like um wood buttons I don't think she has any pendants left but um anything made
of wood um so I just want to give you some examples
of how this 25 off affects the price you know we've been um pushing the Julian
starter kit and it the price on that was reduced to 25 and I checked on the
website um for you know the baby limb the regular original jewel loom and enough
products to make your first project you know so it's
great for Christmas or um birthdays just a gift or even to add to your collection that is now 21.75
that is a fantastic price for the value you get and also um
glass pearls which is usually um four dollars and now three dollars and you
know you can use that on the limb but you can use those on any of your jewelry making
um items and another great value the five dollars check glass mixes are now 375. you know so just think of all your
findings cords and beads are all on sale you know besides some other things I'm
not thinking of offhand Okay so I just want to go over we are using the
silver silk loom today it's um it's a wood made of sustainable
Baltic Birch wood Loom and and the cords are made for the three
millimeter um silver set cords but it is great for
the three needle because it is really less waste using this slim when you're
warping and then I'll also be using another sustainable Baltic Birch Pro product the
um the Silver B board I love how this is sectioned out
so I use that a lot um with my bigger beads
so let's get started on on our project then and just to show you what we're going to be making we're going to be
making this bracelet with the CB pattern and fire polish so um and then this is a great
um sorry my brain's going faster than my mouth and this is a great way to start
on seed bead patterns if you're pretty worried about it because um the fire polish can take up a lot of
room so you only give them one small section of the seed bead pattern so let's get started
I'm going to show you what I'm going to be using today um I have some like rainbow clear
crystals and I had this metallic gold Japanese glass bead I just think that really pops
out these are all 11 of those right here and then I have like a gold lined
um clear bead and blue beads also 11 0's and then for the fire polish
I have like a light blue a darker gold color
and then this is like a really dark one with like blue and other color highlights
so um those are going to be like centerpiece and um end of the bracelets
so and I got those all laid out on my bead board unfortunately I didn't look at my chart so I didn't lay the seed
beads out in the right order I wish I would have put um the blue here and then
move these down so um there is a i there is a chart that um
I'm gonna I'm gonna add the attachment to in the description and unfortunately
when I printed it out it didn't come out good but I also have a um like it written out too for the seed
bead part but all this is right now it's going to be part of it as you can see there's my chart I tend not to use the
chart anyway so um
I want to show you how to warp first and we're going to do it the easy way I decided to use blue just add a more blue
accents to this so blue wildfire
and actually I need to only need two warps for this and they're going to be the center warps so I'm going to add
this first and
I'm thinking I'm going to try this a different way since I only need two warps I'm going to come I'm gonna put it
over the center Peg
try not to waste so much wildfire
and then I'm just taking it around to the back and I'm gonna just tie them together
make sure it's pretty tight
okay turn that off
now I'm using River colored um three silver cell three needle chain
which I love these and they're going to be the outside warp so it's going to be like a frame
to my beading stuff it's so easy to use and yeah after
my tutorial last week I discovered
I am gonna try to do this just remember too now I'm putting it on
either side of the pegs sorry about that you can see I'm putting it on either side
and I'm wrapping it around here and I have the other one I'm holding we want to make them oh crap
okay we want to make them tie I it doesn't
matter which pay goes on the bottom I'll just keep doing this totally in place I'm going to use one of these
good thing I got two of them here to hold these in place and tighten them up because when I used them last week
on last week's tutorial it really held in place and didn't bother my beading so I'm holding the silver silk tie
and I'm pushing this up against this making sure it's tight and I got that in
place I'm pushing it down so it makes that
tighter so it's nice oops and I made a mistake and went in the wrong warp over here so
I gotta fix that so I want it on either side of the other
two warps
sorry about that foreign
place
open my bead stopper put them in I want to get tied up against this and
down
I end up using two of them just to make sure they stay in place and I think I will
my bead Stoppers aren't flying across the room so I'm gonna
go on and get it all the way down I clip this one on so I'm going to use
this tiny binder clip to keep it in place because I couldn't find one of the
bead Stoppers
okay now it's nice and tight and
okay let's move my camera a little bit
I'm going to move the bead board back
I'm just leaving the rest of that silver silk on there so I can when I trim it I can make it as long a pieces as I can
and then don't worry about the shorter pieces you may get because I've seen some cute designs like somebody wire
wrapped it to some hoops to make look like a little hoop on a pair of earrings
and it was really cute I mean there's all kinds of ways you can use it or you can use it like a bead frame you
know wrap it around okay now
I am going to take
yep two yards so that's about the longest I can go a
wildfire
okay I put a cardboard here I folded it up just to tighten up my strings here I do this with the large wisdom Warriors
sometimes um um so yeah don't worry about if you have
to do that as long as you have tighter strings here I'm gonna make my beaded air about
um six and a quarter long because my clasp area from income one end cap to
the other with the clasp attach is um
is about um um one and a quarter long and I want a
seven and a half inch bracelets so this measures from Peg one peg to the side to
the other um eight and a quarter and size so we want to start about two
inches in so I'd say halfway between the s and
jules's name
okay just want to show you what I did I went ahead and changed it to a black
.008 because when I started this I did not like how the blue was showing up
against this dark river color and um this 0.008 Blends in better
uh I don't mind what the warp still being blue I also want to point out I'm
um with warping they're just days I can't tighten a warp uh very well as far
as the um um wildfire goes so what I did here was
I folded up a large business card in three to raise it and then you know I've
said that my painter's tape is my best friend I take painters tape to the end so it
doesn't ruin the loom and I went ahead and did my fire pot I mean my fire line
and I saved nine inches for the end and I did to get out of my way I just taped
it to the back here so so you can see it because the light's
not on that part so I just like all those extra strings
getting out of my way and I forgot to thread my needle when I was starting this
um so um we're going to start with the the
blue and we're going to do three I mean nine um seed beads in blue first
because this is where I need for the longer bracelet and if I make it too long I don't mind I'll either give it to
somebody or I like I don't mind wearing loose bracelets I don't mind if they go
around flop around their wrist because to me bracelets are and rings are for me to
look at earrings and necklaces are for other people to look at
heard that on a jewelry show on top of it I thought hey that's pretty clever it's true
and I do fidget with my bracelets a lot
and my rings
I like following the designs of them you know when I'm wearing them
find seed beads on here
and I want three seed beads between each Warp
and when did I do oh okay I need to flip that over okay there we go
I got the three seed beads between each one I really should start the other way
on the other side it's just more comfortable for me
and I'm not looking to see if you can see what I'm doing
sorry about that it got flipped to the pattern and I
have the pattern printed in front of me and I can't see if you can see what I'm doing
so with mine I'm going to except for the clear I'm going to put a row seed beads
here like I said I'm trying to start a tiny bit past the halfway mark between the F and
The Jewels part for my sizing okay so now I'm gonna um
glue the McAllen gold and I love these metallic gold beads I wasn't going to
use them but they pop out so much in the design they're Japanese bead they look
like metal but they're glass
and it really makes the design pop so I decided you know because I used it in my prototype and I just love how they pop
so I you know I thought well and maybe I shouldn't you shouldn't use
them though and so you can I got these at my local bead shop
and I actually have them in 15s 11s um
15 11's eights and sixes I even have a couple sizes in the antique gold and I
have all those sizes in the silver too I just love them so much it just adds a
way to add metal to your some of your projects without actually using metal
because sometimes the metal can cut through like the threads and stuff
usually I'll go through this row and lock it in place oh I gotta fix that
but since I got all that thread to tie at the end I'm not going to worry about
it on this design but if you feel safer go through the um you know back and forth twice
I don't know why I'm having so much time getting getting them even between each Warp
so after this one I'm going to do the um
another row of that um Gold Line bead that's a little bit
clearer and then I'm gonna then I'll start the
check glass I'll check back with you with the Czech glass okay just uh so this video doesn't go on
forever okay I got my three rows of seed beads now I'm going to put five runs of fire
polish and I'm going to make the same pattern three spots on the bracelets so the first row you know like when you cut
you might if you have to cut down to make your sizes you know just eliminate rows you know make the design that you
want or the pattern you want but each row is going to contain three of the same color bead
now for the gold I've got the light blue then the gold
so I'll come back when I come to the pattern okay I'm just going to put five rows of seed beads and I'm gonna start
the pattern or five rows of fire polish and I'll start the pattern
okay now I'm going to start the seed bead pattern I'm going to have my um pad right here
I'm going to use the handwritten one like I said you can use the drawing I made adjustments so please make sure you
read the notes on the drawing because I changed one of the colors like um within
the diamond where it shows white which you'd send clear I actually used the like Jonquil which is the Gold Line bead
and then I added a row of beads on either end
just to try to tie all the colors together so um
so I'm going to pick up four of the gold wine rainbow junk all I'm going to pick
up nine of those
three
four five
sex
I'm gonna see if I can scoot all these together and scoop
s
I got nine here so I'm gonna
um you know before I start getting into the pattern just to save some time I'm
going to make a row of the um well I just made a row of the light rainbow junk wall then I'll make a row of the um
a metallic gold a row of the blue and then a row that um clear
so and I'll be back when I get those rows done and then we'll start um where you know the lines start
changing okay I got the first four rows of the
seed bead pattern done which is all solid colors and then um
now um you know after I do the clear now I'm going to start adding the actual pattern where each row is going to
change but my needle is getting a little curvy I usually get my nylons off pliers
I try to straighten it out some
I do that Until It Breaks or it just doesn't work very well because I was having a little bit of problems
um picking up seed beads so in my um first row
um you know after the four solid colors I'm going to pick up four clear
one two three four one blue
more clear that's pretty good
so what we're doing here is kind of forming a diamond and I'm calling it
um diamond and Fire and Diamond I can't remember which word I use first fire and Diamond
um bracelet because of the fire polish and then the um the pattern that the
seed beads for
I originally was going to make this like a um Chevron but when I was doing the
Prototype and did the Chevron I thought you know I kept looking at it and it would just have the fire polish right in
the center and the rest would be Chevron and I just I kept thinking of that diamond pattern and I just went ahead
and made the diamond pattern and I liked it better okay so now we got first edge of one of
our diamonds now we're going to increase it and then we're going to make three clear
I am because it's probably because it was curvy
my needle was curvy I was having problems picking it up in the tray and it's just one of those days sorry about
that so I laid the seed beads out on me on the mat because I usually can do a
little bit faster from a bead mat
okay so I got three clear three blue three clear
some of you might be able to figure out this pattern um you know just remember you know it
increases and then gets the other side decreases um you know just you know drops off
colors just to form the diamonds and I have each diamond
wall double
okay
he's going to catch on the silver sock the way I'm doing it and
okay see it's kind of falling because I don't think I got it
around the under the warp over the warp that time so I'm gonna just go back through this thing went
back pick it up again
Maybe
gotta watch that so I don't knock those beads off the table
I'm gonna raise it up and make sure I go over each warp when I'm going back
yeah I see the silver of the needle over the warp so I know it's over the
warp
okay now I'm going to do two silver
I mean too clear two blue
one gold in Reverse to Blue
soap I mean to keep going to call these clear silver
now I picked spark I like sparkly I did pick sparkly don't be afraid to change it to what you like like for instance
you can use clear but not used to Rainbow just use the regular clear or you can even make it like a pearly color
make it white or white beads or whatever
pearly be the Pearly the lemonas are really pretty
yeah now I need to pay attention to make sure I'm going over the warps
and I'm going back through
okay now I'm gonna one um clear
two blue
three gold
two blue one clear
foreign
okay you can see where it's starting to form a diamond pattern pretty good
now we're gonna have two blue we're done with the clear right now
two blue two gold
I'm just going to call this yellow okay now
one yellow two gold
two blue
oops oops I gotta my coordinate it so I gotta move my tail
down in my needle
okay go underneath
okay
yeah no so if you don't like a lot of sparkly like there's versions of these
colors that aren't sparkly too that's um I I don't want to mention the
colors too much because you can find your own version Jules has all kinds of colors in her
store now we got one
and then two gold three light yellow
too cold
one blue
I know I always put that in my hand when I there
I'm gonna get the needle back over there
I have to get the most awkward ways
the silver silk looks so delicate but it's really strong
okay okay
now we're down to
we're almost to the center of this pattern two gold
two light yellow then we're gonna go to Blue back to Blue
one blue to let you know we just work our way
backwards again to light yellow to gold
see I had glue on the bead mat I keep forgetting to move my projects off the bead mats while I'm um you know gluing
the ends
okay
this pattern is in the description of the video
and it's also um will be in the blog too
okay now here's the middle row we're going to do one clear I mean one gold
two yellow three blue
and backwards again to Yellow and one gold
[Music]
oh you know what I put in four blue oh I hate that
get rid of the blue maybe I'll let you feed back through the other three
will that work out just fine
line them up
[Music]
come on [Music]
[Music]
okay all right that's the halfway point another pattern new verses so it's you
know like the color is going backwards go this way and once you get to the um
gold and then the light gold then you're going to do this repeat of the CB I mean
these fire polish again and then you're going to pick back up
with the pattern just like it shows here like we did here
I mean when you do the fire polish you ignore these because that's just for the ends um
but do the pattern here again and then you're gonna
um after you do the CB pattern you're going to do this again and um I'll come back
just to keep the video go you know not being like two hours long I'll come back when I um get
towards the end again okay as you can see I um finished the beading
I would you know I had stopped down here and then I just went and reverse the
pattern to here and did my extra rows of solids five fire polish
um and then I did the seed bead pattern again with the the Rose three row four
rows of solid fire polish this is actually going to end up bigger than what I've been for it to do just
remember when you're sizing your bracelet you can cut off the ends and maybe just if you want leave a one row
of seed beads at the end um and yeah if you have an extra small
bracelet you can cut out some of these solid rows and even make a smaller section of fire polish depending on what
size bracelet you have you know wrist you have or who you're making it for
so when I finish this I taught you know um I tied off the end up here
um around the silver silk and then I pass through here because I left nine
inches of cord I passed through here 12 times and then I tied it off again just
for some um support to make sure you know security
and I'm going to do the same thing here this is where I started the pattern I
tied it off when I started and now I'm just going to go under over under over
back and forth like that for 12 times
and this is getting ready for our ribbon crimp and make sure you keep going under over
under over because you start out over you're going to do your last row okay two under over under over three
whoops and we could tighten this up some too
since we're going to be um using a little bit smaller ribbon crimp and my I just want to make this a little
bit tighter sorry this
fell out earlier the one I was using
I just want to hold it in place I don't keep getting loose while I'm doing this
okay I started this and made a boo-boo so I'm going to go ahead and go through I noticed that what I was doing was off
camera so I'm going to explain what I did when I finished this row
um you know and I it's already explained that you know I passed through here 12
times and then when I got to do this and actually I already glued it too when I
went through this end um when I got done with the last you know this is where I started and I had
tied a knot so um just trying to fix that blue bead
okay I kind of not and now um I'll go go going through the under
over I'm going through 12 times you know each way so one two three and I already
did six rows and I realized I was off camera so you just do um each way under
over under over that's seven because I already did
yeah six rows okay under
over under over eight
under over under over nine
under over under over
10.
let me shorten this under
over under over 11.
under over under over 12. okay and I want the rest of this I'm not you know
some for tying off so it's going to be a kind of a tight
tie I love 12 inches I probably should have left um 15 maybe to make it easier
so um I'm gonna tie my knot but remember all this is going to be
glued too together just this is just going to make a little
bit harder to tie my knot okay so I'm going around the silver so I'll
come back that and I wrap it around so the um
um wrap it around so the end of the cord goes inside the
loop I just pull tight see if I'll let me get one more time
and just remember this Knot's going to be hid inside the crimp bin
okay I'm gonna take my
bread burner and then push it in
yeah I got my handy GS hyper cement
and remember don't squeeze this tube
let your hand warm it up
so I'm kind of spreading it back and forth across trying not to get any on the beads
I have cool hands so I get a little bit impatient to warm up come out
so I try to keep myself not to squeeze because you know they're not all come gashing out
okay now I'm going to show you a real quick secret I learned this from Myra Banks
um if you want when you want to put your lid back on if you try to get in the frame for your hyper cement
well I'm trying to get adjustment because it's finally warmed up it keeps coming out hold both at a 90 to a 45
degree angle and as you lift the needle slides right back in
thank you Meyer for teaching me that okay
now um now we can take it off the loom
[Music] I always say my painters tape in case it
can has enough sticky to be reused I'm going to take these off
remember you don't have to I mean I use them for the silver so because I think I can get a tighter warp than that
um now get my handy scissors I could save just
for my Wildfire
I guess I'm not to cut it on this side I don't know why I'm being real careful
there because I don't need all that cord okay now I see I kept the leap on that
because when I trim it down I always have a good piece of the um chain left
because I'll just cut it straight across and that way I can use it for something else
okay now I'm gonna um
I am going to put a little bit of glue on the other side
all right see if that works I want to kind of double this
or maybe make a little extra so that way I can wrap it around because
that's why I'm going to glue over those sweet what thread weaves I did
okay
okay so
let me do another one right now I'm gonna have to trim it down once I get it I just want to make sure I
have enough to work with got this
when it comes to ribbon you know I'm using 1 8 because it usually works out better usually they say you use like a
satin ribbon or a Velvet Ribbon or something um I saw somebody else use something
else so I'm just gonna try it I haven't had a problem so far
because I would think just so long as everything's glued it should be okay
so I'm gonna put some glue across this
and I'm using I I also picked up the gold sparkly because I wanted to kind of blend in with the
clasp
I'm going to lay the weaving without getting on the beads
I'm going to squeezing the slower Circle a little bit
a little bit of more great work to relax
and I'm going to hold on to it um to let it dry some and then I'm going
to do the other end and I'll come back when I get both ends done okay I got everything glued on so I'm
going to trim up against the ribbon um this is a little bit wider oops
that's good so I kind of folded over the ends to hide them in the clasp so
um and like on the other end of the silver silk see I stud the loop so they were cut this much off so I could use
that to wrap up on something I use it as a bead frame and I probably can do it against this so cut your um
cut your cords right up against the ribbon
I have to use two colors different Cutters for this since I'm using both silver silk and the
wire fire see that can end up being a nice piece
too that I can just smooth out so quickly that Smooths out
now I already got the other end done and I
got my clasp attached to this so it gee since I'm using magnetic class if you're using a magnetic glass you might want to
wait so um when you're crimping it instead of using flat nose pliers with
some tool Magic on it some people I've used um nylon gel pliers I used to use
that but they'd slide a lot so I really like it with the tool magic so be careful not to
get it over your beads and then crack in them since they're glass we're breaking them so I do both sides
and I just crimp over it
so for the measuring this is where I'm gonna find it's pretty big
but um just a minute when our mind still has an old
got it yeah there it is okay
so there we go so like I said this would even be cute having this in the center maybe skipping
this all together and maybe making like three sections of the seed bead or in
with some in the middle or maybe like one one to three rows of um
of fire polish in between to break up the sections but this is a good pattern
if you're learning seed beads and how to make a pattern with it but you know you don't want to go with a whole length
so or you can just make this in the middle on these big beads on each side all the way just to get a little
practice with the seed beads okay thank you for joining me with these tutorial this tutorial and I hope you
enjoy making it don't forget the um the pattern and descriptions to help
you out with this bracelet are in the description of this video plus I'll be
including it in the blog which I'll be posting around various places tomorrow so I thank you again for joining me and
have a