Your Cart is Empty
How to Loom a SilverSilk 3-Needle Chain, Fire Polish & Pearl Bracelet - Jewel Loom School with Joan
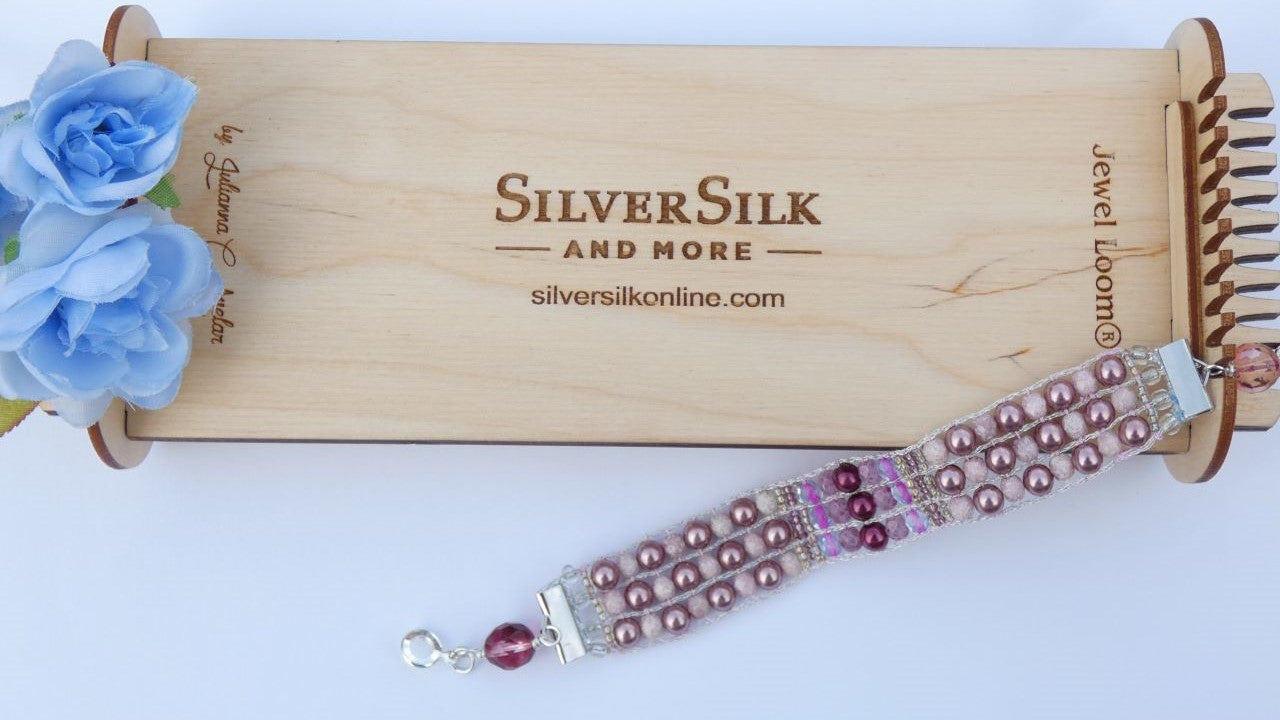

Learn how to weave a lovely bracelet on the SilverSilk Loom, using SilverSilk’s newest product, the 3-Needle Chain, as the warps. Grab your glass pearls, fire polish beads, & a small handful of seedbeads & get ready! Joan discusses how to figure out the length of the beaded area you need & how to determine the number of rows you need to weave on either side of the bracelet’s centerpiece design. The How to Warp with 3-Needle chain was previously recorded & the link is listed below. Also listed is how to add a ribbon clasp to your beaded project. And another plus, below is a written explanation on how to determine the number of bead rows you will need on each side of the centerpiece.
How to Warp SilverSilk Loom with 3-Needle Chain: https://www.youtube.com/live/ASmk0QHAZok?feature=share
How to Add A Ribbon Clasp to Your Beaded Project: https://youtu.be/RuT5Zbdbo7U (this shows the easier way to put a ribbon crimp end next to your woven beads)
How to plan the length of your bracelet:
Ever get frustrated on your bracelet being too short or too long? I’m going to help you with that with this bracelet. Here are some measurements you need to know to plan out your bracelet. First of all, since these beads are a little bigger, you will need to add a little length to your bracelet…why? Because the bigger the beads, the further out from your wrist your warps are standing, which means you need a bigger “circumference”, which is the length you need for the bracelet to fit right. My wrist measures 7 ½”, so I’m going to go for 8”, since the 6mm beads make the beads stand further out from the wrist than seed beads would.
Here are some measurements you need:
- The length of the bracelet you want ,including the clasp you will be using & endcaps you will be using. Since my endcaps will set up against the last row of beads on each end, I am measuring the endcaps with clasp attached & closed. Mine measure 1 ⅛”.
- The centerpiece in this bracelet measures approximately 1 ½”.
- 5 rows of the 6mm Glass Pearls with 5mm Fire Polish beads equals 1”.....Or ⅕” per row.
- 2 rows 11/0 seed beads equal ⅛”.
So here is the formula for how many rows of Fire Polish/Pearls you need on each side of the centerpiece: Length minus centerpiece minus ending/clasp equals length of pearls/fire polish areas. Divide the # you come up with by 2 to get the measurement for each side next to the centerpiece. For instance, 8” bracelet minus 1 ⅛” for encaps/closure minus 1 ½” for centerpiece equals 5 ⅜”. Divide 5 ½” (I rounded up from the ⅜”) by 2 to get 2 ¾” of beads on each side of the centerpiece. You can keep measuring to make sure you have enough beads for your length on each side. Or, knowing 5 rows of beads for each inch, you know you need at least 10 rows, but what about that other 3/4 inch? 3 more rows will add a little less than ¾”. So you can add 2 rows of 11/0 seed beads at the ends to make up the slight difference you are missing. So I would weave 2 rows of seed beads, 13 rows of Fire Polish/Pearl Beads, Center Piece, 13 rows of Fire Polish/Pearls, then end with 2 rows of seed beads. Hope this helps!
Please ask any questions by either replying to my comment below the video on YouTube (so I am tagged), on the Jewelry Making with Jewel Loom Facebook group page, or in the Jewel Loom School Community group (link listed below & is free to join).
Supplies Used:
- SilverSilk Loom: https://jewelloom.com/collections/silversilk/products/silversilkloom?aff=11
- SilverSilk 3-Needle Chain: https://www.silversilkonline.com/3needle-chain
- SilverSilk Bead Board: https://jewelloom.com/collections/silversilk/products/silversilk-wood-bead-board?aff=11
- 6mm Glass Pearls: https://jewelloom.com/collections/beads/6mm-round-pearls?aff=11
- 5mm Fire Polish Beads (can also use 6mm): https://jewelloom.com/collections/beads/5mm-fire-polish?aff=11 (Suggestion: I used 24 Fire Polish Beads for 16 rows on the sides, which makes a 5 ½” bead weave area. There are 25 beads on a strand. If you buy a bundle, you may want to adjust your design at the ends if you need a longer beaded area than 5 ½”. Otherwise you may want to buy 2 of the same bundles, if you want a consistent design, so you get 2 of the same strands)
- 11/0 Seed Beads: https://jewelloom.com/collections/seed-beads/size-11-0?aff=11
- Wildfire: https://jewelloom.com/collections/accessories/beading-thread?aff=11
- 20 mm Ribbon Crimp: https://jewelloom.com/collections/accessories/products/silver-ribbon-crimp-20mm-1-pair?aff=11
- 2 jumprings
- Clasp
Jewel Loom Beading Looms Starter Kit is on sale now, while supplies last! This kit contains both the Original Jewel Loom & Baby loom, besides the supplies to make a project. Great gift for a friend/family member or to get you started with looming: https://jewelloom.com/collections/weaving-goddess%E2%84%A2/products/jewel-loom%C2%AE-beaded-bracelet-starter-kit-with-bonus-baby-jewel-loom-and-needles?aff=11
Subscribe to the Jewel Loom YouTube channel to access past & current tutorials: https://www.youtube.com/c/JewelLoom
Sign up for the Jewel Loom newsletter & get 15% off your first order, plus a free pattern: https://jewelloom.com/pages/save-15-on-your-first-order-get-a-free-pattern
Receive text notifications for Jewel Loom shows & special deals by texting "Sign Up" to 1-805-768-0568
Check out the Jewel Loom Blog for past & current tutorials, plus read details on project: https://jewelloom.com/blogs/craft-hangover
Follow Jewel Loom on Instagram: https://www.instagram.com/jewelloom/
Join the Jewel Loom School Community (off Facebook) to share your loom creations, be inspired by others, & a place to ask & answer questions: https://www.juliannaavelar.com/offers/5ss8HfCp/checkout
Jewel Loom Facebook pages: https://www.facebook.com/Jewelloom & https://www.facebook.com/JuliannaJewelsAvelar
Jewelry Making with Jewel Loom community page: https://www.facebook.com/groups/228056324285807
Please contact Jewels with any questions you have about her looms: email - hello@jewelloom.com or text - 1-805-768-0568
Transcript:
hi everyone my name is Joan dice I am the um Jill Loom School concierge and
I'm also the silver silk social media Ambassador um so I do work both with Jules and
nelay so this is like a great project for me to work on I just want to say hi to all of you
um both currently watching while I'm in chat and for those who are watching
later this is pre-recorded so I am in chat um to answer questions and chat along
with you if I do miss a question give me about five minutes because I am flipping between Facebook and YouTube
um to um catch what everybody's saying uh so and then I am recording this right
after I already did all the tutorial pieces and edited them I just want to let you know that
um the original ending that I show at the beginning had to change because it
didn't work out but what I'm going through telling you about the measurements and everything goes for any
ending that you use it doesn't have to be that specific one that I'm showing at
the time so um well let's get started and thanks again for joining me
okay let's get started um first of all I want to um help you figure out
um how long to make the beaded area so uh first of all I want to show you
what I'm using of course we're using the silver silk loom and I've already got it
warped I showed that last week or the week before on how to warp it with the
three needle um chains the silver six three needle chains and I also am using the silver
silk bead board so um it'll and of course everything's
showing backwards on my um camera but it gives you the idea it's got a lot of great sections and with
measurements and um okay so I'm using wildfire
and I decided to use the pink since I'm using rosy colors I I tried the gray and
um and I also tried a different brand with their Smoky color but I do I I'll just give a little bit accent of pink on
the cord and I'm also using some seed beads I
ordered the wrong size so I got this out of my stash it is from jewel store I just don't have the name and then I've
got these and they're both they're both 11 old 11 0's this one's Gold Line Rainbow Light charcoal
and then I'm also using six millimeter glass beads
and um since she had a great sale on the fire polish um you know buying them in bundles I'm
using the five millimeter fire polish I don't care if it's a little bit wavy
on the sides because of the difference in sides it's a little bit but the silver silk might cover that up some
more and for the centerpiece I'm using a little bit different colors for that
Okay so how to measure how with the beaded area is going to be first of all
I'm going to end a little bit differently I didn't have the pensions or the crimp ends from Pierre Castle on
to use where I have them I can't find them my disorganized Dash I put them away I
don't know where so I'm using these um ends that actually I got them from Danielle Wick store you
you know you can beat around them for your ends and I'm using like um
what do they call those ball closures
but you know pick out the closure you want and then these are going to cramp
the um silver silk when it comes back over
um actually I'm going to need two for each side
I'm sitting one here just so I can show you how to measure so you can figure out the beaded length so I've got everything
laid out for what what I'm going to end with and I'm going to hold up my measurement
and of course my camera is getting in the way
I can't find my shorter so you move it up here some
sorry about that
so that this is a total of two inches and since I want a seven and a half inch
wrist that means there's five and a half inches of beading so I'm going to put these to the side
now and then as far as the five and a half inches of beading goes I
um there's a center of the bracelet that um is going to be 1 and 3 8 inches wide
and then I found Roe um that um two rows of seed beads is about an
um to a CC's not a quarter of an inch I think it's an eighth of an inch and
that's about what I need to make up for it um I wrote down the wrong number so so I'm
gonna just to make my seven and a half inches I'm going to end with the row seed beads on each end so that leaves me
with I need um not counting the middle I need eight rows of pearls and the fire
polish on either side of the center and that makes it one and three-fourths inches so I get now I've got a total
adding all that together of a seven and um
seven and a quarter let's see I don't know if you can read my sloppy writing so when I make the blog I'll show an
example how I um figure that out you know writing down my example
so I'm going to go ahead and get started
and I think move the yeah I'm going to move this
closer and I forgot to thread my Wildfire I usually do about
um do what works best for you I always use two yards because I hate
adding thread but if I have to add thread I'll show
you I've had it in a couple of my tutorials before on how much the um
and um I have a pair of scissors dedicated to
this and um they're Fiskars they're really sharp and that's all I use it on is Wildfire so I
can keep them in good shape foreign
you know I'm a big fan of the um big I need also if I have done thread
and stuff and even though I know how to thread a needle and I can do it I'm lazy so I always use the big eye
needle although it's a pain to open it up to this is a new one I do like them
when they get used and um kind of bent curvy but when they get too curvy I just
until they break or something I just keep straightening them out with nylons on pliers
so I'm going to start let me move this forward so I'm going to start this in
and since I want seven and three fourths and this board is about eight and a
quarter um I think I'll start about half inch down
which is a Jewel's name right down here
you can weave into the um chain
but I'm not going to I mean I'll just give a tiny bit more pink accents to it
and it kind of hides in there so um
I left some feedback through the beads to strengthen the ends
so I tie my knot and
I mentioned this during the um
I'm looking for my painters tape oh here we go I use painters tape just to get things
out of the way so it's not getting in my way while I'm
working on this so I'm just going to take the and just out of my way that's
not the end [Music]
and I'm just gonna tuck it back here
and I taped it to the end so it's out of my way until I'm ready to feed it through the beads
I almost double the Wildfire I mean not really quite double maybe take about three-fourths of the way down when I'm
almost doubling it so you know give me a work area and then I'll just keep pushing it through okay
so I said I wanted to start with one row seed beads the um
help me out so I'm going to use some of the gold
and I found with the seed beads it just I usually use um three in between each warp but when I
did it I always use a thicker cord for
um I eat one one and a half millimeter leather when I
was making my prototype instead of um the um
um what do you call it instead of the silver soaked three
needle chain because
I was waiting for the chain and the beads to get here and I wanted to at least get a prototype going so I
can get going on this three
six seven I need two more
eight
nine okay
so I'm trying to get three in between each warp if I measure it right one two
three nope I didn't I could have swore I got mine on there
and look now the ninth one's showing up
I'm just getting that one needle another one
okay okay so get three oh I need to move this up I'm sorry
about that so after you um get your nine
on there put three in between each Warp and then you you're you went under now
you're gonna take the needle and go over and go through and make sure you're going over both the um
going over off all the warps
okay just straighten this out and then I'm going to start my pearls
and um I said how many rows I just want to check this eight rows on each side
so
okay so I'm going to I use the ones that I have the most of I'm going to turn
this around because those are the ones I'm going to use the most
make sure you can see everything sorry about this I'm really bad about moving
things okay okay so my first row of the larger beads
I'm going to use um a glass Pearl
fire polish in a glass Pearl
let's go back through
our family hands this morning okay
now I'm going to do the opposite now I'm going to do a fire polish so right now for these um
eight rows I'm just gonna um use the two colors so I'm going to use a fire polish
a glass Pearl and a fire polish you know this would look great too I think using
all four millimeters um like fire polish and glass pearls it'd be a little bit
thinner bracelet then um I just think it would look great against the silver silk too you know so
you can play with the sizes
okay I'm I'm just going to do one more row
you know you got the idea until you get the rows done you want before the thinner piece
which remember is um the center piece is one and three
eighths but we're adding these um seed beads at the ends to make up for
that next the other eighth oh
okay I just need to tighten up my warp on them
before I pull through there beside that little Loop
I'm gonna see if I can get my light down here a little bit better because it's kind of dark
then my hands are making an or two
okay now I'm going to go back and I'm just going to keep alternating
until I get my eight rows done
I can't remember if I mentioned this uh and when I was warping but like when I
um you know the silver silk I used to tie onto the warp when I took it off to
work my hand tied it you know I was careful and untied it tie it and then all I did was smooth it down I you know
rub it between my fingers which I'll show here at the end too and it really
smoothed it down quite a bit it didn't make it look bad or anything and in fact I I've done that and reused
it in some other projects too and you can tell you know I'm gentle with it I'm not
rough okay
so then I'll come back when I get done with my eight rows and then we'll start the centerpiece
I can't tell if you can see this but it's slightly wavy I mean just a tiny
bit it's really hard to tell um but I like I mean I like the look so
I'm not going to worry about it if you do have a problem with it you know um just make sure your beads are the
same size which like I mentioned that the um this
is five millimeter and this is six millimeter that's why it's causing that light always laziness
um so I have my eight rows of fire polished pearls and I put on nine beads
I'm using the golden ones and I'm going to go underneath with them
line them up
just when you switch in from one kind of beat
to another it's a little bit difficult okay
now I'm gonna go over the warps through the MC beads
remember go under the warps the one way and then over the warps the other way
okay I got a stubborn seed bead here it's almost like dealing your first row
for the first time because I switched the size of beads
but I'm using seed beads to kind of section off the middle so it looks a little I just thought instead of having
the same cuff you know repeating itself all the way across we can put a decorative middle in
it to make it look a little different [Music]
there we go I kept wanting to go under the warps
now I'm going to use that um nine of the rosy color
um 11 0's foreign
one two three four five six seven eight nine okay
and a Jules always goes underneath first I don't know why I do it this way but I do
I go under after I pick up this beads I try to train myself to go the other
way and I don't I still find myself going back to this way so I got three in
between each Warp
and now go over make sure your needles are going over the warmth as you go back through them seed beads
foreign
you know just looking at this I think I'm gonna put one more bead in
the middle so that means I gotta go backwards and get out I just I see a big gap there and
I don't like that so I'm going to make it three four three
it might be because that Pearl's a little bit bigger and that's you know in the middle bead there
okay that was stupid okay I'm gonna unthread so I can get
that out of there
let me use my needle to pull pull back through by
getting it in the
hoop
so don't be afraid to change the design some them you know to make it look good to you
can I gotta re-thread my needle
pick up one more bead
and then uh I need between the warps I'm going to make it three four three
okay
[Music]
okay now I'm gonna try just because I'm going to use fire polish after this I'm
still I'm going to try it with nine beads on the other side like I did on the one side of the rosy so the golden
ones are going to do with nine beads again foreign
this morning so I'm six
seven eight
nine okay
so this is my last row of seed beads on this side
okay
boy really got a twister going here
usually I don't have this difficult time
with seed beads okay making sure my needle goes over the
warps we don't want it under otherwise they're going to droop down or in some sections it might just totally fall off
the thread like if we did that at the beginning
sometimes if I just have a really hard time with the last one or two I go and feed my thread through and go back for
that one I just
makes me stay a little more patient
okay there we go now we're going to do the center part
and I'm going to use these clear I mean they're lined with pink but they're clearish that's
going to be my first row
fire polish
I didn't realize they're going to be so um I for some reason when I saw it on the
court I thought that was the cord making the color if I don't like it then I'll undo it and
restart the row over let me restart this section over
okay for the second row I'm going to use
these little bit darker spotty beads
go over the warps
and then I add these um darker pearls I'm just trying to make the second in the middle section
um look a little bit different but you can do it like this with the same beads here
but not I mean not you know just use the same color beads but line them up like this
and maybe just throw in like a clear row or another one that complements that um the beads you are using
I am going to check something
okay that's right it's going to be shorter I
you know when I decide to start down here I wasn't thinking a beading section I was thinking of the whole thing I
could have started further down
it's okay
okay now I'm gonna work my way backwards
because that's my center row that dark that burgundy one
ask for a fire polish in the center
okay after I finish this row all I have left to do is the three rows seed beads I'm
going to repeat them exactly um so what we're doing is we're going in
reverse this is um you could see where this is the same as this this is same as that and then
you you'll want to go the gold and the Rosy the gold and then start with this pattern but you're
working this way so just reverse it
and then I'll get back with you when um I get the rest of it done so I'm going
and reverse them here starting this but going backwards and going this way so I um check back in here shortly
okay I just want to show you how I'm I'm finishing this I went ahead and finished
pattern like I went through it did through and then I passed the you know after tying a knot I passed the
finishing ends um thread through um two to four more times and then started
feeling the ends through the beach you know just to strengthen it then
okay you could see how wavy it is but like I said I like how it's wavy
um adjust your bead size if you do not like that I just think it's pretty okay so now I'm going to show you how to
remove this you know when I wore since it's um I had a hard time warping
I mean tying off the last things I used the bead stopper and I actually worked
really good I just put it back behind on the bottom and it's seen in place the whole time I was using it so you can
always do that for your beginning and ending if you want and then I'm going to go ahead and remove this
and [Music] I'm going to untie this one
trying to do it gently um you know I don't want to think of
wasting the um this three needle chain it doesn't come in 60
piece endings 60 inch rolls but you know whatever we
cut off I'm going to try using um
um cutting them in the pieces see how it is and make a tassel of it and use those haircuts pinch in caps
to hold them in place some you know to make a cute little
metallic Castle okay just a minute
okay I'm tying it and see how it kind of looks kinky if I I just gently here work out some of the
Kinks and then roll your fingers over it smooth it through your fingers
and it pretty much goes back in the way it was when you before you started
so you can use those pieces again now
you may have to cut that to get it off I was hoping I wouldn't have to
so I'm just gonna snip that in I'm gonna have to snip it eventually anyway I'm
just trying to leave longer pieces so I want to make something else
okay okay I'm just going to leave that roll that over that way
and that's how you remove it and then I'll come back to show you how to do the ends
we'll be right back I wanted to show you first of all
I can't use this clasp the end beans because it didn't work out the way I wanted it to so I
um and I because of these cramps the inside's two
by four well it's each cord is one millimeter but
the um it's it'd be better if it was at least one and a half millimeters thick
um so um so it was you know just wouldn't work
um because I couldn't get down the crimps tight enough because I tried on this end first so I didn't have a crimp
in wide enough just needs to be a little bit wider so I'm interested improvising
the best way to do this before you um take it off the loom
is to take your threads back and forth this weaving up and down up and down up and down or in and out until you get to
about the thickness of this and then once you cut off your threading and tie it off and cut it off put some
thread I mean glue over it um like I said I'm improvising so I
couldn't get it down tight enough there so because this is a smaller one
and I thought I had 1 8 inch ribbon
but it's a quarter inch it'd be better if you use 1 8 inch
so mine it's showing a little bit on here so sorry about all this improvised
improvising but I'm I'm letting you learn from my mistakes so what I did since I couldn't start so
at the end I got some um six um six of seed beads
and I'm just um stringing them on each strand that I have left
and I kept the longer stance make it easier to show you because I thought I was gonna have to wrap them around there
so sometimes I have to smooth out the ends or trim it a little bit
so um I can get them in the hole easily
on and the Sixers do slide on on these
strands pretty well I have one more to go
now to make it a little bit easier why um I'm trying to do the rest of it
I'm putting a little bit of glue right where I want to put the bead so it'll hold up against it because I kept
wanting to slide on me and I want to try to put the crimps up against um you know the ribbon crimps up next to
it now remember if you're doing it the way
that it's normally done where you do the inside out which in the blog I'll put um
a video to reference for what I'm talking about if you want to use the ribbon crunch try
to cook against the edge and if you wanted a ribbon crimp
um let's see here see how wide this is
um get a ribbon crimp at least 3 4 inches wide I'm not sure how
um here let's see if I have it here
about 20 millimeters wide so I got those
now I want to glue my ribbon on someone about tiny bit over
like I said if you did the threading underneath this which would be easier for you
um
so I'm going to squeeze it in a little bit I'm going to make it about twice as wide enough High stuff to
make a little bit longer and twice as wide so I I want to trim some up I want to make sure I have enough
sorry about this silver so if it does peek out whenever I use the claws and the ribbon cramps that um
you know it's silver peeking out so unless you're staring at it you won't notice something's been glue down on the
ribbon like right in the center and
let me get the ribbon onto the edge of the beads
I'm going to put some more glue
on it
and that says not to squeeze this but I'm a little bit impatient right now
so I'm sure I have a mess to clean up and see where I left the bottle before when I left it open
okay so I'm folding it over
and I'm going to trim it just a tiny bit over halfway because I wanted to overlap so the cut
Parts in the middle careful not to cut anything on the bracelet
and then do the same thing over here as long as it's not showing on the edges
just be on the safe side I'm gonna um put some weight on this and let it dry
and then I'll be right back to show you how to finish it off
these accidentals are advertised to cut anything so I'm going to turn my off with the scissors
and um like I said I'm going to try to save these to see how they work as tassels
okay now I'm going to put my cord in and
I'm gonna try folding those down because I don't know somehow it got bigger
so you can fit them in there so I see I just angled them over
hopefully I'll stay that way while I'm doing this I tried gluing it but I I don't know
maybe I didn't lay something tight enough
you know sometimes it's just playing with this stuff to get it to work the way you want it to or you learn for the
next time okay I have some tool Magic on this to
um crimp them they probably needs to be replaced but I'm just going to crimp it
slowly so I can keep adjusting it into place
and try to push that in there a little bit more
I like going over it a few times okay
so I have the um one end on I just have to attach this and remember I measured um
according to what I thought I was going to use so I might have to make adjustments if this doesn't go on like I
might have to add a bead or extra Rings or something um okay so I want this
I want to make sure this is going up the right way
and just show you what I'm doing this is the top of the clasp and so I want the I want it to kind of
back to back because this is the top of the bracelet
and then I'm just gonna close my jump rings by turning side to side because you never want to
open like this you always want to open and close side to side and do it a few times to feel a click
there you go let's see if it fits me yeah see because I measured with
something else it's a little too short so I'm going to show you a cheater way to
extend this it's not really cheating but you know it'll um it'll make it look
more intentional so um let's see how short am I on this so I
know how much to add
so about
I'm gonna say it's about the tip of my finger
um and I put my row away so I need to add about an inch
and I'm thinking with the loops I might try
to add um I can either either add jump Rings or I
can add beads I've just got into my stash to find a couple
um you know because I want the larger beads so that's a good thing to find in your beet soup if you keep a mixture of
beads um I actually found this in my Jesse James
bead stash okay now I'm going to work from um the spool
I'm using um 20 gauge wire 22 would work too
um I'm using Derma style wire but you can use artistic wire whatever craft wire
um you have so I'm just guessing on how much I'll need um
actually I guess I put it away that's where it is
this has a smaller tip so I'm going to use these to bend the wire
I don't really need it there but I want it when I get to the other side and then
I'm going to use the smallest and my sixth set and I think that's 1.5 millimeter this one's too you could
probably use either one or just find a good spot on your round nose pliers I just really love my um six step Looper
so I tend to use that the most so that way I can get the consistent loops
Okay so I messed up so I got my in place and I'm going to wrap it around
I got twirl it around
and I'm just adjusting it so some people use pliers and here I just
use my fingers so I got my little wrap Loop
trying to stay in the camera sorry about that and I'm going to wrap it around a couple
times
once I get it twice around then I'm going to snip it
okay and you know what I forgot to touch this
so um which is fine because I can attach my um um
jump ring for this sense but I gotta remember when I make the loop to attach it to the
ending the end cap on my um bracelet
or I'm going to start all over again so I got my tip and I wanted to bend it the
opposite way of that one because of the way it's going to go on the bracelet
so my um fill my class will lay right and
I think it moved on me
hey I got my smallest step on here
I'm gonna wrap it around move it roll it out of the way
okay I got this now before I close it I do need to snip
and I'm going to put it on my clasp or my ending
and put on my ending
back I'm going to use my pliers to hold it in
place why wrap
one two
make a little snap snip the end off
push the end down so not scratching anybody
they said cut it at an angle so you can tuck it in there really good and I always forget about that if I snip
okay now I'm going to lay this out put my tools out of the way right now
I think the two I'm gonna need now is the one I dropped and that one
so okay now I want to put my class on and I want to make sure
they're laying right it's nicer
got that there now I gotta find my little ball thing and I want that up
there so now I got everything organized the way I want it so they're both facing up I'll just grab these so you have to
wait for me to get my so
I like the smaller pliers better for this but um twist it back and forth until you here
click I usually like making sure it's okay
like I got my ball there I gotta do the same way
here I want to make sure I got the hitch
the right way up
you know what it feels a little tighter this way so that's the sign I'm going to have up
so I'm putting my hitch in and I got the words there up because it
was felt tighter that way on the hitch when it was closed putting that on my open jump ring
and then I want the back of what I want for my bracelet going facing towards the back of the jump ring I mean the closure
then we're going to twist a couple more times
probably shouldn't do what I'm doing but I do it all the time I just like making shirts tight and I
kind of squeeze it into I started doing that when I was doing some chain mail and it worked pretty
good okay now I'm gonna see if it works I sure hope it's um loose enough now
or you know
so there's the cheater way if you do make it shorter just add some beads to the end that complement your bracelet or
even necklace or whatever you're making
trying to see so you can see it there you go
excuse my mess
okay feel free to ask any questions that you
may come back to at any time on this video or
um on the Julian School Facebook page or if you belong to the
um Joel Lim school on the um the link is in the jewel loom store and
that's easy and free to join for a chat that I have a link to in this video
description and I will be posting um a Blog with those formulas I talked
about no later than the day after this video so
um and I'll put the link to the blog once I get it done in in the descriptions
um on the Jewel on Facebook page and in YouTube so thanks again for joining me and y'all have a good evening