SAVE 15% OFF ON YOUR FIRST ORDER PLUS GET 3 FREE PATTERNS. SIGN UP BELOW!

0

Your Cart is Empty

Shop
  • Read our story

  • Each of our carefully researched, styled, tested and distributed collections reflects a particular aesthetic and ethos. We hope some of these speak to your own style, and help you refine and redefine your own look and style philosophy in the process.

  • Watch Me Create a Colorful Beaded Ring Step by Step!

    August 10, 2025

    Watch Me Create a Colorful Beaded Ring Step by Step!

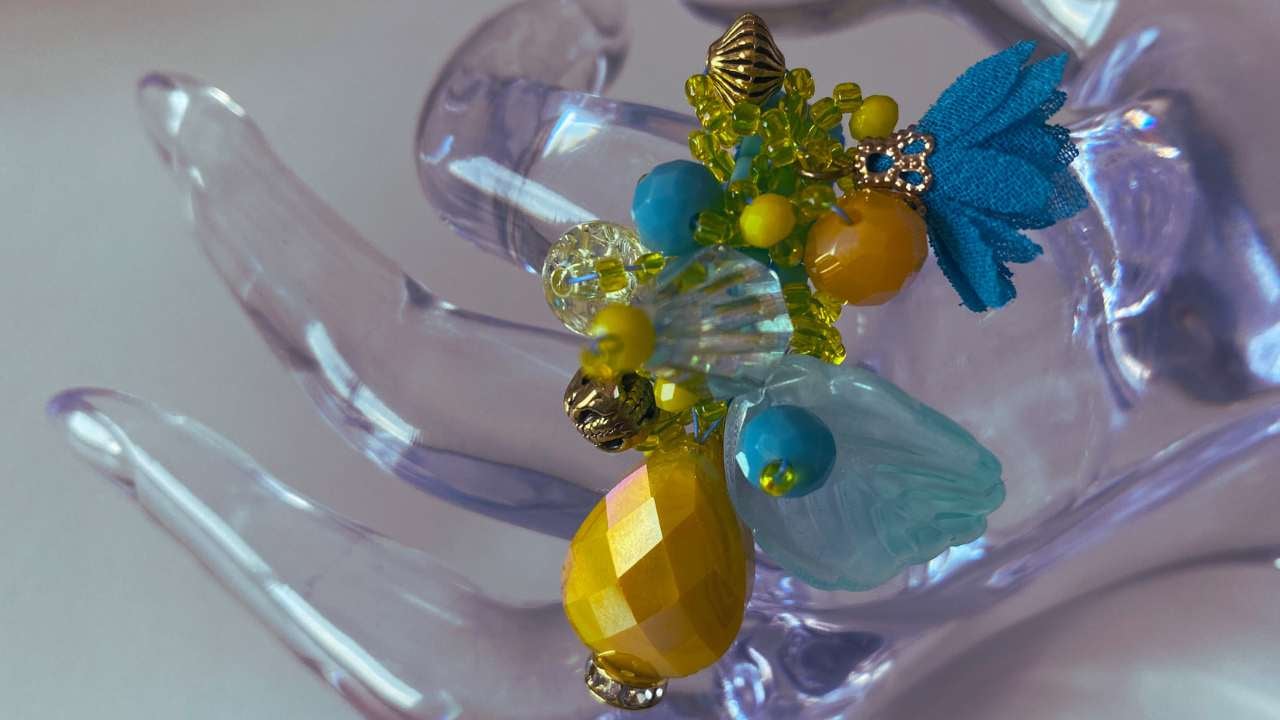
    Creating a fun and colorful beaded ring, full of movement, is easier than you think! Learn how to make one, with Julianna C Avelar, using Beadalon's Baby Loom. She is using a Jesse James Bead Mix...the specific mix she is using was made for BellaCon 2025, but any of JJB's mixes will work! Learn how to weave a basic base of 8/0 seed beads, then how to embellish them using 11/0s and the mix. Jewels also shows how to remove the ring from the loom, finishing off the ends, then stiching them together. Instructions for how to warp the loom is listed below.

    Watch the tutorial below.

    Learn how to warp the loom by watching the quick tutorial below. For this ring, you will need 4 warps, skipping a groove between the warps.

    Supplies Needed:

    Save 15% off your first order, plus Get 3 Free Patterns: https://jewelloom.com/pages/get-3-free-bead-patterns-and-save-15-percent-on-supplies

    Did you know Jewels has a Book? It’s true! You can get a digital copy of the Jewel Loom Inspirations book here:  https://bellacraftspublishing.com/jewel-loom-by-julianna/ 

    You can find Jewels here:

    Transcript:

    Hey everyone, I'm Juliana from Jewel Loom. I am so
    excited. Okay, I don't know about you, but this girl loves a big beaded ring.
    And when I get a palette put in front of me
    and there are 2 mm sized beads
    up to I don't know, what are we talking 14 maybe?
    And the leaf. And there's like all kinds of big fabulosity
    in a kit. [Music] Mama wants to make something big. So,
    I'm going to show you how to make this big, bold, beautiful, vivacious,
    gorgeous ring on the baby jewel loom. And a beautiful kit from Jesse James
    Beads. absolutely divine and delicious and scrumptious.
    So, without further ado, I'm going to take you down to the mat cuz I really
    want to make sure that you understand how to make these. Okay, so we are going
    to get started and do a little switcheroo camera. There we
    go. Okay, so let's talk about what you're going to need. All right, I'm
    working on a small loom. This is the Beatelon baby jewel loom. It's about 6 in long by
    3 in wide. I'm also using wildfire in
    blue. You could certainly use some fire line if you like. I always like to have
    my wild fire cord cutter. Makes my life a lot easier.
    And I'm working with some size eight Toho beads. That's going to be the base
    right here. And I'm also working with Toho 11 O's. And I'm going to use those
    with my unbelievably gorgeous, delicious
    Jesse James bead kit. Now, okay, wait. This doesn't do it justice. We're going
    to open up a new one cuz I've got everything organized.
    Oh, is this closed? Oh, it's closed. Hold on.
    I got so excited. Here we go. Just a quick And that's a good thing to know. It's good thing to know that they come
    they come secured. Look at this. Oh my heck, y'all. When I saw this at
    the event that I was teaching at, I was like, I need this. I need this in my
    life. And not for nothing, I need to wear as much of it as I can. And of course, you know
    me, I had to go big or go home with a ring. But this is so incredibly beautiful. Um, this is a special kit,
    but Jesse James, they make they make so many different beautiful kits, and
    they're always in a nice container. Sometimes they're on a strand. I've known them for so many moons. I knew
    Papa time ago. So great, great company.
    And this is the kit that we're going to be working with. And as you can tell, there really is a variety of different
    sizes. We've got some 3 mm in here. This is like an eight. We've got some six.
    We've got big ones. And I'm using them all because I think that's fun. So, I
    have already built the base to my ring. And let me bring that up to
    the camera. And there are a couple different
    um videos that we're going to tag so that you can understand if you don't
    know how to warp and how to build your base. It's very simple. And I do want to tell you that you don't have to go so
    big. You really don't. But why not? We got one life. I think we
    should live it big. Anyway, what I do want to tell you is that if you chose
    to, you could just make a band, a beaded band, call it a day. But, you know, not
    for nothing, I'd probably make a band and still wear my big ring. So, you have options. You can you can go simple,
    sleek, or you could go big or go home. And it's all good. Whatever you choose to do, we are here to support you. All
    right. So, the way that you determine the length of your band is you're going
    to use a sewing tape measure and you're going to wrap it around the finger that
    you want to wear it on. Now, see, and I got to point this out. So,
    today I'm I'm I'm a decent 2.75.
    Last night, mama was pushing a three. Okay. So, my recommendation
    is to definitely add a couple more rows. All right. There is a little bit of a loss when when you turn it into the
    ring, into the band. And then if you have any swelling tendencies,
    all right, you're going to want to have a little give. So just keep that in mind. Now, this length right here is 27
    rows. And so what I did was I divided it into threes. So I'm going to have nine
    and then nine decorate uh decorated and then nine more. Okay? And you don't have
    to do that. If you're just like, hey, you know what? I just kind of feel like I want to do six rows of fun, then knock
    your socks off. Just keep in mind that the reason, excuse me, the reason why I keep it
    centered is that you, you know, you want to be able to close your fingers. At least I
    think you do. So, again, I'm not here. I'm just kind of giving you some ideas.
    All right, perfect. Okay. So, let's take this off because I could wear all my rings at one time and have a lot of fun.
    So, if we take a look right here, this is the wildfire and the needle. Everything is already attached because
    when I finished my um base, I still had a lot of thread left. And so, what I did
    was I weaved it to row um eight because now I'm going to start making a loop on
    row nine. So, I'm going to take the needle and I'm coming up and I'm going to bring
    you up to the camera here. You see how I just came out between that far right
    bead and the middle bead. And then I'm going to take the needle, pull all the
    way through. Okay. And then I'm going to come over to
    my pile of 11 O's. And these are just some gorgeous transparent
    um yellow yummy beads. The more beads you pick up, the bigger you your loop will be. And
    the less beads that you pick up with the 11 O's, the more tight your um loops
    will be. So then I'm going to pick up, let's see, let's see. This is always the hard part because all the beads are so
    delish. So, I'm going to pick up a I I refer to these, by the way, as decorative beads. So, if you hear me
    call out decorative beads, this is what I mean. Okay? So, those are like our
    pretties. They're our focal beads, our decorative beads. And then I'm going to pick up three more size 11
    seed beads. And I let those fall. And they're going to go
    all the way to the loom there. And then this is the magic. So, let I'm going to bring this up to the camera. All right.
    So, I'm going to take my needle and I'm going back through the right side of that bead. And then I'm going to go all
    the way out. And I'm going to be very patient. I'm going to guide my wildfire.
    And poof. Look at that. There's our first loop. Adorable or what? So much
    fun. It's like stitching. like if you've ever done any sewing um you know,
    anything like that, it's kind of like making a stitch. All right, so we're going to pick up three more seed beads.
    And again, let's see. Let's see. Let's see. Kind of trying to go small on the ends here. Let's pick up this rondelle.
    That is really pretty. And then we will pick up three more.
    Whoopsie. [Laughter]
    And yep, there we go. And then again, I'm going to go to the right side of the
    bead. All right. And then I pull all the way out. So it's like you're creating
    these loops. Oh my goodness. Watch this. Watch this.
    Oh yes. Oh, my most favorite part. Okay. And just in no time at all, we've got
    our first two loops. Now, as you can see, right hand, left hand, loom is
    right in the middle. Okay. And now I just pulled all the thread out over here
    to the left side. So, what I got to do is I have to turn my loom.
    Okay. And then I'm going to take my needle and I'm gonna come up to that next row.
    And this time, let's see this time. And you and you want to think
    about how you're going to lay out these beads, right? So, man, if I'm going to do the whole go big or go home thing,
    how am I doing this? Where are they all going to go? So really think about laying out your beaded project,
    especially for a ring before you get started.
    So on this first row or this first bead, let's see. What am I going to do?
    I'm going to pick up my little seed beads first.
    I'm a scooper, by the way. So like I I'm scooping mine up. Some people just like
    I think Danielle is a picker. I'm not sure. She'll let me know. I can't
    remember. Everybody's got their own little way of
    of um picking up the beads. And I don't know. I've always just kind of been a scooper.
    So again, three seed beads, one decorative bead, and three more seed
    beads. Now, this time, this time I'm going to come out right after that
    second bead and in between the second and that third bead to my far left. And
    then I'm going to pull.
    And again, I just like to guide the loop up there. And now, this is
    where I'm going to put my first my first decorative bead. And one thing that I
    learned from yesterday, let me see. Because yesterday,
    I think I did four today. Today, cuz I want it to be a little bit
    tighter down there. So, for giggles, let's just try to do one.
    And then we're going to pick up that fancy little feather duster bead. It's
    so flipping cute. I was like, "Oh, that is so going on my ring."
    Okay, now we're gonna come back and we're gonna go through. See, I'm
    getting my needle there in to the right side of that middle bead. And I go all
    the way out. So, it's this constant looping. And once you get it down, you'll just be
    like, "Oh my gosh, I have to do this all the time." Okay. So, then I'm going to pull pull that.
    Yep. Okay. So, that's a little bit tighter than yesterday. It's still got a little floppiness, which I love. I'm not
    complaining. All right. So, let's do another another loop on this row.
    So, picking up three. Oh my goodness. When you have so many
    beautiful beads. Let's see. This is a big guy. Let's use a big guy.
    and three more decorative beads.
    And then again, I'm going to come over here to the right side
    and then all the way out. And you know, pay attention to how I
    hold the beading thread, um, how I hold the loom, okay? Because it is a very
    lightweight, small loom. And so you got to learn how to dance with it. Okay,
    tell me right now, is this not already turning out to be so gorgeous. By the
    way, same idea. Like you could do this for a bracelet. You could do this for a pendant. You could do this for some
    earrings if you wanted to. So, we're just learning a really cool technique
    and then and we're applying it to a ring that you could do it.
    You could do the same things and make a different type of jewelry project. All
    right. So now, now, now, now. Okay. Yep.
    Okay. So, I think my Gen X people will understand
    why I'm going to refer. Okay. Wait, wait, wait, wait. Jules, hold my horses.
    Okay. Nope. I'm not going to pick up any seed beads. I'm not picking up any. Okay, this is what we're going to do.
    Okay, I call this my Madonna bead.
    So, I feel like my Gen X folks should know why this is my This is my Madonna.
    All right. And then I'm going to pick up one of these one of these.
    What am I going to pick up, Jules? I'm going to pick up one of these little guys. One of these little yellows. and
    I'm going to pick up one seedbead. Okay. So, watch this trick. So, what we're
    going to do is we're going to bring that seedbead
    towards us. Right? So, we've just separated the seedbead from this combination. And we take the
    needle and we're going to go back through the yellow bead, back through what I'm calling the Madonna bead. And
    then I'm going to go back through the right side of that bead. And I'm very carefully
    going to guide all of this up and onto the base of my ring. And that's how you
    get it to stand up. Look. Oh my heck. Is that so cool?
    I love that. All right. um kind of feeling. Sometimes when I do this,
    sometimes when I do this, I like to take a look around to to see if like I need to support it in any other way. Do I
    need to maybe do like a little loop to um add some definition? I think I'm
    going to do that. I think I'm going to do just a loop with seed beads.
    Okay. And you know what? Um, I want to really empower you to know that this is
    just what I'm doing. This is just a technique and you get to learn it and
    take it and do what you want. Okay? You can do what I do or you can do
    what you want to do, which is the cool thing. [Laughter]
    Oh my goodness. Okay. So, back to the right side. And then I'm going to pull that all the way through. And so, again,
    I just felt like it needed it needed a little something. And in all
    honesty, I probably maybe should have done something on the first one, but it's not
    a deal breakaker. It's not a deal breaker. I have actually gone back into
    my finished pieces and sewed in um missing, you know, or like, oh, hey,
    I wish I would have done XYZ. And you can go back and and actually add that.
    So, let's go ahead now. Oh my goodness.
    [Music] I genuinely get very excited when I make these. So when you when you have like a
    lot of floppiness going on, you just want to make sure that everything is pulled nice and tight and that the
    beading thread has not, you know, wrapped itself around cuz that's a bummer, you know, cuz you don't want
    like this beading thread just um out in no man's land. Okay. So, let's pick up
    Let's pick up or how many rows have I done? I've done
    one, two, two. Okay. And then this was three.
    And now I'm over here. I kind of feel like since we only have
    Maybe it's time. I think it's time. I think it's time for the leaf.
    Okay. So, we're going to pull that. Let's just see. Let's see if we got
    Oh, yeah. It's time. Okay. So, I'm going to do the same type of technique where
    I'm going to pick up a decorative. I'll do a blue one this time. And then let's
    get a seedbead.
    Okay. And then we're going to let those drop. And we're going to do the same thing that I did with that big old
    crystal. We're going to bring the seedbead towards me. And do you see how
    I'm like letting the loom move as it needs to move? I'm not I'm not like
    being crazy about it staying in the same spot. And I want you to like give
    yourself that permission to just let it do what it needs to do. Okay. So then
    we're going to go back through and all the way out.
    And now we have Oh, thank you. Look. Do
    we love it? Oh my gosh. Okay, for those of you that are just joining, I know I just want you to see
    the finished one on me really quick, okay? Just just kind of be with me and see where I'm going. Like, these are so
    fun. They're huge statement rings. And if you make this type of a project, like
    if you have a boutique, right, or gifts, your friends are going
    to be like, "Oh, yeah. I'm your bestie for life." Okay. So, I just wanted you to see where I'm going so you don't
    think I'm like totally off the wall. And all right. So, what are we going to
    do over here? I think we need some I think we need one of those orange guys
    in our lives. These beads are just happiness. Like, whoever put this collection together
    is just a happy happy person. Okay, now I know you have a hole. Where you at?
    Where you at? There you are. Okay.
    And again, three more. So, yeah, when you're picking up the seed beads, if I
    were to pick up like say I picked up six seed beads, then a decorative bead, and six more seed beads, I would have a very
    um full loop. But I'm only doing three um to kind of keep it tight. So again,
    we're going to come out on the side and I'm just, you know, really paying
    attention to guiding that thread because there's a lot. And then I'm pulling nice and tight just
    to make sure everybody is up there. Okay.
    And then we're going to come down to the next row. Where we at? Okay. Good to
    know. And we're going to come up. And you know, you can do a loop on every
    single ado if you wanted. That would be a very
    tight knitted ring. I've done that. I did that with turquoise chips. Oh my heck.
    That was a really, really pretty piece. Okay. What am I? Is it time? Is it time
    for this big guy? I think it's time for that big guy. Okay. Now, I did not do
    Let me see here. Did I put him in the middle? I did put it in the middle.
    Okay. So, I'm good. But I do want to I do want to get a smaller,
    right? But I don't want two oranges next to. So, let's Oh my heck. Let's do a
    blue one. I'm serious. Picking out the beads is they're so pretty. I can't just make one
    decision. So, I'm going to come back through the right side here, back up the middle.
    All right. And each time I'm just making sure that all all the um thread is nice
    and taut. And now I'm going to go for this big guy. And I'm going to go through cuz I
    kind of wanted it to be like a heart. So I went through the pointy part first
    and then I put like a little halo on it with the rondelle and um and then a seedbead.
    Whoopsie. [Music] Okay.
    And then what we're going to do again. Yeah. So the little the the seabed bead
    wants to hide in the rondelle. So I've got to grab it. And then we're
    going to go back through the rondelle and through this big delicious bead.
    And then again we're coming on the right side
    and all the way out.
    Okay. And then I'm holding it and I'm pulling. And there you go. All right. I feel like
    we got to clean. We got to do something in here. We've got like a space. So, we're going to
    we're going to pick up attempt to pick up those three. Um Oh,
    maybe another green one because these guys are big. Let's pick up this big guy.
    I'm trying to like fill in that space right there.
    And again, right side of the bead and all the way out.
    Oh no, they're there. Okay, I almost thought I forgot to pick up the second set of beads.
    Okay. So, all right. Now, at this point, at
    this point, Jules, let's see. How are we doing? How you doing, ring? How you
    doing? I want to kind of see what's happening right here. I want to make sure that it's going to lay correctly.
    And so, get our little Madonna bead in there. Make sure everything is nice and tight.
    Um, okay. I feel like for right now we're okay. And if I have to, I'll come back.
    Now, what I need to do is, let's see. 1 2 3 4 5 6 7 8 9. So, I've got a couple
    more rows. It's getting really tight in here, y'all. So, um, you know, just know
    that that's that's going to happen. And so we're going to put
    I'm going to put a bead over here. And this is where you know Yeah. Just make sure you're not grabbing the other beads
    cuz that's going to be such a bummer. Okay. So, let's come over here.
    And I I swear I'm I'm I punish myself with
    these transparent beads, but gosh, they're so pretty. I can't help but use them. But they're not really friendly
    when you're trying, you know, when you don't have like a super mega light over
    you. Is that Oh, that was four. So, what would happen if I didn't catch
    that? It just like my loop will be maybe, you know, uneven. But nobody's ever
    going to tell in one of these big chunky chunky rings. So, what color should I do now? I I feel like I feel like maybe
    this guy. What about this guy? But then we're gonna have two big guys really on top of each other.
    Um, let's do this one. Let's do this gold. Look at that.
    Gorgeous. Can't even with this kit. It's so beautiful. Okay, so three more.
    What will I do with two rings? I think somebody's going to need a gift.
    We'll have to measure it. Okay, let's see.
    Okay. Oh, I like how that worked out. That's cool. Okay, so that's just sitting
    there. And then we're going to come over here. We're going to do a loop over on the far side.
    So, one time when I taught at an event for um for JJB Jesse James,
    I made a really very
    um oh gosh, what's the words? Well, it's kind of like this ring. Very very
    voluuptuous bracelet. And it was so fun. It was like fibers and and all of their
    beautiful beads and this beautiful loom that I made for them. And it was just um
    really really gorgeous and it was so fun to see what everybody created. And
    that's the part that I love about all of this is that I get to see
    what you do. And really, that's the gift.
    That is the gift.
    Okay. Oh, see how that just really helped to percolate that big that big one.
    It looks like a heart. Mhm. So when you go through the bottom of it and then you give it a little halo.
    Isn't that awesome? All right. So now we got to turn the loom.
    And I don't know what am I what did I get all of the big ones? I
    think I was thinking about using this guy. I should do that, shouldn't I? Okay. So where am I though? If I do
    that, that means I've got to I've got to come up the middle here.
    And then I think this will be my last row because that this guy is going to
    take up a lot. So, let's just see what we can do.
    Wh'd you go?
    There it is. Okay. Let me just see. I just want to put it on here
    and then kind of think about
    do we want it to lay down? Do we want it to I mean it kind of would be cool if I could get it to do that. Ooh, that'd be
    cool. See what I'm saying? Like if I could get it to be perched, but then I
    got to make sure I have enough beads.
    So, let me just work through this in my brain really quick. So, I'm going to have to pick up more more
    beads. And I feel like what would happen if I did that? Let's see what would
    happen. I'm going to let that fall. And if I did do that.
    Nope. I don't like that. I'm pulling that off. Pulling that off. Hold on.
    Not exactly, but okay. So, come on, Bubba. Get back through here.
    Yeah, we do not want to be um rethreading a needle right now. Okay,
    cool. So, here's my thought. What if I pick up a bunch of seed beads? Let's
    just not try to be so fancy, Jules. We'll do
    we'll do like a bunch of um seed beads and we'll see how that works.
    It's a beautiful kit. It's a beautiful beautiful kit. Okay. I think I feel like
    that's I feel like that's going to work. So, let's go back through the far right side
    of that bead and let's just see what happens. Yes. Thank you. Okay, cool, cool, cool.
    Right. Okay, let me see over here. Oh my gosh, this one might even be more fabulous than the first one.
    Um, okay. So, I'm over here. Okay, I feel I
    feel like I got to do something right there. So, bear with me. I'm going to do
    I'm going to do one, two, three. And what haven't I used? Have I used
    this cracked? Cuz this bead is to die for. This like this is like a cracked bead.
    It's very cool. And then three more
    of the seed beads.
    Come on, little buddy. Okay. So, let's
    So, what I actually want to do is while I'm I'm turned over here,
    I want to go through the right side of the bead over here.
    So, there's there's I hope you're seeing that there's just like a lot of freedom
    to kind of maneuver around and do some fun stuff.
    And you don't really have to be restricted.
    Okay. Okay. So, I'm kind of thinking like if
    we go any more big, we might be charged excess uh excess
    weight. Okay. So, I'm going to take I'm going to take the needle and thread now,
    and I'm going to weave back through every row.
    Okay. And yeah, I got so much going on here. I
    got to make sure. So, pulling through.
    Yeah. So, we're just going back through the base so that I can get back
    to the um back to the top.
    The great thing about bead weaving is that I truly feel like you're always
    creating art, you know? So, some people have a canvas and a paintbrush.
    And with this, we have a loom and our
    beads. And it really allows us this cool freedom to just express ourselves.
    And that's what I love about weaving on a loom so much. All right. So, I'm back
    up here to the top. And I'm going to leave this all
    connected cuz I still have to have this um need, you know, this thread. And by
    the way, I want to say that I started with at least a yard and a half. That's a lot to bead with, but that's why I
    keep telling you to, you know, be patient, go slow. All right. So, we're going to turn this over,
    and I'm going to cut this end.
    Okay, now I'm not sure. This is always hit and
    miss with our sweet um Danielle trick. Um where's my flats?
    Sometimes it works with these rings. Okay, there you go. It's working. Let me
    just make sure. I don't know if you just saw that, but the magic is that when you pull one end,
    you know, and then you just want to make sure you don't pull too tight. And then let's
    see. So la. So the first ring I I made, I could only do one because I must have
    punctured my warp. So it didn't work out. But that's okay. It was fine. So now I'll try to see.
    That one's not moving. Let me see if this guy's going to move.
    No. Okay. Oh, thank you. Thank you. Thank
    you. Thank you. It worked. It did. So, last night So, I keep saying last night
    when I made the when I made this first ring, I I must have put my needle
    accidentally into one of the warps. And so that's something that uh Danielle Wix
    always says to try to pay attention to, you know, don't don't puncture your warps. So I did better this time. She'll
    be proud. Okay. And so then I'm going to turn this around. And again, we just want to make sure we don't remove that
    original piece of thread. And so that's right here. And I just want to kind of scooch all
    this gorgeousness to the side. And then I have all these
    guys. And so what I got to do is I'm going to
    tie some of them together. Now they're they're pretty much just going to disappear
    in the end. You could certainly rethread these and you could weave them back in
    if you wanted. I don't really want to have that much fun, so I don't do that.
    But you could you could definitely do that if you wanted. I just do like the knots and I'm just kind of crisscrossing
    from one warp to the other and it doesn't, you know, it's not a
    deal breaker. And so, um, I'm going to trim these. And then I
    I also at some point will use a little bit of a lean tacky glue um to put on
    the knots. But for right now, I'm just going to pinch these
    and trim them as the crowd gasps like, "Oh my gosh, she's doing what?"
    Okay. And then I'm going to
    take my needle and I'm going to bring these two ends together.
    All right. So, I'm just going to the opposite side there. So, here's the thread. And the goal is to bring these
    two ends into the shape of a band for the ring. And so, I'm really careful.
    I'm just holding everybody. I'll bring it up to the camera here in one second. See how I'm pinching now?
    Got a fur child in the studio
    who's sleepy and snoring. [Laughter]
    Okay. And I just do this like a couple of times to really feel better about, you
    know, the two ends being. And then I'll start to
    weave on one side just back and forth. I honestly don't think you can do this
    too much because it's a ring and you're going to be wearing it.
    And [Music] um I think that it's a good idea to make
    it as sturdy as possible. Okay. So, I'm going to come back the
    other way. Boy, this one This one ended up a little
    bit bigger. I don't know. I might have a tow ring.
    Big toe. A big toe ring.
    But then I'm going to probably put it on and then it'll fit because my fingers are swollen.
    And when I can see better, when I can actually get underneath like a really good magnifying light, I'll go in there
    with a tooth toothpick and a little bit of white glue. Make sure the white glue dries clear. You could use like a
    jewelry glue, too. So, I'm just going back and forth from,
    you know, one side to the other.
    Then, we'll come back in again. It may seem a little obsessive,
    like I'm doing it a lot, but it's a ring and I just really feel like you have to do it as many times as you can. As as
    much as you can get the needle and thread back through the 80 O's,
    which let me just tell you, if you're going to do the loops, you definitely want to do it with 80 O base. If you're
    just going to do a band, you can use your 11 O's, but you're not going to be able to make the loops on your um with
    your 11 O's. They're just too tiny and you can't get the um needle and thread
    back through. So, yeah. So, I'm, you know, I'm just doing this until I really
    feel especially this area is really nice and secure. Um going to do a couple
    more. I will tell you that from start to
    finish, including warping the loom and making your base and then the beading um
    is is less than an hour. So, that's good news. All right, so let's go through.
    Okay, we come through and then I'm going to come up and in between those beads.
    And then I'm just looking for a warp.
    And I put my needle under the warp. Okay. And then at the last second here,
    I'm gonna put my needle back through that loop. And there's a little knot.
    And then I'm going to take the needle and push it to the back.
    Okay. So now I just I could just feel that knot going in the back there. And
    then very carefully, I'll bring in some sharp scissors because I don't want to puncture anything.
    And again, if you wanted to put a little dab of glue there, you could. And boy, this came out a Will it fit this big
    chunk? Oh yeah, look at my big chunky finger here. Oh my gosh.
    Come on. It's a party waiting to happen. It's It's a party waiting to happen.
    Okay, I am totally seeing I'm seeing summer vibes. I'm seeing on the yacht.
    I'm like doing the colors for New Year's Eve. I mean, very fun. Let me put my original
    one on that fits my my finger very well.
    Okay, so look at this. Let's look at it really nice and close.
    So yeah, so take the techniques, take the idea, you know, formulate your own color
    pattern, you know, to whatever occasion you might be designing your jewelry for.
    Definitely a statement piece, but let's look at let's look at the idea of just
    doing a band again. So this is a band and these are 11 O's, so no loops. And
    that's just fine. And you could actually wear it. You could color coordinate it, right? Um, this is always fun. This is
    just a really big chunky band. And then I added um a button, you know, just for
    just for some fabulousness. Here's another big chunky ring that I made.
    This one's super fun. I love wearing that one, too. I I don't think I'm wearing all these at the same time, but
    maybe. Uh, what else do I got? Oh, this is always a lot of fun, too. These are two holes. So, you can make a ring with
    your two holes. And I did like a little pico stitch.
    So, lots of ideas. Um, pretty much the same techniques.
    And so, let me come up really quick to see what we got going on
    in the
    Yay. How's everyone doing? It turned out beautiful. Thank you so much, Debbie.
    It's fun. You know, I like to wear things um sometimes that are just unique and
    fun. And I I feel like a statement ring or any type of statement piece just like
    you don't have to wear five of them. You could you certainly could, but if you
    just want something simple to feel like, you know, like you have something
    on. Oh my Zandra. Zandra. I love that idea. So, the idea is to make one that's
    big enough, which quite frankly, well, I'd have to roll something pretty tight.
    But for a napkin ring, that is an awesome awesome idea. I love that. And
    it would be very elegant depending on the colors. And look at me. I should
    just do this like hello. How are you?
    But I love love love that idea. And again, technique is the same for
    bracelets or if you wanted to do a little pouch. Um, you know, I don't really like my
    earrings to be too heavy. So, you could kind of maybe back off a little bit on the loops. Maybe just do a
    few so that you're not like really weighted down. But, um, yeah, they're so
    great. So great. You know, I just got a glance over here. I'm not too sure if you have subscribed to um the Jewel Loom
    newsletter, but when you do, you not only get a generous 15% off discount
    code, you get access to three free patterns.
    And look at one of them. I mean, come on now. Is this gorgeous or what?
    All right. This is a This is a Trisha design. Trisha made these three patterns for me. And isn't this so gorgeous?
    I mean, holy guacamole. So, when you sign up for the Jewel Loom newsletter,
    15% off your first order, access to three patterns that are super super
    sweet. So, fun times. I hope you enjoyed this. I want to thank um Jesse James
    Beads. Again, I have to tell you a little story. When I was just a wee one in the industry and I started off with
    Alen Jackson from Alen's Creative Living, Alen's tacky glue in the bottle. I went
    to the big huge trade shows and Jesse James would have a big huge booth and I
    just remember being this 20some yearear-old who was
    just so you know like I don't know like celebrity struck you know and just so in
    awe over their company and and their booth was always so fabulous and
    I just would you know I would just like sneak over there when I was, you know,
    going on my lunch break or something cuz I was working the booth back then. And I
    just always thought that they were such a great company. So when I when you know, now as a big girl,
    now as a big girl, I um you know, I'm playing with their beads, designing with their beads, and it's just such an
    honor. So I love them. And a big shout out to Beetleon, obviously. Um, you
    know, they make my jewel loom, they make my baby loom, and I'm just forever grateful for that. Baby loom is a
    powerhouse, y'all. It really is. I mean, mama mama's all that in a bag of tricks,
    okay? But the baby the baby's really, really great and it's portable and it's
    super lightweight and so you can take it anywhere. Great for the rings, great for
    pendants, great for small items. quite the powerhouse, the baby jewel
    loom. And a huge thank you, of course, to uh Cool to Craft for allowing me last
    night to uh share our community, the Jewel Loom community, and for uh being
    able to make the base of my projects. So, make sure that you give them some love and always giving a huge shout out
    to um Bellacraft Publishing. And so this is where actually that kit came from.
    Bellacon 2025. And uh yeah, so I hope you enjoyed it.
    And as always, if you have any questions, if you need any help, just today I had a community
    member reach out and she said, "Hey, do you have a tutorial on these chandelier
    earrings that I had made?" and I had sold them uh in my whatn not auction and
    I did not have I did not have a video but I had the picture and so I said hey
    will the picture help you and she said yeah it would so I sent it to her and I said is this good and she's like yeah so
    everybody was happy I don't want you to buy my products and then feel like you don't know what the
    heck to do with them that's why we do so much content that's why we have our amazing Joan, who's in the group. Make
    sure you tag Joan. You can tag me as well, but we're always there to help you. Um, you know, Danielle is, we love
    Danielle. Danielle's a huge part of the Jewel Loom family. And so, there's always people um who are available to
    help you. And if not at that moment, we'll figure it out and we'll get it together. So, lots of good stuff going
    on. I'm not doing a whatnot tonight. I do need your help. I do need your help
    with the following. I have a ton of uh artistic wire that needs to
    it's it needs to go. I have a lot,
    but I don't know exactly how you would want it. So, if you're interested, let
    me know how what is a good bundle. Like, do you want to buy the gauge? Do you want a variety of gauges and colors?
    Because I would like to bring that to next Thursday's What Not. And if you're
    not on Whatnot, it's literally WH A T N O T. And my shop over there is Juliana's
    Jewels. I think it's Juliana's Jewels, right? Yeah, Juliana's Jewels.
    And uh and so yeah, let me know. And and so I would love to Carmen says she's
    interested. Debbie says she's interested. So let me know what that means to you because it's a lot. It's
    like it's from I think mostly 18 gauge.
    How should I message you? Great question. You can email me at jewelsjuloom.com.
    I think that would be a great a great way to communicate. Let me know what you want. What gauges? What colors? Like I'm
    totally can I will literally pull it all together for you, too. Like we don't
    have to wait till next Thursday. I'm your shopping babe.
    I need a shirt. Okay, Sandre. Oh, thank you. Oh, good. Thank you. I hope
    everybody um enjoyed it. And again, big thanks to Jesse James for like every
    time I was sharing something today, JJB was resharing it. I was like, I'm over
    on the Tik Tok, I'm over on the Instagram, you know, I'm I'm on the Facebook, I'm on YouTube. And so it's
    always um one of the biggest things that you can do for a content creator
    obviously like their content, you know, subscribe to their channel, but um when
    you share that just like means the world to us and you know whether it's myself,
    Juel Loom, JJB, Beatelon, Culigraph, Bellacon, um Jill Weisman, all of our
    besties, Danielle, you know, Sam and Neil included like anytime you share it
    just helps. It helps a lot. And so, um, you know, we're all small to mediumsiz
    businesses trying to do our thing and serve you. That's really what we love to
    do. I'm speaking for like, what am I, the queen of this group now?
    I just took it upon myself. I'm sure that hopefully they're okay with me uh
    just just shouting out to our people. Okay. 20 to 26 gauge, any color. Okay.
    Yeah, email me cuz this is all going to go away. I won't, you know, I won't be
    able to see it. So, all right. I love you all so much. I am so forever
    grateful for everything that you've done. Thank you for the love around the world for the original jewel loom. I got
    to tell you, I'm working night and day trying to figure out this darn international shipping on the wood looms.
    Oy, oy. Anybody else? I don't know. I haven't asked Danielle if she can help me. I bet Danielle's got answers.
    How come I haven't asked her? Maybe she does, maybe she doesn't. I
    don't know. But um yeah, huge thank you to their queen in the back there, Joan.
    And uh always grateful for her posting all of the links and and to you all. So
    so incredibly grateful. So have a beautifully blessed
    weekend. Don't forget, um, I do believe that Danielle is still doing her
    Saturdays. Is that correct? Yes. I see heads going up and down. So, I think it's at 200
    p.m. Pacific Standard Time. Is that correct?
    I just got shoulders on that one. But, um, yeah, Danielle and then Neil has his
    jam on Sundays. Always a lot of fun over there. And so, you are right. It's just
    a community. It's a huge village that's a combination of like so many of us that have known each other too quite frankly
    for many, many, many years. So, um, on behalf of everybody,
    we love you. We love you so much and we appreciate you. So, yeah. And Danielle
    is with Nle as well. I think I'm gonna have to crash a Sunday.
    Okay, everybody have a beautifully blessed week. Uh what's left of it the weekend and um oh hey, join the Facebook
    group, the Jewel Facebook group if you're not in there. It's such a great way to like share your stuff and I love
    waking up to that. So all right, be blessed and we will see you again.