SAVE 15% OFF ON YOUR FIRST ORDER PLUS GET 3 FREE PATTERNS. SIGN UP BELOW!

0

Your Cart is Empty

Shop
  • Read our story

  • Each of our carefully researched, styled, tested and distributed collections reflects a particular aesthetic and ethos. We hope some of these speak to your own style, and help you refine and redefine your own look and style philosophy in the process.

  • How to Set Up Your Bead Loom Super Easy Steps!

    August 11, 2025

    How to Set Up Your Bead Loom Super Easy Steps!

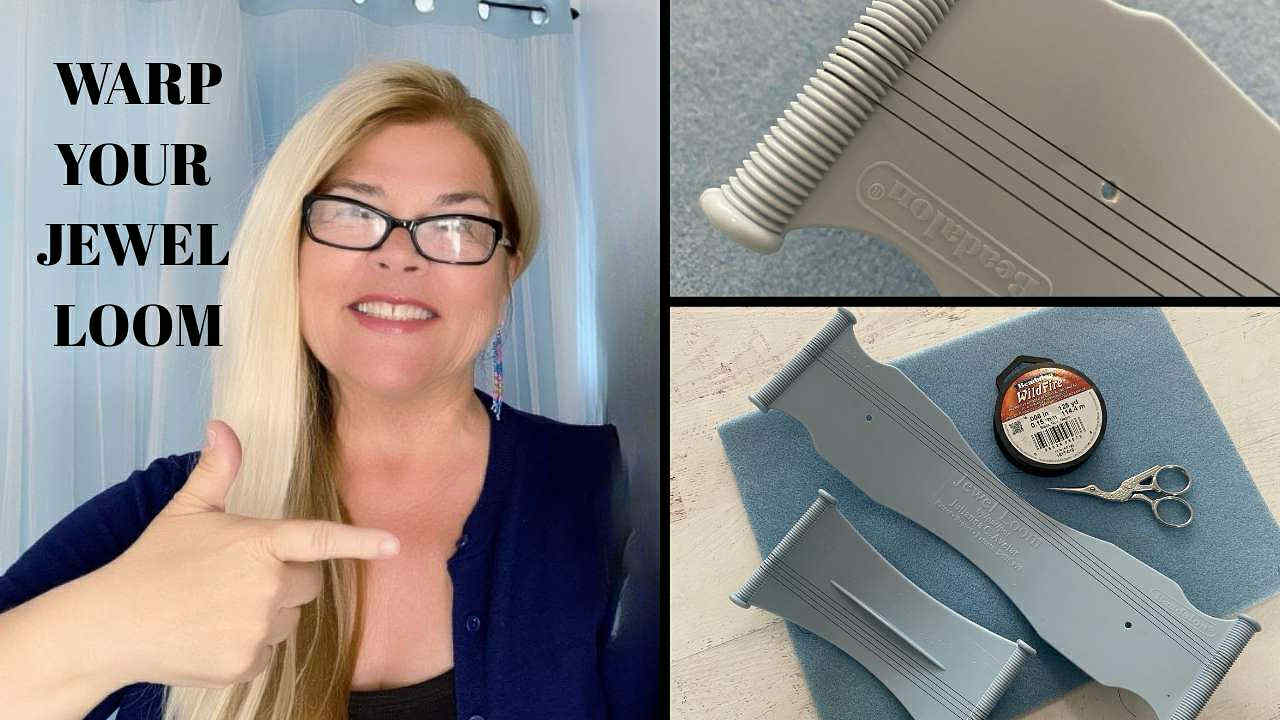
    In this beginner friendly tutorial, learn how to prep your Beadalon Jewel Loom for your next jewelry making project with Julianna C Avelar. Learn all the tips and tricks to getting the perfect warps to give you a great start to your beaded projects. Julianna also shows how to warp the Baby Loom, which is a little different, since it does not involve a removable rod. Watch the tutorial below.

    Buy a Jewel Loom Bead Loom Ultimate Bracelet Starter Kit with 18 total items including: Jewel Loom Bead Loom, Jewel Loom Stand, Baby Jewel Loom, 6 Jewel Loom Needles, One-g Beading Thread, 6 Strands Fire Polish Beads, 2 Yards of Hemp Cord and 1 Button: https://jewelloom.com/collections/jewel-loom-bead-looms-for-jewelry-making/products/jewel-loom%C2%AE-beaded-bracelet-starter-kit-with-bonus-baby-jewel-loom-and-needles

    Buy the Baby Jewel Loom and get a FREE Bag of Beads:  https://jewelloom.com/collections/jewel-loom-bead-looms-for-jewelry-making/products/beadalon-baby-jewel-loom-bead-loom

    Save 15% off your first order, plus Get 3 Free Patterns: https://jewelloom.com/pages/get-3-free-bead-patterns-and-save-15-percent-on-supplies

    Did you know Jewels has a Book? It’s true! You can get a digital copy of the Jewel Loom Inspirations book here:  https://bellacraftspublishing.com/jewel-loom-by-julianna/ 

    You can find Jewels here:


    Transcript:

    up. And I'm going to take
    the wildfire and I'm going to make a
    little loop in the air. It just makes it
    easier for me to attach it to that back
    button. Now, I want to make it really
    clear that this is how I warp my loom.
    You are going to see other people who
    maybe use the other buttons to start
    with. All right? And they may start with
    this closest to their body. They may
    start with it most furthest from their
    body and there is no wrong way. Okay? I
    just want to teach you how I do it. That
    way if you come across problems I can
    better speak to helping you because it
    will be the way that I taught you. So so
    far I have two two knots. And just for
    giggles I'm going to do another one. And
    all we're trying to do right now is
    really make sure that our beading thread
    is attached to that back button.
    And so what we're going to do now is I
    the other thing I really want to point
    out is like really pay attention to my
    hands. The way that I hold my loom, the
    way that I maneuver it. Again, it's the
    way I do it. It may be in the end that
    you figure out a different way, but as
    long as you still get to a good warp,
    it's all good. So, this is my left hand
    and this is my right hand. And I come in
    and I grab the loom with my left hand
    and I'm I'm putting it like in the
    middle upper upper middle I would say.
    Okay. And then I'm going to grab
    the beading thread. And can you see how
    it dances around the the button there?
    This is really important. So, I'm
    grabbing the beading thread and I've got
    it really nice and taut. Can you see how
    with my right hand I'm really pulling on
    it? And I'm going to lay it down into
    one of the grooves. I'm going to bring
    that up to the camera. Can you see that?
    It's just laying in one of the grooves.
    And and what's even more important right
    here is I'm going to try to do this.
    Okay.
    the knot that we made that I made, it's
    right there. That knot needs to follow
    you. In other words, let me back up.
    Like, say for giggles,
    the knot was all the way over here and
    then you just kind of casually came over
    here and you laid you laid your beading
    thread into
    the groove and that knot did not move
    with you. And so what's going to happen,
    believe it or not, that little bit of
    lack in tension could actually make that
    first warp thread not be as tight as it
    needs to. So when I do this first warp,
    because this is always the first warp is
    where everybody
    usually loses their tension, I make sure
    that I'm really pulling it nice and taut
    and that that knot is staring at me.
    Okay? Like here's the button. Here's the
    knot. Here's my right hand. And I'm just
    going to tell you as I point my face is
    this way. Okay. So, I'm staring at it.
    I'm holding it. I lay it into the
    groove. And then again, you see my four
    fingers over here. My thumb is under the
    jewel loom. And now I'm going to turn it
    over. So now the top of our Jewel Loom
    is facing up to the ceiling. And you see
    how I still have a grip, right? I still
    have a nice grip on that first warp. And
    I'm going to lay it down.
    And I'm just doing an eyeball. Okay?
    Like I'm not going to get so crazy
    because I'm just doing my warp in the
    middle of the loom. I'm not using all
    30ome grooves. And so I could tell that
    the space on the top up there is very
    very very similar
    to the space on the bottom. And so while
    I still have while I still have the
    tension, I'm going to see how I just
    walked my four fingers. My hand now is
    holding the belly of the top of the
    loom. And I'm gonna turn it and wrap it
    around that back button. All the while
    I'm keeping it nice and tight in my
    right hand. I'm gonna go ahead and I'm
    going to skip a groove. Now, how many
    grooves you skip
    determines it's determined by what size
    bead you're going to be working with. If
    I'm working with size 11 O's, it's no,
    you're not going to skip a groove. If
    I'm working with an 80 O, which I'm
    going to in the next series, I want to
    skip
    one groove. All right. So, then I'm
    going to flip it over again.
    And I'm bringing the wildfire back up.
    And you see how I'll bring in my pointer
    right here. And I'll press down.
    And I'm going to get that spool out of
    the way. And I want to get back to where
    I have I have it all nice and tight. And
    I can Let's see for giggles. Yep.
    So, you see how that first warp
    looking pretty good. Looking pretty
    good. Okay. So, again, turn the loom.
    Wrap it around that back button. Come
    back up.
    Is that one? Yep. That's one groove.
    Flip it over.
    Come back down.
    Skip a groove.
    Turn it around.
    And what we want to do is we want to
    create one more warp. Then we are going
    to be using beads.
    Okay. I got my fingers a little tied up.
    There we go. And
    skipping.
    And I think I'm just going to do three.
    So that means I need four warps, which
    is exactly what I have right now. One,
    two, three, four. All right. And then
    I'm going to flip it over. And I'm going
    to continue to keep that tension. All
    right. And we're just going to wrap it
    around the back button a few times. And
    we'll lay it down. We'll come over here
    and we will
    wh cut.
    And then what I like to do is watch my
    pointer finger. I'm going to push it
    down. And then I'll take the end
    of
    the wildfire. That's very dancy.
    Okay, there we go.
    And then I went so I I took the end and
    I came under those warps.
    And then I'm going to come under that
    loop. And basically all you're trying to
    do is get a really nice knot. Okay. And
    I just did. If if you figure out how to
    tie off differently, that's okay. Like
    I'm just showing you what I do. And
    again, ultimate goal, keeping the
    tension, making a knot. Let's just do
    another one for giggles
    under the warps
    through the loop. Pull up. Awesome. And
    then I'm going to go ahead.
    All right. And I'm going to trim those.
    And our let our We're looking good.
    Okay. Like I'm I'm pretty happy. Usually
    what happens if somebody loses their
    tension, it's on this first warp and
    it's going to be really kind of loosey
    goosey.
    But here's the magic and this is the
    cool part. We're going to remove the
    rod. Okay? And so again, it's a flexible
    plastic. We want to be really careful
    when we remove it. And what happens is
    that the jewel loom can spreads out a
    little bit more that flex, right? And
    that's what creates,
    right? The best warp around. And so that
    is pretty good warp, right? That's
    really great warp. And let me give you a
    little secret.
    the distance between the bottom of your
    loom. So, I would just like call like
    this the little belly, right? It's where
    the jewel loom, let's turn it this way.
    The jewel loom is stamped into the um
    plastic here. You can see my name. You
    can see the patent. So, the distance,
    let me bring this a little bit better
    into the camera, between the bottom here
    and the warps should never be more than
    2 in. All right? In fact, I want to give
    you that visual. So, hold hold a second.
    Let me bring in my sewing tape measure.
    And what I'm going to do
    so we can see. Let's turn it this way. I
    think the the warps are a little closer
    over here. So, we've got Yeah. 2 in.
    Okay. So, you never want to pull your
    warp so incredibly tight that you're
    putting all this crazy pressure on your
    jewel loom. Um, you know, because it if
    it's more than 2 in, that means that
    you've really bent it very very tight.
    And again, it's a flexible plastic, not
    a bendable one. So, from the uh warps to
    the belly here of the jewel loom should
    never be more than
    2 in. And
    whether you're warping the jewel loom or
    you're warping the baby jewel loom, it's
    going to be the same process except for
    that the baby loom does not come with a
    metal rod.
    And you know what? I think we have time
    to warp one. Let me come over. Let me
    find a baby.
    I happen to have a baby. There she is.
    Okay. So, if you've never done any
    jewelry making at all, like I I had
    somebody ask the other day, is this
    really something that I could do? I'm a
    total, you know, newbie. And my question
    is always, well, do you mean that you're
    a newbie newbie? Like, you have never
    made a piece of jewelry ever, or do you
    do um bead work like, you know, peyote
    stitch and other type of stitches? you
    know, always let me know like like
    here's what I've done. You know, even if
    it's not jewelry making, like if you've
    done sewing or quilting, you might the
    connection might be there. And um I
    think that you would probably have a lot
    of success. But buying the baby jewel
    loom, like if you just don't even know
    if this is going to be something you
    enjoy, starting with the baby jewel loom
    is like the way to go really. Like if
    you just don't know if you're going to
    love this or not, I would buy the baby
    jewel loom. And by the way, just a
    little plug right now. When you buy the
    baby jewel loom, it comes with a free
    bag of check beads. So, they're fun.
    They're colorful. They're round. Um
    they're just they look like ginormous
    well, they're small seed beads and large
    seed beads. They're really cool. So,
    let's let's warp the baby. Okay. Because
    we have we have time to do that. Again,
    you've got buttons on each end. And if
    you turn the baby loom over, you've got
    buttons on the back. But what's missing
    is that there is no rod. Baby jewel loom
    is always in its warped position, which
    makes it really, really easy for you to
    learn. So, let's do this. We'll go
    ahead. Same materials. You're going to
    need beading thread.
    working from the spool.
    And I'm going to create a little loop.
    We'll put that around that back button.
    And we're going to do that again.
    Okay. And two is fine. You don't have to
    do three. All right. And so it's pretty
    much the same process in which I use my
    hands. Um, baby Juloom is in front of
    me. This is my left hand. This is my
    right hand. And this is my body. Okay.
    So, we're going to pick up the baby.
    We've got the wildfire in our right
    hand. And what I'm going to do is again,
    you want that knot to follow you. And
    then I'm going to lay the wildfire right
    into the groove. And then I'm just going
    to bring it down.
    Okay. And I'm just going to eyeball it.
    All right. Just eyeball. Looks good. And
    then I'm going to flip the baby over.
    And then I'm going to skip a groove.
    Okay.
    And then I'll bring it up to the top.
    And all the while I'm keeping the
    tension. Wrap it around the back.
    Okay. Okay. And if I'm going to do
    something with three beads across, three
    size 80 o seed beads across, then I'm
    going to want four grooves.
    Okay. And then we're going to come up,
    lay that down. And you can see how fast
    that went, right? Because it's half the
    size of the of the original jewel loom.
    And then I just wrap around a couple of
    times. again. Take my pointer,
    bring my scissors in.
    Whoop! Imaginary cut. And then I'm going
    to slide that under all the warps
    and bring that through.
    And then scooch that up. Making sure
    that I didn't lose any tension.
    And then we'll come under again.
    Bring it back up.
    Give it a little bit of a trim.
    Flip it over. And you can see how
    incredibly quick it is.
    And that's really great warp. Really
    great warp. Now, you can't warp this too
    tight because it does not move. It It's
    the baby jewel loom. It's got the warp
    built into it, so there's no rod. It's
    such a great way to learn. And it it's
    so good too like if you want to do some
    fiber projects, if you want to weave
    with yarns or sorry ribbons or something
    like that, it's really a great way to
    test the waters to see if creating on a
    loom is something that you want to to
    do. And I do believe that the baby jewel
    loom is under $10
    and plus shipping. So, I mean, you're
    not investing a tremendous amount to try
    a new craft.
    So, we've got the baby jewel loom. We've
    got the original jewel loom. Both
    warped.