SAVE 15% OFF ON YOUR FIRST ORDER PLUS GET 3 FREE PATTERNS. SIGN UP BELOW!

0

Your Cart is Empty

Shop
  • Read our story

  • Each of our carefully researched, styled, tested and distributed collections reflects a particular aesthetic and ethos. We hope some of these speak to your own style, and help you refine and redefine your own look and style philosophy in the process.

  • How To Make a Sparkly Beaded Cuff Bracelet with 2-hole beads!

    September 04, 2025

    How To Make a Sparkly Beaded Cuff Bracelet with 2-hole beads!

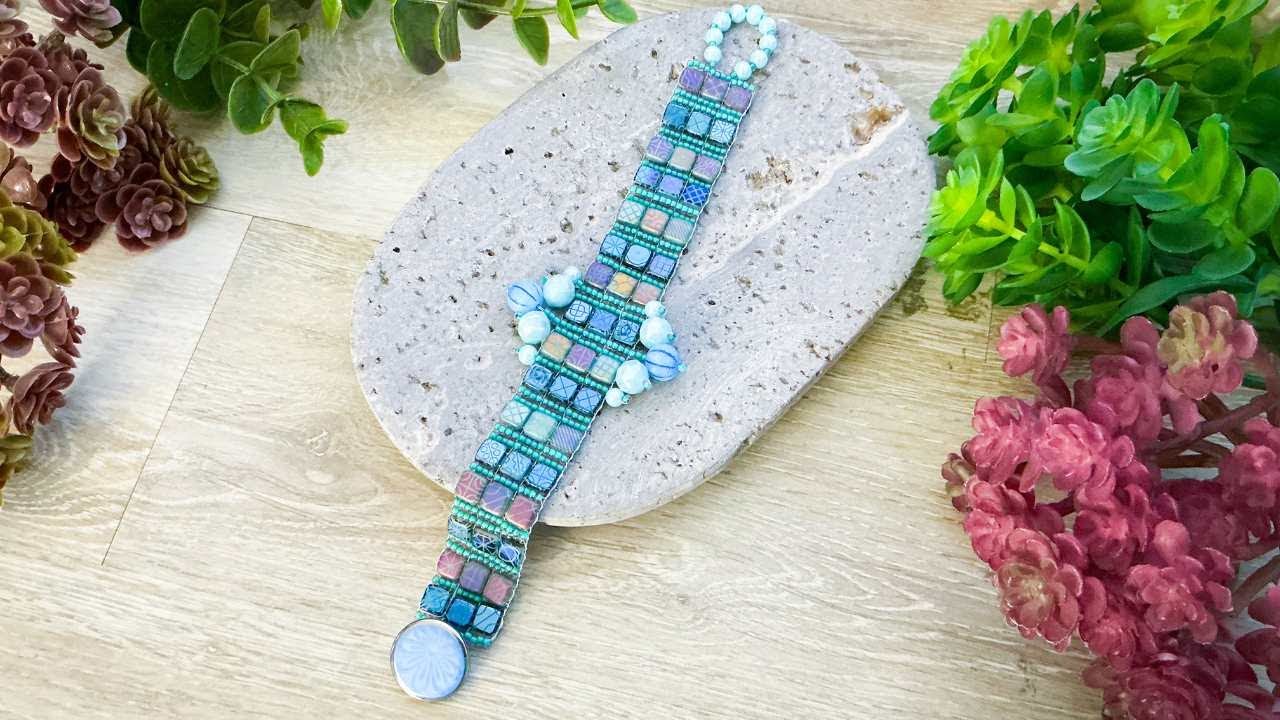
    Learn how to make a gorgeous embellished center cuff bracelet, using Beadalon's Original Jewel Loom and a variety of different types of beads. This is a great project for beginners. Danielle Wickes explains and shows each step clearly in an easy to understand format. Pick out your beads and learn how to by following along with this tutorial! The link for the instructions for warping the loom is below the main tutorial.

    Watch the tutorial below.  

    Learn how to warp the loom for this project. The following link will start when Danielle explains the warping of the loom. Once she is finished explaining the warping, you can go back to the above tutorial to learn the rest of the steps for your project.  https://youtu.be/jivt5TzUYy4?si=6MW7-a7N5YwCTgYS&t=49

    Materials used in this project (these are suggested items, which may differ in color from the beads/button in the tutorial):

    Save 15% off your first order, plus Get 3 Free Patterns: https://jewelloom.com/pages/get-3-free-bead-patterns-and-save-15-percent-on-supplies

    Did you know Jewels has a Book? It’s true! You can get a digital copy of the Jewel Loom Inspirations book here:  https://bellacraftspublishing.com/jewel-loom-by-julianna/ 

    You can find Jewels here:

    Where to find out more about Danielle Wickes:


    Transcript:

    Hi there. Um, thanks so much for tuning in and this is another edition of the Jewel Loom Jewelbox Creative Soul um,
    edition of creating beautiful pieces of jewelry on a loom. So, the creation that
    I have to share with you today is an embellished center cuff. So, it's a beautiful button, little flower button
    there, and a really cool pearly looking button loop. And then, of course, you've
    got your truly glamorous little center focal that uses some of the extra beads
    in your kit. And it's all put on a base of checks and seed beads.
    So really lovely, really easy to put together, lots of very simple techniques, just stitch together as one
    to create something really lovely. So I'm going to walk you through it. I wanted to make sure and mention that the
    type of configuration we're using for the loom portion of this design is very similar to one that we've done
    previously. So I'm going to skip demoing warping the loom and just um please refer to the description if you're
    someone new to warping the jewel. There's another video to point you to where I go through that in detail. And
    so if you check that one out, if warping is something you're struggling with, we're going to get right from the looming part here. So, um, but I will
    show you how to space it. It's basically three spaces apart, four warp strands.
    So, kind of exactly similar to the one we did in June. So, check the description for that. And, uh, let's
    dive in. All right. So, here's an up close view of my jewel loom with all of the warps
    completed and ready to go. So, I'm going to cut a new strand of beading thread.
    I'm using the gray color wildfire wildfire beading thread in size 06.
    I have a size 10 beading needle and I'm going to go ahead and follow the pattern that's in your your printed PDF
    and it starts with a row of seed beads. You're going to want 12 seed beads. And again, oh, sorry about that. Again,
    these are size 10 check. And then initially, you're also going to want to have each one of each of your
    colors of tiles. You'll probably have a lot of extra tiles after this design, but um I didn't
    actually even end up using my second strands, so these are going to be enough for an entire other bracelet. But you
    have enough to do um any length that you would like.
    for your design. So, I'm going to set those aside for just a second and show you putting on the first row. So, let's pick up 12 of
    these beads.
    All right, just move those. Here's our 12 seed beads.
    Slide those down. Leave a tail that's at least seven in. We're going to use that for weaving in.
    And then bring your needle back through all 12 of those seed beads. And this is
    just to stabilize it while we get started. Position those underneath the
    warp threads. Use your finger to hold them steady. And try to arrange it so
    that there's four seed beads in between each warp. And remove your needle. And
    working with your eye side, bring your needle back through those beads, staying over the warp threads.
    And I avoid tying knots because I like to pull my warps in. But if you're somebody who doesn't mind weaving in,
    there's really not that many warps to weave in in this case, then you can feel free to start with a knot. You can also
    feel free to skip the part where I go with the eye side of the needle. I work eye side so that I don't puncture the
    thread. The reason I do that is I like to be able to slide my piece.
    Um, and let me just grab I'm going to use what I uh a business card would work, a ruler. I like to use a thread
    scooper. This is one of those things you can use for cleaning up your beads. I use it to slide
    the beads and test that I haven't punctured a warp thread. And when I get to the end of this design, I'll pull
    these warps in to save me some weaving in. Um, but again, that is optional and you could always just weave them in uh,
    one by one and cut your strands free, too. So, many, many ways you can do it. But there's my first row. 12 seed beads.
    And sorry for the focus there. Let me get that to go back. Okay. 12 seed beads, four between each of the warp
    strands. And here's just a close-up view of the spacing just in case that's helpful.
    three coils. So now I'm going to go for It actually doesn't matter what color you start with. Your pattern can be your
    own. I did kind of an asymmetrical um pattern because I didn't want to
    worry about having it, you know, work out exactly centered because we're just going to
    choose the closest point we can to the center when we do our embellishment. And since everyone's lengths might be a
    little different, I would say don't sweat the small stuff on the pattern. Just go with something you like. The
    very general idea is illustrated here for you, but it's just going to be a row of seed beads, a row of check tiles will
    be three, one between each warp. Then you're going to do two, two, and in my
    case on my design, let me just show you. I started with the row of seed beads and then I went two two one two two one two
    two one two two one two two one. And
    then I ended ended it with one. That's what ended up working out for me. Uh, but you can always change that up if you
    want to. Lots of different possibilities. And oh, by the way, here's a close-up view of the bracelet. Isn't it cute? And, uh, that's the
    closure side. Cute little button loop. Stays on really nicely. So, bring your needle under your
    warps. Pull that through. Pick up three tiles.
    Slide those down. and position them underneath and in
    between each work. And here I'm just going to bring my needle through. I just went with the
    forward side of the needle here because I was able to really clearly see in between each of those tiles to know that
    I didn't poke any thread. So in this case, you don't have to worry about that as much. Straighten those
    out. And so these are a two-hole bead, right? So, we've just secured the first
    hole of these three. And at the moment, these three are just
    kind of poking up. And what I'm going to do is I'm just going to poke them down. One, two, and
    three. Poke those down. And then take your needle and go through
    all of those.
    Make sure you got through all three of them. And then if you have, go ahead and pull
    that thread through.
    And you'll have something that looks just like that.
    And then bring your needle through all three of the tiles. And this time you
    want to keep that needle above the warps without puncturing them.
    And so there's how to put on a row of tiles. It's a twohole process. So you're going to be going through the beads
    twice basically, but one time through each hole. So that's how that looks. I'm going to
    put on two more rows of seed beads. Starting with
    four. And here's four.
    And four more. Bring those under.
    And this time you won't need to pop your needle through them. They should very nicely. And with these I do tend to work
    through the eye side just because it's a little harder for me to make sure I don't puncture threads.
    the tiles, it's just a little easier for me to visualize. And the holes are actually larger, too. So, you're less
    likely to puncture thread. But with tiny seed beads, your chances of puncturing that thread are higher. So, I always eye
    side for the seed beads at least. There's those. I'm going to put on one more row of seed beads.
    So, there's our next row. All set. And time to add a row of tiles. This time, you can change up the color.
    There's one, two, and
    chasing them around the mat till I can find the open side of one. There we go. Okay,
    there's three. And my threads already passed underneath the warps. Stringing
    those down. And then just kind of use my fingers to hold them. Arrange them in between.
    And let's make sure we get through. Staying above those warps, all three
    holes, the first hole of those project tiles. Just kind of poke them downward.
    Try to hold them in a row so it's easier. And get your needle through all three. One way you can test your needle
    made through all three is you can just kind of like move them like that just to see
    if you missed one, it won't move with the others.
    One, two, and through the third one. So, this is going to stitch up really fast.
    It's not a lawn design. Nice and easy, right? I'm going to do two more rows of
    seed beads and then another row of check tiles in the the lighter color. And I'm going to carry on like that until I have
    my desired length. So, let's talk length really quick.
    I'm just going to move this aside for a second. Here's a finished bracelet up close.
    And let me grab a tape measure. So my beaded length that I did was
    roughly six inches. It's a little bit more than that. About six and a it's under six and a
    quarter but over six. So you know just right up here you can see the few ticks above six inches. And then when I added
    the button you want to measure from the middle of your button because you're going to wear it at the middle and then
    measure from kind of just the edge of your button loop. So, I'm looking at seven and a quarter.
    So, I did 16 rows of tiles and I spaced them one, two, two, one, two, two, one, two, two for the seedbead rows. So, make
    this design, this length here, one inch shy of the length you'd like to
    wear it at. And then meet me back here to do the next steps after you've finished your
    loom design.
    If you run out of thread, I started with a wingspan of weft thread and I am running pretty short now and I'm going
    to leave at least seven inches uh before I create more rows. So to add a new
    thread, just take your needle off of the old one right after you finish the last row when it started getting short and
    then just start a brand new one. Bring that brand new one
    underneath and leave the same length of tail you did at the beginning. String a row
    of whichever bead is next in your pattern. So for me, that's my 12 seed
    beads. And string those down, leaving that same tail.
    Bring your needle back through to stabilize it. arrange them underneath those warps and
    pull the needle out. Then go ahead and go through those beads. I'm going to go through with my needle side and just
    really carefully make sure I don't puncture any of those warps. Um test it. Make sure you didn't.
    And then just go ahead and pull pull that through.
    And you can keep going until your tail is about the length that you want it to be. And then what I usually do is like
    I'll take the two tails. See how these are kind of curled. Just uncurl that.
    Bring those tails over here. And you can even like take some washi tape. Just
    bring the tails down and tape it to the back. Just get them out of your way so that they're not bothering you while you're working.
    And there you go. You're off to the races with your new strand. So just keep creating new rows up from
    there. All right. So, here's my finished piece. And I'm going to go ahead and just show
    my finished measurement here. So, I got this to roughly six inches. Go
    ahead and stop there. To remove your piece from the loom, leave all your leave all your we threads in place. So,
    your weft threads are these these four here. In my case, I have my starting weft and then I have my two tails here
    from beginning and ending thread. And then I have the end of my working strand here at the back. Grab some chain nose
    pliers if you got them. Use the um one side. Just kind of press it against your
    belly a little bit. Don't bend it or put any stress onto the loom. But just go
    ahead and remove one of those loops and then the other one. It should be pretty easy to do
    considering that it's just four loops that should be on there. And then once you've done that, they will fall free
    from the other side. And depending which side you started with, um, you'll either have your knot
    on the side you freed or on the other side. So for the knot, we are going to need to trim that.
    There we go. Going to set my loom aside for my next beautiful project. If you have any
    little knots on the edge, just go ahead and trim those, too.
    There we go. So now our loom piece is free from the loom and we can start
    doing the next step. So what I like to do is I like to do the pulling to weave in method. Um I'm going to also point
    you guys to another video where we show that. Um it's really quick to do.
    All right. So what I did is I actually did some weaving in I wo everything but
    two long strands, one on each side. And then I went ahead and left these. Um,
    and this is just optional. Uh, in the instructions I actually describe it as just go ahead and weave in a new strand
    because not everybody will have a thread ad in the exact position where where I do, but I just so happen to have one and
    I think I'd like to save myself a little effort and use it. Um, and so this is where working with about a wingspan of
    thread, I ran out of thread and added a new strand. So, I actually have these two really lovely probably maybe even
    close to 10 inches each that can probably be used to do my center embellishment. But when we get there, I'll explain more about how how to add
    and weave in and um get your thread going to do the center. But for now, let's start with step three in the
    instructions, which is putting on the button loop. So, between the two sides that you've got, choose the one that's
    longer. For me, that's this one. and go ahead and put a needle on there.
    Let me see if I flatten this end. Yeah, if I didn't already say this earlier, if you flatten the end of your
    wildfire with a chain nose pliier, you can get that needle threaded so much easier.
    So, in this case, my thread that I've got left here is a warp.
    So, I'm going to go over one of these seed beads, and then I'm going to head
    through and exit from the middle right here. So
    you'll see you'll have four seed beads that make up your center. Just exit from the side of one of those.
    So your thread will be exiting like that now. And so get some of your four mm beads
    from your kit. We're going to need those and the seed beads. So just a handful of
    those. and go ahead and string one seedbead
    and one four millimeter bead. Repeat that a total of nine times.
    So there's one seed bead and one 4mm bead nine times. And I'm going to add
    one more seedbead. And let's head back through the four
    center seed beads right here.
    So, there's your button loop, and it's that easy to put on. And go ahead and test your button. I've noticed
    that um with buttons, it's always just good to test. You may not need to. Your
    button should be exactly the same size as mine, but not everybody like has the same preference for how tight their
    button needs to be or how loose. If it feels difficult to fit the button
    through it, then maybe add another bead. And so I'm going to go ahead and just demo testing.
    And so your button will be inside of a little baggie of beads that came with your kit.
    So here's my button. Let's just see what happens. Yeah. So when when we reinforce
    this, that's going to tighten up a bit. So if it's a little loose now, that's that's what you want. That's good. So that's a total of nine.
    And all you need to do now is go back through it once or twice more and then we'll weave
    in. So, I just went all the way around. And I do have one tip I want to share. If for some reason mine are actually
    trying to get a little tight here, these four seed beads. Um, keep in mind when we loomed we made two passes and then
    I've made an additional pass traveling through it this way. And when I was weaving in the thread on this side, I made a pass that time, too. So, I've
    already got four strands running through those four center size 10 seed beads.
    So, if you're running into that snag like I am, here's something you can do. Bring your needle
    underneath the weft that are on the top layer in between the four and then the
    other four. So, let me get mine under it and I can show you. So, I got under the we right there. Let me try to pull it so
    you can see. And then if you can continue under the weft that are located
    in between the two tiles there. So you're just getting your thread through these two little sections.
    And sorry that just snagged a little there. And so this will put your thread exiting
    right next to one of the tile beads. And you can use the tile bead to travel through
    And then go ahead and go under the weft. Under the weft.
    See that little trip there? Under those two.
    And now I can get a third pass through here.
    So, I went ahead and went all the way around. And then I flipped over to the other side,
    and I'm going to go under the wefts from the reverse side. And this just kind of centers everything
    above the edge of the bead work. And from here, you can just weave in as
    normal. And in case weaving in is a new uh a new thing for you, I'm just going to quickly share really quick how I do
    it. It is I go under some of the wefts. See that are connecting all of these
    beads and then I'll go through a set of beads.
    Let's go through say like these four. Then I'll do the same thing again. Just
    keep picking up and get through a few sets here.
    and one more. So, just carry on like that to weave in. It's a little boring to watch, but it is really easy to do
    and it's the best method for weaving in that I that I know of. It's a really
    tight way to secure your work. Once you're happy with it, just go ahead
    and trim or burn your excess thread.
    And let's move on to working on the button attachment.
    And again, just ignore these were my thread ad tails. Just hang out with those over there for a second. Those are
    not needed right now. Um, and if you don't have thread ad tails, no problem. We're going to we're
    going to weave in a new strand for you if you don't have these hanging out there. But for now, let's head over to the other side. Let's put our button on.
    If you haven't already flattened this edge, looks like I've already done that. and thread a needle.
    And then go ahead and refer to the next step here. It's actually still part of
    the step three. We're just going to weave to exit from the center four seed beads on this side. We're going to
    string three seed beads, the button, three more seed beads, and we're going to connect it through the opposite side
    of the center four. So really, very, very similar to what we were doing to attach the loop itself. So, from here,
    I'm going to just take a look at what kind of thread I saved. And I actually saved the tail or would
    have what was potentially the remainder of my working thread, working weft
    thread. So, it's the one that's coming out of the beads, not running along the side. And you can see here it's exiting
    the bead on one side of its warp thread. You see the little warp thread right there? Running the side. I'm going to
    just make sure I go over it and through the beads
    and then exit from one side of those center four. Let's string our three
    our button and three more
    and then let's loop back through.
    So you should have that. Use the same process that we had on the
    starting side with the button loop to reinforce.
    So in my case, um I'm first I'm going to test and see if I can get through the four.
    And it looks like I can get another pass through there. So I'm going to do that.
    That'll probably be the last one I can comfortably work through those beads.
    Let's make another trip through the button.
    And then here, let's use that same trick. And it is nice because if there's any like sometimes this this row will
    sort of pull away from the work. And we can really fix that nicely by going under
    through
    Then we'll head under. Make sure to go under the left here as well.
    And then through the button one more time. So go ahead and do that. And it will start to move some of that pulling
    down further. But when I weave in, I'm going to lock these together. Lock these together. And that's how I'll make extra
    extra strength for the part of the design that's going to feel some pull. So I'll show you that. Uh, basically I'm
    just going to go through all of these beads here, go through here, head back down here,
    and do some weaving in to tighten all that up.
    So, I did a bunch of weaving around and see much stronger. The trick is really
    just to go into those WS, make trips to beads in kind of like almost a square stitch fashion. It's a little extra
    effort. It takes a minute, but then you have this really strong piece. And so I
    did that when I did the weaving in over here, too. And so I've got both of my
    sides complete. I'm just going to go ahead and burn this end. See how far I did weaving down? This is the rest of
    that thread that was used to create the button. Okay, so these sides are done. And that
    by itself is gorgeous. But of course, we're going to we're going to take it to the next level. Some gorgeous embellishment. Just test your button.
    Make sure that's all good. Looks really great.
    So, if you do not have threads left in the middle from adding thread, which most of you won't, go ahead and just get
    another strand. One sec. I'm dropping things today. So, you just
    want to get a little bit more wildfire. And you would just weave it in and add it using the same method we were using
    to weave in. So, for example, you would just take your take your new thread in through a row of
    beads and then maybe go under some of the weft, make a square stitch turn a few
    times. When you pull on it, the tail thread should stop moving and you know you've got a good weave in.
    And that's how you know you've got your new strand woven in. So, once you have that all set, um, go
    ahead and start creating the embellishments. So, first we're going to need to get out the beads that make up the embellishment. And so, you'll need
    some more of the 4 mm beads. You're going to need your seed beads.
    And then you'll also need some of the melon beads. And then we're going to want more of
    these.
    All right. So, I actually have quite a lot of beads
    left in my kit. I didn't even scratch the surface on some of those beautiful uh ceramic ones either. So, you've got a
    lot still to play with even after you make this beautiful design.
    All right. So, let's pull that through. All right. So, if your center row has
    two rows, the way I figured out my center row is I just started counting
    rows of tiles. 1 2 3 four five six
    7 and then I've got this as my center. So your center could either be a row of
    seed beads or even a row of tiles. And the identifying the exact exact center
    is not super essential. Just kind of you know identify the centerish part of your design.
    And so it also it also doesn't matter um if you start in the middle and work
    around. You can work one side and then work the other side with you know it doesn't matter the order. I'm at the
    center currently. So what I'm going to do is I'm going to string the three of the seed beads.
    And then I'm going to string this melon bead and then one seed bead for being my
    turn. So this is the first center embellishment going on.
    I'm going to skip the last seed bead you strung and then head down through the
    three seed beads. And in my case, I'm in a tile, so I'm just going to go through the tile.
    So, I've got my first little fringe on there. Use the we to travel. You'll want to go
    under the one that's coming out of the hole you're exiting. This keeps your thread from showing. So, go under one.
    Go under the next one. Go underneath one more.
    So for the embellishment, this is kind of like you can really make it however
    you like it to look, but um I did skip one position in between each of the
    fringes. So got one exiting here. And you can you can see it
    in the illustration as well that my next bead is one hole away. So in my case,
    I've got a tile here. So, I'm going to skip the next hole in that tile, and I'm going to work out of the row of seed
    beads there for my next row. And that row consists of
    one of these really cool faceted crystal beads
    and one seed bead. Now, let's make a turn and head back through.
    And then same thing, you want to go under under
    and under. So you're basically going through the one you're exiting and then skip the next one, go under the one
    after that and then head up through that.
    And this one is going to have a 4 mm bead and a seed bead.
    and just head back through here. All right. So, there's one side of my
    embellishment. And what I'm going to do here with this one is I'm going to carry on through the
    whole row and copy that here on this side. So, here's my 4mm
    and my seedbead. Bring that down.
    Go through just the check tile there. And then let's go
    under and under and under
    up through this one. Let's get our crystal
    seed bead. String that down.
    and then head back through. And so essentially that's the process. So what I'm going to do is I'm going to
    use what I have left of these threads. And you know I have to weave around a little bit um to make my lengths work out. But if you were working with just
    one solid new strand, you could do it all in one swoop. Just start one side and do the other side. And then finish
    here, come over here, finish the two on that side. And there you go. You can always tie off with your tail too if that makes sense to do. But that's
    basically how to do the center embellishment. And feel feel free to freestyle that the design here. You can
    see that your center point can vary and still look great. My center point on this one happened to be a row of seed
    beads and so it's built there. And on this one, I must have just made the
    length a little bit different. So my center point here happens to be a tile. And it actually doesn't matter where you
    put that embellishment as long as it's ish in the center. Right. And that's it. So, let me finish this up and show you
    uh the finished piece.
    So, there it is. It's all finished. That pretty embellishment. There's our button. Here's our button loop.
    Everything worked out really great. And um I think that there's so many things you can do like to make this different
    and make it your own. A lot of different style changes that you can do. Um, here's the other one just to show you
    how no two are ever truly alike. And it looks like I feel like I made
    them the same length, but they do look a little different. So maybe I was just adding extra rows here and there. It's possible I did that. My tension was a
    little tighter on this one. It looks like. So this was the first one I made and this is the one we made together.
    But they look good, right? I think they're pretty nice. So, I can't wait to see your creation
    that you create. And I hope you enjoyed this video and thanks for tuning in.