SAVE 15% OFF ON YOUR FIRST ORDER PLUS GET 3 FREE PATTERNS. SIGN UP BELOW!

0

Your Cart is Empty

Shop
  • Read our story

  • Each of our carefully researched, styled, tested and distributed collections reflects a particular aesthetic and ethos. We hope some of these speak to your own style, and help you refine and redefine your own look and style philosophy in the process.

  • How To Make Colorful Beaded Earrings At Home!

    June 29, 2025

    How To Make Colorful Beaded Earrings At Home!

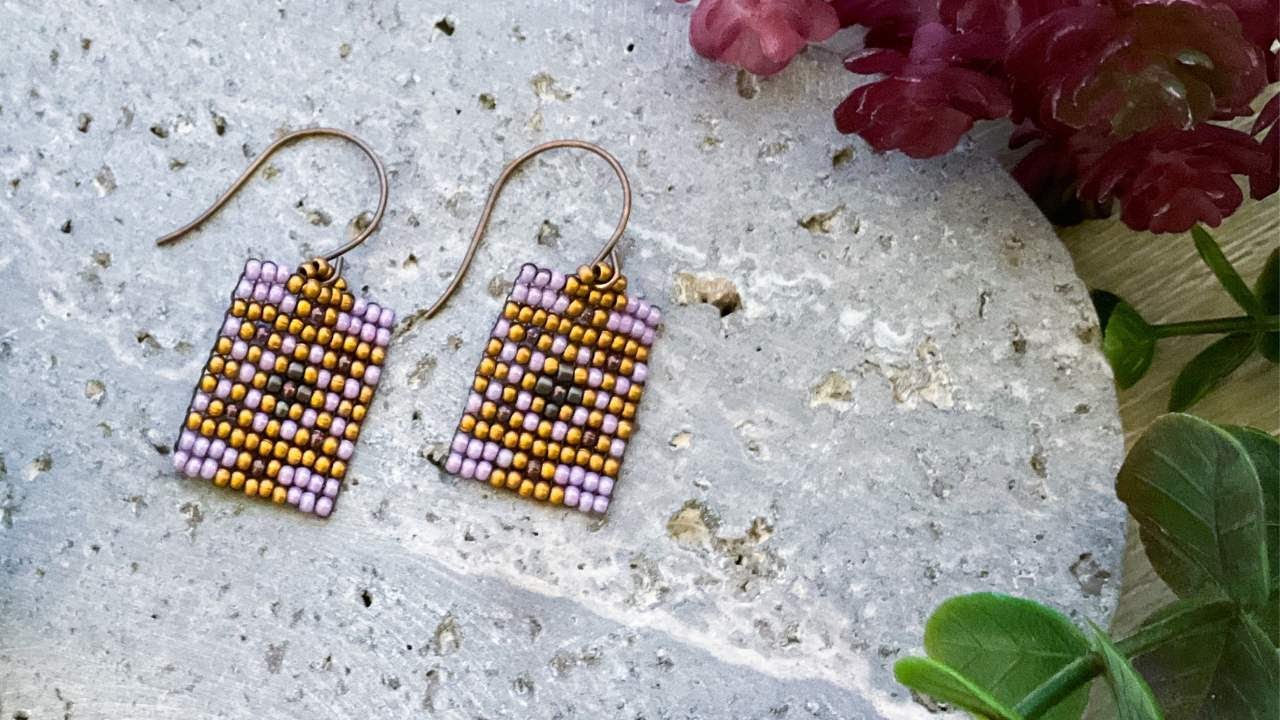
    Learn how to create easy to make seed bead earrings with a simple pattern in no time using the Jewel Loom Earring Looms! Danielle Wickes shows you how, from warping the loom, including tips to make warping easier, to finishing the earrings. One of the great tips she shows is how to easily start your beadweaving with the first row, which is usually the hardest row to do. Though the beads and pattern are from the May Creative Soul Kit, the techniques she shows can be used for any seed bead earring pattern made on a loom. You may only have to adjust the space between the warps, if you use seed beads larger than 11/0. 

    Watch the tutorial below.

    Need earring looms? Buy yours at this link:  https://jewelloom.com/collections/jewel-loom-bead-looms-for-jewelry-making/products/2-pack-micro-tiny-wisdom-warrior-earring-loom

    Save 15% off your first order, plus Get 3 Free Patterns: https://jewelloom.com/pages/get-3-free-bead-patterns-and-save-15-percent-on-supplies

    Did you know Jewels has a Book? It’s true! You can get a digital copy of the Jewel Loom Inspirations book here:  https://bellacraftspublishing.com/jewel-loom-by-julianna/ 

    You can find Jewels here:

    Find Danielle Wickes:


    Transcript:

    hey guys let's make a beautiful pair of
    earrings together i'm going to be
    starting with my earring loom and i've
    got out four of the five colors that
    were in your uh creative soul kit i
    started with the plum and then there's a
    dark golden um there's also this kind of
    like darkish mediumish purple and a
    slate gray so those are the colors
    there's one other color in the mix that
    i didn't use which was a lighter purple
    um just for the earrings i had a design
    that was more more contrasting so um we
    did use a lot of that other color in the
    bracelet and necklace design so be sure
    to check that
    out um i'm going to be working from my
    spool to warp this earring loom and so
    i'm going to start by tying a double
    knot right here onto this little notch
    that you have on the side of the
    earring there's
    one and here's the second half of that
    double
    knot and so i'm going to be putting 12
    warp strands onto the earring loom and
    12 warp strands is going to be for a
    design that's 11 beads
    wide so i went ahead and draped that
    across the front of the
    loom and down through the first comb
    here and if you use your finger or
    thumbnail you can hold it in place while
    you bring that thread
    up and go ahead and feed this one for
    one through each of the combs
    again just use your finger to hold it
    steady and then when you pull you can
    help by kind of nudging it down like
    that and then up through the next comb
    and
    over there's four
    and
    five
    oops there we go just going to move this
    over here
    [Music]
    let's see how many we have
    there's 1 2 3 4 5 6 7 8 9
    10 so there
    goes
    11 and 12
    and from here what i'm going to do is
    i'm going to hold this steady and let's
    get that tail thread ready to go see the
    tail thread here i'm going to go ahead
    and bring
    my working strand
    or warping strand
    here over to meet the
    tail and i'm going to go around this
    little edge to meet it
    so that should put me right
    here where i can tie a double
    knot just to keep everything nice and
    tight and if by any chance you're
    working on a different design at some
    point in the future and you have an odd
    count meaning an odd number of warps
    it's actually super easy um you would
    end up on the wrong side to tie off with
    your tail but no problem just travel
    back behind it and tie off so that's one
    way you could get around the issue of
    the odd count but for today's design we
    have just an even count of 12 warp
    strands so once you have that knot tied
    i actually just did a third
    knot just for just for extra strong you
    can go ahead and trim
    that so oops sorry about that a little
    loud so trim free from the um spool and
    you'll have something that looks like
    that so i like to take the tassel maker
    which now comes with your earring looms
    um and bring that up and under so let me
    show you from the side what i'm doing
    just bring it in like that and turn it
    like
    this and that gives you tight tension on
    the earring loom it's optional but
    really cool and then go ahead and start
    with you probably won't need more than
    about 45 inches of beading thread
    that's
    plenty and so i've cut that
    here and i'm threading my beading needle
    this is a size 10 beading
    needle folding over just a little bit of
    that and now i'm going to bring my
    needle under the warps and i'm going to
    pick up row one from the pattern which
    is three beads of color a
    three four and five of the
    golden and then it's going to be three
    of these and i have these in the wrong
    order it's a b c and d i should probably
    move
    those slide it down until you have left
    a tail that's at least 7 in long i go
    for about 7 to 10 in usually or
    tails and then right before you bring it
    up and underneath the warps which is
    where we're headed if you'd like to
    stabilize your work you can go back
    through the beads let me just bring
    those all down i usually just take my
    needle and just run it back through the
    beads just to have something to hold
    them you can do that with the needle
    you're working with or with a separate
    one it doesn't matter then just bring
    that up and under those warp
    strands if you have any that didn't
    quite make it where they're supposed to
    be just fix
    that and get those to fit just like that
    and you can take that needle right out
    so working with your eye side now the
    eye side of your needle go back through
    those beads staying above the warp
    strand bring that
    through and you'll have something that
    looks like that
    i'm just going to locate my bead scooper
    i have a little beetleon bead scooper
    here i love these and just going to
    shove this down just a little bit let's
    work the next
    rows and right now what i'm doing is i'm
    just getting the tail thread into
    position you want to get that tail
    thread out of the way just point that
    the other
    direction so it doesn't get tangled up
    in your work and go ahead and put on row
    two
    there's 4 a 1
    b 1
    c b and 4
    a and again apologies about those being
    flipped i think i just was just pulling
    them out in order of how they were
    stacked in my little box
    here and here you probably don't need to
    bring the needle back through you can if
    you want as a way to stabilize it but
    once you've got a row on i find it
    usually can be done just by pushing
    those beads
    up and then we'll just get our needle
    right back through
    it again staying over those warp
    strands there it goes looking really
    good and this whole one is all the gold
    color
    five and six 7 8 9 10
    11 so let's just work the whole pattern
    together why not and we'll just start
    adding our rows and we can watch it all
    just kind of pop in place should be
    pretty fun
    there we go start to finish 15 minutes
    not bad
    eh all right
    there it is okay so that's all done
    let's pop out the tension um you know
    aid there and i'm going to go ahead and
    get my flush cutters back flip over my
    loom and i'm going to free just this
    knotted side so the the part where we
    did our
    knot just so i can free these
    threads and if they don't immediately
    like come loose you can trim them one
    more time here at the top
    but you just want to free the first
    one and last one right so you'll have
    these two
    free and the others um are going to
    still be looped around the comb on your
    loom all you got to do there is just go
    pop falls right off all right and so
    ignore the wefting threads for now
    that's tail and working just hold those
    aside grab one of your ends whichever
    end you like doesn't matter and begin to
    pull and when you pull this little loop
    will come right
    up just like that pull the next one
    down watching that loop here at the top
    watch it come all the way
    down just hug that bead same
    here same thing again
    and if any of them are trapped like this
    one just it's pulling its thread a
    little you actually take your
    needle and just go like that and free
    it and then resume pulling that
    strand and let's just keep going like
    that
    and here i want to make sure i pulled
    the right one here we go
    [Music]
    last
    one happy happy all
    right starting with the one i've got my
    needle on still which is my working left
    this one right here jumping over the
    warp
    strand this is the warp
    strand that runs the
    side where's my
    thread thread appears to be on this side
    of it so i'm going to jump over and go
    through the
    beads there we go pops right in place
    needle under the
    left hop over that work
    do that one more
    time and let's trim that
    next
    one also a left this is our weft tail
    jump over that warp on the edge head
    through some
    beads head under some
    weft go through a row
    oops there we
    go enter
    okay short warp
    strand so running this way you want to
    go over the
    bead under some left right here on the
    edge
    and move over here a little bit there we
    go down to one
    we're going to use this one to pop a
    little loop on for our ear
    wire and again it's a warp strand so
    we're going to go over the
    bead and then we'll
    go under a couple of the left
    there just to get us in place where we
    want to be
    going and then head through some
    beads aim for one of the three middle
    gold ones
    here head up and up by using those
    weft to travel see
    them string one
    two
    three and four beads like
    that jump over one 2 3 and go down
    through one
    two three there we
    go just a tiny little loop there at the
    top and what you could do here is go
    through one
    bead and head back up this way
    and go through the
    bead and it's going to make it go in a
    nice little pop like that isn't that
    cute keep
    going through the next
    two and from here go down
    through the other side of that bead you
    can either do that by picking up the
    weft or by going through that bead
    whichever is easier for
    you so now i have this little
    loops and i'm just going to go ahead and
    reinforce that one time
    and there we go so go ahead and weave in
    let's go through some beads
    go under some left to take us into a
    different area where we've got a little
    less stuff going through
    beads oops it's catching my tools there
    there we go
    and there we
    go all we have left to do is pop on an
    ear
    wire and grab our ear wire
    here and if you have a side you like
    more make that the front doesn't really
    matter should be the same roundabouts on
    both
    sides there it is so let's repeat make
    our second earring and we're all set