We are a brand born of a love for the beauty of restraint in design, the inherent grace of feminine strength, and the necessity to treat our environment and each other with love and respect.
Each of our carefully researched, styled, tested and distributed collections reflects a particular aesthetic and ethos. We hope some of these speak to your own style, and help you refine and redefine your own look and style philosophy in the process.
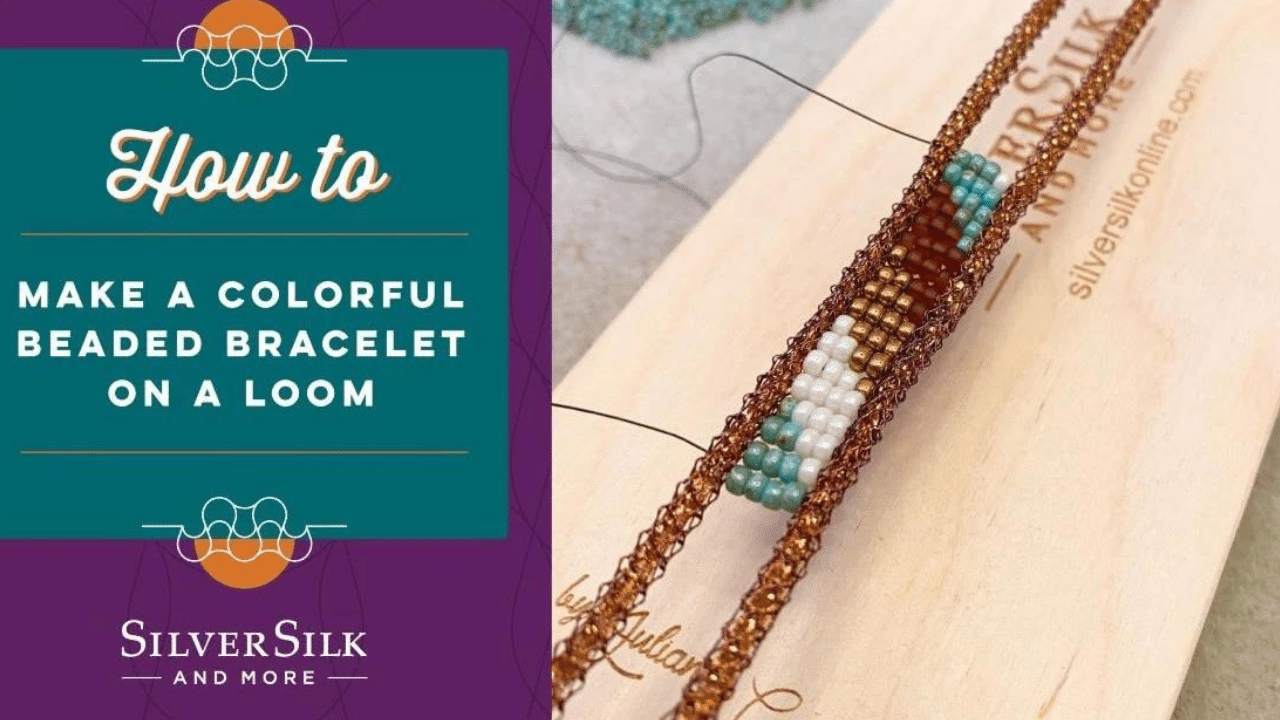
Join two of Interweave's Top 5 Trendsetters, Designers Danielle Wickes & Nealay Patel, as Danielle shows us the simplest way to make a very colorful bracelet using the SilverSilk Jewel Loom and large seed beads. She shows us how to warp, weave and finish this bracelet using a few simple methods for a clean and professional finish. This project is great for leftover seed beads you may have or another fabulous excuse to shop for SilverSilk and beads!
Materials List:
The SilverSilk Loom
3ft SilverSilk Capture Chain
20mm Wooden button
1.5mm Leather Cord
1 Double-strand end cap
Beadalon Wildfire .006 beading thread and a beading needle
good evening everybody welcome to the silver silk and more channel uh my name
0:07
is neela paton the owner designer and educator here at silver silk and more and i have got the fabulous i'm going to
0:14
do an unveil ready danielle wix with me
0:20
hi danielle thanks so much for um just hanging out with me this evening
0:27
anytime it's always a pleasure i feel like we we've planned this class for a little while and
0:33
some time passes we win awards i don't know i'm just saying and then um here we are
0:40
i know time's going really fast it is just like speeding my eyes
0:45
it is we were just talking um for everyone out there we were just talking about how i had a week and a half i feel like um
0:52
with work-wise stuff not even the fun job of my day job and then i was just like these weeks man we gotta stop
0:58
then danielle kindly reminded me that there's going to be another week next week so
1:04
yeah there's always weeks in in our lives so in our on our calendars
1:14
uh well how's everything going on on the john bead and and your
1:22
personal creativity oh it's going great i've always got so many projects going so it's
1:28
you know three things on the table at once um minimum and then you know
1:33
planning for more it just keeps i hear again yeah absolutely
1:39
that's good i'm glad i can understand i'm planning for several things myself for the end of the
1:45
year um some stuff i haven't really solidified yet i've been talking to miss
1:51
joan dice on the back end who's helping us today with our um
1:56
our shares and also teresa and greta are in the house as well over on the silver
2:01
silk silkies um facebook group but joan is going to be posting links and
2:06
answering some questions and occasionally flashing some questions on screen if you guys have anything
2:12
um so big shout out to joan and let's give her some some little golf claps for helping out
2:18
with silverstone and teresa and greta too of course thank you ladies colleen is also in the house
2:24
um who usually helps out on my youtube and i love colleen so much she's quite the treasure
2:30
um and i just wanted to say hello to her as well so um what do we got today i gotta add
2:38
this to this stream here because we got uh you really i feel like you always outdo yourself
2:44
with the next project eventually i'll have to keep
2:50
yeah well yeah i mean i don't know you bring always something special and so delightful to the table
2:57
each and every single time and this week um or at least this class for silver silk and maura is no
3:04
exception um you're just you're so creative and i love to see what you do with
3:11
um you know coordinating silver silk tools whether it be the jewel loom or just um really just anything with silver
3:18
silk in it so do you wanna talk through uh well
3:24
i'll i'll shut up now so you can talk thank you so much um hey that's a huge compliment coming from
3:30
you because every time i see one of your designs i'm like oh wow how do you think of that how do you think of all those things that you come up with and every
3:37
time there's something i love the one you did last week was it last week that where you put the seed beads on the jump rings
3:43
yeah it was last week or yeah it was last week that season time and its concept is it doesn't matter for
3:50
me but yes yeah that was um that was a little like leather tie on at the end and just adding some jump rings with
3:56
seed beads which actually those seed beads belong from the jjb kit that was yours
4:02
oh they do oh wow that's so cool so i brought a little bit of your um
4:08
your mind and design sense into my design too so we feed off each other's creativity
4:15
yeah that that what's on the desk we'll get work with like i've noticed that if it's out and it's on my desk i might it's gonna get pulled in right
4:22
there and i'll have to go digging in a box for it so exactly that was also a very appealing
4:27
part of the whole process it was just right there and it coordinated so perfectly so
4:33
oh i'm glad oh awesome so yeah um i got to meet um juliana at
4:41
fest when i was there earlier in mid-august so was that like two weeks ago already
4:46
yeah i know right i don't know it was sometime around the 17th 18th or so we were there and uh
4:52
so i just got me thinking and she sent me these buttons these beautiful like little wooden oh wow
4:59
oh my goodness juliana is another creative force to be reckoned with she's just such a great
5:06
inventor of design concepts ideas tools and just such a
5:11
great human being and spirit and together her and i had um
5:17
and i would say mostly her birth this loom that was inspired from the silver silk
5:22
chains and we just um came up with this entire new series
5:28
of designs that we can do and then uh artists like yourself and designers um use it in such creative ways like the
5:36
class that we're about to get into like this um that it just it's so mesmerizing
5:42
i love it i think it's it's really cool that you can just throw the silver stuff on it capture chain it works pipe chain
5:48
all of it and just start stitching and right into the medium like that that's just the coolest thing ever
5:55
and that's literally all i did was i took some beautiful pearlesque capture chain
6:01
and i had a couple different colors going i think this one was like a like a gold inside mm-hmm
6:06
yeah that one looks like the fall chain and i think this one might have been that um that one is
6:12
it's what i named fall because it kind of reminds me of seasonally yeah the fall
6:18
kind of colors the golds and browns um and then you've woven these gorgeous
6:24
beads that coordinate with it so well i just went to town just kind of coordinating the colors that were in the
6:31
chain and in this pearlesque one has there's like little hints of green
6:36
uh-huh that's um the tinsel so it it's weird how that tensile is because with
6:41
any sort of aurora borealis finish there's always some hints of like greens and purples i
6:47
feel like that kind of creep in there but i think that's what gives it its polish and it's sort of shimmer
6:55
you make it look so good on camera i can never get it it's just like popping
7:00
out of there i grabbed blue and i grabbed some green when i switched to this one because i
7:05
thought that's just going to just be perfect and it came out so cool like you can see it
7:11
shining in the light here so i'm going to look those colors really brought it out
7:17
yeah and so yeah i thought i would just show you guys like and this is all kind of
7:22
stuff i feel like in some way it's been done before all of these steps um but putting it all together it's
7:29
really fun just to see and it's fast it's really fast to do and i've got this one ready to finish it's
7:34
ready for its button um but i've got another one here to show starting it
7:40
sweet all right let's just get into it and so all you'll really need is um
7:47
we'll figure out your closure option first if you want to do it exactly how we did this one you'll need a button
7:52
and then you'll need um one side of the finishing clasp so this
7:58
is one of the three prongs i found that one to be a really nice fit for how wide i made the uh the loomed section
8:04
but i think a two would also work you just pull it together more so you could even put like one on each
8:10
side if you only had a single you could just do each end with one
8:16
that would work but on this one like i was noticing it really worked with the three nicely
8:22
yeah there's almost like a little um three millimeter three and a half millimeter gap um
8:29
between the last two channels so it really does accommodate those seed beads pretty well
8:36
yeah that came out really well so i was really happy with that i made my loop too big on my first one this was my
8:41
prototype and so all i did was just stitch a little speed in there to make it smaller you could put some charms on that
8:47
but i'm like a good idea yeah so it you can turn it turn a mistake into something amazing and on
8:53
this one i think i've i've dialed it down to where like it's really going to fit the button true like
8:59
without me having to do that so we'll see when it comes off okay by the way i've got got options there
9:05
um and so that that's the let's see you'll need some pearlescent capture chain of
9:11
your choice um the loom you know you'll need a clasp and a little bit of leather to finish uh your
9:17
button if you wanted to do the button this way it's just one of many ways you can do it and then of course seed beads and thread
9:23
and needles so let's see um all of my seed beads are size eight
9:29
and i literally just grabbed all of my favorite colors off of the table earlier just i kind of went with some frosted
9:35
rainbowy but the ones here are there's like a picasso sea foam and a map root beer
9:41
with a light bronze and this one called limestone
9:48
i listed all these colors out um i actually have this one as a mix in my shop so i listed all those guys out if
9:53
you want to know what the db numbers are they're all miyuki ones you can uh snag those numbers if you like that mix
9:59
perfect and then this is the wildfire i'm just using regular .006
10:06
i love wildfire yeah me too it's i think i use it every single day like
10:11
there's not a day where i don't use it for something yeah they well especially the fact that
10:17
it also comes in a ton of different colors it just makes it so easy to bead weave with
10:22
it does yeah it really does and then you'll just need a beading needle i've got a size 10 beading meal here
10:28
but i think you could use you know like the jewelry needles those will work too i just like to work with them
10:35
when i was kind of poking it through the capture chain i kind of liked i like using the harder needle and the
10:42
shorter one okay good good tip i think that that's a
10:47
good sturdy way to just sew it right through it worked for me but i think they'll
10:52
they're all going to work you know and so let's see just set it up you
10:59
don't need a much capture chain just um enough to run back and forth and leaving some space for your button
11:07
and so what i did is i i kind of let it hang over about that much
11:12
which is probably three inches or two and a half inches or so and it's more than i needed but it's just to give me something to maneuver
11:18
when i'm attaching the clasp later you could maybe get away with making a little shorter if you want to save some
11:24
of your chain and you know just kind of making it
11:30
tight i love how it stays put once you've locked it in there like that it's really nice
11:36
yeah the wood makes it um it's like soft enough and not as a
11:42
abrasive of a material for a loom so that the chain can kind of stay
11:48
its shape if that kind of makes any sense um some other types of blooms that are a
11:55
harder metal or whatever might end up scarring some of the chain um knit
12:02
or you know marring it or bending it out of shape but i've noticed that this loom really does accommodate nicely
12:08
and you're able to just um pop it off the grooves pretty easily
12:13
and the grooves channels were designed to fit the chains specifically too which
12:18
is great she was and i say she but juliana worked with her designer to kind of
12:26
figure out what that length was going to be for each between each groove
12:32
but so it was just it was really genius the way that they made it happen
12:37
i think it's amazing i'm just i'm always amazed by the inventiveness
12:42
um jewelry designers aircraft you know our industry is
12:47
just full of inventors right engineers right really yeah for sure i'm glad to
12:53
do that so kind of kind of cool just to see what everyone comes up with too
12:58
and i get to enjoy using them yes yes that's it that's setting it up super
13:05
simple super easy and yeah that's a great tip a little extra oh i see he used them for earrings
13:13
yeah that was uh nugget from joan there
13:20
oh that's a great tip yeah that's because i do have a little i'll have probably maybe like that much left at the end
13:26
so see i always save all my little pieces and so what i did here is i just kind of
13:31
measured um i'll turn it this way but where i'm starting is going to be
13:37
like right about let's see right about here i'm thinking so giving me room for my button right
13:44
yeah i'm just going to grab some wildfire here it just needs to be vegan i wonder if um
13:51
juliana since she's in over on the youtubes can list what the size of that button is uh or give us a millimeter
14:00
um oh yeah i can give it to you in inches it looks like it's about one and a quarter inches
14:06
oh perfect yeah so that's how much you'd go down maybe just a tad more um on that
14:12
loop and that way you have enough to kind of slide it through yeah exactly that would be
14:18
even better like more mathematically sounded weird
14:24
for sure and knowing that i got it wrong the first time i tried it also noteworthy
14:32
that's okay we all eyeball as artists who um i think i've just gotten into the habit of asking for measurements because
14:38
everyone uh of my customers keep asking me for measurements
14:49
because then you're not sitting there at the end trying to wing it you're like okay you set yourself up for
14:55
an engineering task at the end well creative um
15:00
creative problem solving i'm gonna use one of the um i know you
15:06
like this colors oh my gosh i freaking love mustard it just goes with everything every season
15:12
i don't care what anybody says i just love it
15:17
so let's see this is about you said an inch and a half or yeah so i'm going to go with like
15:22
i had my tape measure i set it aside somewhere so i'll just
15:27
go with my old school way but i just went straight through the through the chain so here's let me show you a
15:33
little close up what i did is this how you also do it you just kind of try to go toward the center
15:39
yes yeah definitely i also um appreciate because i don't know if everyone does it
15:45
if they work um from closest to them and up if that makes any sense instead of working from
15:51
the top down from the top notice a lot of loomers they'll start up here and work right now themselves
15:58
i can't do that i have to go from the bottom up i'm here i work from i work from here up but that's just i've always done it that
16:04
way i don't know where it came from i must have been taught that way maybe or
16:10
that was how whoever i watched on youtube do it the first time had their cameras [Laughter]
16:17
well it's definitely um nice to see that i'm not the only one but also helpful i think um because it is easier
16:24
i think to work that way yeah me too yeah and of course now that
16:29
i have it formed doing it this way it's like i'm stuck that way
16:36
and so for um i start my looms kind of differently than um a lot of folks will do some kind of securing
16:42
to their side um warp but i i never do even on the other looming styles like when you're just
16:49
doing you know a regular wildfire warps i i never not i wait till the end and
16:54
then i just take this one and just weave it in same process if you add thread you just
16:59
come along and start a new path just like we're about to do here
17:04
and at the end you just have all these little ends to weave in and it's kind of it's a habit from a different uh kind of
17:10
looming where you can pull your works in it just kind of comes from that
17:16
but it also oh go ahead no no that's so i'm just saying it's also kind of quick you know to get
17:22
started but it is loose that first time you're doing a stitch you've got loose thread hanging up
17:27
um something that i don't i have these like miniature bead stoppers that i like to use for almost
17:34
everything and that's been a little helpful to kind of keep it in place for the first few stitches and then you can
17:39
always just remove it there too but i like what you're doing which is just adding a loose um
17:45
woven bead yeah that's that's great i like the little those little mini um
17:50
uh so that means you kind of start these the same way then if you're using the the stoppers i think you can have some
17:55
of those somewhere i should try that i noticed joan was using them um i watched jones tutorial the other day
18:03
and she was just really um beefing up on the tutorials lately i'm
18:08
uh i'm very impressed with her style of working and just her way of instructions
18:15
yeah she was using it to secure the beading wire um on if i remember correctly
18:20
and it worked like a charm it was like on the other side of the loom had that little bead stop secure
18:27
it's really cool um so what i did here is i just threw four beads on these are again these are
18:32
size eight but you could use any size beads you want i feel like you could use sixes you could use 11's whatever you got
18:39
but i just go ahead and try to eyeball a what's mostly like a straight line from there
18:46
and then just go through the capture chain on that side
18:54
and i think um hopefully it's been a bit easy to see where you are between
19:01
the ball chain between the beads of the ball chain and maybe stitching through that um
19:08
kind of more purposefully yeah that is a it's a good point i have
19:14
i can see them sometimes i have to try a couple times before i get i get it to where i'm happy with once
19:20
i've got one um one started then it's easier to get the next one
19:26
the first one i always struggle with that but so i'm going to try looking for the ball chain like you said
19:31
let's see [Music] on this one here
19:39
so yeah i want to go just roughly right through there and i do i do try to circle around the actual ball chain itself when i come
19:46
back through oh going through the
19:53
really pretty brilliant
20:02
and just being careful not to miss it but i'm trying to capture the
20:07
actual center of the um the ball chain that's inside ah
20:13
coming all the way back through yeah i like how you um you just basically use it as a cording that you can sew through uh in and out
20:20
fairly easy it looks like yeah is that how is that how you do you
20:26
do the stitching i couldn't remember from you've done a couple where you've sewn with the chain but i wasn't sure if you
20:31
actually stitched through it or went around it i've done both actually um yeah
20:36
and i think i approached it the same way that you're you're doing it now um with your sewing
20:45
just kind of going through the chain and then for how much tension to use i'm
20:51
trying not to use too much because i don't really want to indent it over there
20:58
but i want the thread to be tight enough that you don't really see the thread if that makes any sense yeah for sure
21:05
let's grab another color here and in fact um i know you're using a black it looks like a black thread but
21:12
wildfire comes in a uh i believe a tan color or even a brown
21:17
one yeah like i feel like the green or beige would be even better it'd be harder to
21:23
see for for this demo but i do have um i feel like i have some floating around here
21:29
but i could even show it next to it oh that'd be cool i had it and now it's
21:34
walked away it was here um
21:41
i might have actually put some right here here we go okay
21:46
so this is green sorry this one oh yeah okay yeah green color you can
21:52
see that would be hold it up a little bit that would disappear in the tinsel wouldn't it because utensil has a little
21:59
bit of green in it i feel like it would yeah so you really can't go wrong green the beige should be gorgeous
22:07
perfect but yeah so all i'm really doing here is
22:12
just going through it and i'm trying to well my goal being to hide the thread as
22:19
much as i can um not to put any um super pressure on the sides
22:27
and then also keeping my lines as you know and so they don't buckle i'm trying to
22:32
make sure that each one has space to move you can see it on a little bit on my first sample they do buckle a little
22:38
bit like that so i found that on my second attempt
22:43
making it have a little bit more space than i feel like it needs gave me a long
22:48
look and so like it feels like there's too much space there just looking at it right now
22:56
but that's what i did here and it looks a lot cleaner this one's still beautiful but
23:01
definitely there's room for where i could have improved a little bit with getting it to kind of be flatter
23:08
i still love that though i i think the buckling like it's so minimal already
23:14
yeah you might have just some superior uh eye for details i think
23:21
perfectionism yeah exactly but let me check it out like when you wear it you don't see that yes all
23:28
people see is hey that's like the coolest bracelet when you never see anything like this in a store it's just like 100 unique and
23:36
awesome and you made it um but yeah that's a really good tip on
23:42
the spacing i i have um experienced that whenever i'm working on
23:48
the loom too it's just to add a little bit more than what you think it would be and then
23:53
it whenever all is said and done it does light a lot flatter yeah for sure
24:00
and it's something that i didn't used to have to think about until i started using the capture chain because you know how on
24:06
on just a thread like thread against thread you can slide it around
24:11
but this one's kind of locked in place which is a win because now whatever i do here it's it's not going to change on me
24:17
which is great yeah and it's not going to stretch like sometimes the thread does
24:24
uh so we've got a question what do the numbers mean on seed bead size oh um they are well they're kind of like
24:32
in the same way wire gauges they get smaller as the number gets higher
24:38
so like an 11-0 um is smaller than an 8-0 for example
24:43
and uh as far as like a millimeters i know a six millimeter bead is roughly equivalent to like
24:49
uh sorry a 6-0 seed bead is roughly equivalent to about a four millimeter bead
24:55
okay gotcha so yeah these would be pretty tiny
25:00
yeah so i'm thinking are closer to like a two millimeter
25:06
yeah that's what i would probably need or something like that i guess um and they're they're a little bit
25:12
squished too so that's it's more like a one and a half by two millimeter ish
25:18
sort of a size give or take um but you know i have found that the size eight seed beads are the most
25:24
comfortable um to stitch with i used to be able to do 15 size 15 seed beads 15's
25:31
yeah i mean are just like what like sand grain by that point right yeah
25:37
those are so tiny i can't definitely have the roll in a design like if you're doing something beating
25:43
yeah designs they're definitely they're indispensable but oh my gosh
25:48
i mean yeah that's uh i think that's actually historically how i've used it too is just for like the end of um
25:55
fringe or pico or something yeah i think the these days i appreciate when
26:02
i don't have to really use them but it's the eight the size eight and the
26:08
size six seed beads offer quick gratification it's a gratification for
26:15
putting together a design fairly quickly i feel like that's you the size 8s are
26:21
they still are small enough to look very intricate and beautiful but they're not going to take you as much time as 11's
26:28
yeah less exactly you know over achievement mode when i start
26:33
working with them but i make the exception for delicas because oh i love delicates
26:39
it's been a while since i've worked with telicas but i feel like that day
26:45
if i find the right project i think is really what it comes down to i had some ideas
26:50
for making beaded beads for the capsule or burlesque chain i just haven't done it
26:56
yet maybe one day oh i'd love to hear those ideas
27:01
yeah some beaded beads um which i feel like would be right up your alley
27:06
yeah count me in for that class you start getting faster i noticed that
27:12
after you get going what's the thing about looming is it's like this
27:18
um i think it was actually juliana that was saying it's meditative it's it's just really fun
27:26
well and you're once you're past the part of setting up and you're just kind of like rolling the
27:32
only thing you really got to pay attention to is a pattern here um i feel like but everything else is
27:38
basically a repetition so for this pattern how does it work
27:44
oh well i'm actually freestyling it but i could um if anyone would like me to send like a pdf over i meant to do it
27:51
actually and it slipped my mind but to do a pdf of the ones that i've
27:56
got here they're super easy basically all i do is i add a new bead
28:01
so like i'll start with a solid of four and then i'll add one new bead at the
28:07
bottom so string of three and one and then two and two and then just one and three and then a solid row of that new
28:12
color and now from here i'm switching the order so it's gonna look like a little triangle but i'm just so clever
28:19
super randomly you can also just make it like stripes if you repeat by adding new colors
28:25
or you can make that triangle shape by either by accident i could listen up in this line or i love that i like the
28:32
variation of different shapes and stuff um you could even do solids and like a block of color and then start
28:38
with the triangle against it there's so many possibilities with this pattern exactly and i kind of like i've been
28:45
challenging myself to introduce more randomness and that's kind of something i was doing here
28:50
it's not totally random because you can see i couldn't help myself i still did a pack
28:56
but it was mostly random yeah i love that thanks
29:03
yeah so this is it this is um uh straight on until morning you just keep doing that until you have the link
29:09
that you want um and then kind of trying to compute in my head a little bit like how much uh
29:14
overlap are you going to need for the button to close about that but
29:20
what i usually do is i will just add an inch for a button closure
29:26
and so knowing that i like to wear my bracelets a little bit tighter
29:32
yeah then making it kind of like maybe give yourself and
29:37
end it maybe three quarters of an inch before you would otherwise um have stopped a
29:43
bracelet knowing that it's going to come around and it's going to loop through and then you're going to have once
29:49
something's on it's going to do this thing where it pulls so you're going to have that space right there
29:55
gotcha okay that makes sense so what i did on this one over here is i
30:01
just gave it about six and a quarter inches or so six
30:07
and three quarters or six and a half i don't remember exactly the measurement but i kind of
30:12
just compared another one to it i held the other one up to it and saw but it's going to be different
30:17
depending on what length you're going for but once you've got it here
30:23
um i i added what i think is going to be my last row
30:30
and so all that's left to do is weave in our beginning and our end
30:35
and then um finishing the end and that's pretty much it oh awesome um well let's see what's up
30:43
um yeah let's do it i'm curious to see how the how you end it i took it off the loom but you could
30:49
also weave it in while it's on the limb too i just did this so i could get into the sides of the beads a little bit
30:55
and i did some of the um the same kind of weaving in that i would
31:00
do on like a regular loom piece with the exception of i don't have warps running in here so what i did is i kind of went down to
31:07
this next one down here i'm just jumping down from from there to
31:13
there and then i'm just picking up the top work
31:18
it's really hard to see but inside there you remember how we have we had a a strand running through the beads and
31:24
then they come back and go through it again so there's two strands running through each of these right
31:29
yeah yeah needle under the top one oh okay so you kind of pick them apart
31:34
with your needle and then just run it through those two yeah and you'll know you've caught it
31:40
because you'll see the little thread it's really hard to see but you'll see the little threads sitting on top of
31:46
your needle there as you walk see that little and i'll do that maybe through two or three of them there's the
31:53
next one down and then here's the next one down
32:00
i can get that one and even with the black thread it's
32:05
pretty well hidden yeah you really can't see it much but this really gives you a solid woven in
32:12
i'll do this um two times i'll go through three maybe three rows right
32:18
and then pull that down and try not to catch my other strands
32:24
and so from here i'll jump over through all my beads and over here i'm just going to try to
32:30
exit on top of my capture chain i can if i end up going through it go ahead
32:37
and just go through it
32:42
and turn and come down to the next row i see okay so yeah you go halfway in
32:50
through the captur chain and you end up on the other side and then you just um go through the two
32:56
threads that run between the top sides of the beads i guess
33:01
yeah exactly and it's like like what i was doing here i couldn't quite exit from this row
33:07
without getting through the capture chain so i didn't even really try i just did a turn and now i'm i'm working
33:13
i'm in a position where i would go right through this row below it but instead of doing that i'm going to
33:19
just do that same thing again i'm going to try to pick up my weft thread that's hiding
33:25
in between the beads there and it's it's a little tricky to do and
33:31
there's other ways you could even that's just kind of my go-to way
33:38
there we got the first one and i got
33:45
got the second there we go
33:53
a little tighter weave on this side but looks like i got through it and i'm going to go through one more row beads and then just trim it
34:00
better safe than sorry [Laughter] yeah so that's like you could do that
34:05
one more time if you wanted to be extra extra sure that it made it but
34:13
and there's that side then excellent i like ads and all i would do over here is the same
34:19
thing just weaving that in and so this is the part that actually
34:25
is hard for me putting these on i've watched a bunch of your videos though in prep for this moment
34:33
and of course uh now you have an audience
34:39
the tool magic really helped me and then i i think i got this tip from your video to
34:44
um open it up first before you try to before you try to put it on is that
34:50
right yes um i just do a little bit to help um help the chains fit in a little bit more
34:57
easily into those channels yeah so just a little bit got it yeah
35:03
that's perfect and so once again i'm just going to take a look at it and i'm measuring at the
35:09
really really question right here but so i wanted to be like right there
35:18
confidently trim
35:28
and just kind of fold these in a little bit
35:40
there we go brilliant look at that
35:47
it's like you've been doing it forever [Laughter] i'm like cheering in my head right now
35:53
like yeah [Music] yes it looks really good
35:58
these findings are really cool you invented these right i did not um i've been working with a
36:05
um a manufacturer one of my close vendors that i work with a lot and
36:12
we've sort of helped improve them and also expand the color line but i can't really take credit for inventing
36:18
unfortunately i just continue with the the good good stuff
36:24
really just uh keeping it out there and um you know letting people
36:30
have access to them and they're perfect they're they use them for their jewelry yeah thank you i'm
36:35
glad to hear that this way it's just amazing
36:40
i will say the antique copper and the antique um brass color within the same line didn't
36:47
exist before so that was that's kind of a fun addition and um those colors definitely get used quite a
36:54
bit with design so i'm glad that that was a pretty successful add-on
37:00
i love them the um brushed copper is my favorite yeah i really love the brushed copper
37:07
and it just is it's perfect for the more earthy
37:12
tone designs that i sort of gravitate toward
37:22
and so i've got some leather here i think this is about 1.5 millimeter i had to guess
37:28
looks like i didn't label my spool [Laughter]
37:35
yeah it looks like a it looks like a pretty um small on the smaller gauge i guess that
37:40
one to two well it's probably not one millimeter because that's one i've seen the one millimeter so it has to be 1.5
37:47
yeah i'm thinking it is because there is um yeah downstairs i just got a bunch of the one the smaller diameter ones i
37:54
think it was one so this has got to be 1.5 it's a little bit on the smaller side
38:00
but i could probably get away with even two millimeter leather with this button
38:09
one thought i was having was um you could also it's a little tricky to get your capture chain through it but if you
38:15
wanted to you could put the button on that side and then just do button loops i feel like that
38:21
you know i think juliana did that with one of her pieces if i remember correctly it ended up really well
38:27
oh so cool and she was able to make it work and go through pretty easily
38:34
on all i really did was just overhand knots um you could do a really pretty barrel knot too they both work
38:40
i feel like there's a lot of different ways you could do this this was just what i i was just playing and
38:46
trying to give it some air if that makes sense when it clasps and um yeah i just
38:51
brought it through it'd be fun to put some beads on the end
38:57
i think so too i mean more is more exactly
39:02
but i would love to see other ideas for how how do you guys finish your buttons with leather
39:08
so i'm not a leather worker by you know by any by any means i just kind of play
39:15
i might have to grab some size six seed beads and put those on the ends before i trim it but yeah
39:20
that's pretty much it so stinking cute i love that i love these buns
39:27
i also like it kind of has a nice like nostalgic vintage feel to it too and i think the button definitely adds that
39:34
extra i don't know like to the color palette
39:40
kind of reminds me of a little mandela or something i love this one and the sunshine one
39:45
look at that it just gives me so much light [Laughter]
39:53
so i definitely gotta finish uh i gotta finish this other one i've got a few other buttons and one when i finish it i'll post i think i'm gonna do all
40:00
orange and yellow uh mustard for that i think that would be so so great it's
40:05
definitely i wish like i could have gotten out my jewel loom and did that tonight too but
40:10
um didn't get quite to my my supplies quite in time uh to be able to make that work but i feel inspired now just from
40:18
looking at what you've done and um you know what's funny is that you were
40:24
able to make two bracelets which you can do with the set of materials if you just purchase a
40:30
or have a spool of the three foot capture or per less chain and then you
40:36
get a set of class or a triple strand end caps because there's two per package you could easily get two bracelets out
40:42
of that yep yeah exactly no it's perfect and i have so much left
40:48
over too there's the um rest of my chain is here and i have just one of these packs right
40:54
okay so this is at least another bracelet maybe more
41:02
yeah yeah looks like you've got the six footer um i think packaging which is a lot of that's a lot
41:08
of silver silk um to be making lots of these
41:13
yeah yeah make a whole series about my fear of running out like no way
41:26
and the tip from joan absolutely i'm going to save these ends because look this is an earring right here
41:32
it really is like you fold it in half and you could put a little double strand end cap on and you got yourself a little
41:38
airing on the fly yeah even that even even if i just put that on the end cap and put a charm or a
41:44
gemstone bead super simple yeah do not throw away the
41:49
scraps because i i have kept a lot of my scraps um just with and then
41:54
i used them in my tutorials and stuff too just because i'm like well it's too good to throw away so but might as well
42:00
just get creative with it so let's get some extra mileage of the silver stuff
42:06
yeah it's so beautiful thank you well i
42:12
love this project so much danielle this was such an incredible um
42:18
exercise for this design let me flash the graphic one more time
42:25
i saw another idea pop up there from is that from that's from joan right she's saying you can put one of those we did
42:31
that beaded end cap that was one of the projects we did i think maybe the last slide
42:37
yeah that would be cute that's a good idea yeah
42:44
oh yeah i'm remembering now that's such a great idea that would have been a cute little like um
42:50
beaded bead at the end or a beaded end cap i need to bring that back with this color though like with the mustard
42:57
you know i would be all over that just the color mustard it just goes with
43:04
everything i don't care what anybody says it goes with everything that turquoise is how i feel about it
43:09
yeah and turquoise see if this had trick wasn't it yeah and like sold
43:15
make me two [Laughter] i might need that turquoise pearlescent chain
43:21
done and done you know actually i haven't made one but i was kind of
43:27
toying with the idea the thing with the tinsel because i've
43:32
had to sort of um really evaluate and audit my chain lines is that some it
43:39
reacts better on some chains than it does other ones so for example
43:44
i tried one time to make um the seafoam capture chain which is just a silver ball chain with the seafoam color wire
43:51
on it um into a pearlescent chain and the silver from the ball chain
43:58
drowns out the tinsel completely so it looks like just seafoam captor chain
44:04
and i was just like kind of a sad production because it's not very it's not as sparkly as i was
44:09
hoping um but i'm wondering what the gunmetal ball chain would do like if it would
44:15
enhance it enough it's just it's a lot of weird chemistry
44:21
stuff that happens on the back i can bore you with it all day oh yeah i know i would go crazy
44:28
but i was thinking like the one of the what you said it drowned out the the chain but the tinsel would still
44:33
hide thread so yeah that's true yeah yeah more so than
44:38
the the capture chain would um because yeah there's nothing inside that so you could really see everything unless you
44:45
used a coordinating thread but even even then you'd still be able to see some thread path i think um
44:52
so the pearlescent chain is a great one to stitch on because there's a lot of meat inside of the actual sleeve
44:58
of the knitted wires yeah looks so nicely it does look really like it makes it um like less bendy right
45:06
yeah there's no um like what did you say earlier it was like the kinks that
45:11
thread kind of makes if you pull too tight an indent um that seems to be a little bit more
45:16
resistant to the indents and stuff it's like so perfect
45:21
i love it so yeah [Laughter]
45:30
i'm saying i'm ready for it cool
45:36
well um i am so delighted that everyone out there can join in on our little class and some
45:43
fun time i learned a few tips and tricks from danielle and i know you guys have and um it's always just such a delight
45:50
daniel to be around and just such a calming like lovely spirit lovely human being
45:59
[Laughter]
46:04
these are really fun for me so i'm happy to be here awesome well i was gonna if joan wasn't
46:10
gonna run away quickly could i bring you on let's bring john john are you there
46:15
i'm gonna do it
46:23
you're like nope i gotta go oh yeah there we go like can we just
46:32
[Laughter] so cool oh the camera broke no
46:39
i just love watching you danielle you gave me a lot of great ideas with that because i hadn't you
46:44
know i i have been wrapping my um wildfire around the capture chain but
46:50
because of the big beads i didn't even think about it be a lot easier with the seed beads because the big beads kind of
46:55
get wonky you know but the little beads stay in line so that's so cool thank you i'm gonna
47:02
now i'm gonna have to fit in time to make one i'm gonna write so many projects there's some
47:08
you don't want to see around my laptop right now all the stuff around oh we're all there we've all got
47:16
yeah i mean i had to really do some work to like i left something out that i was supposed
47:21
to put away but um i i kind of just shoved it all behind the camera for now all of my
47:27
my unfinished things so i get it
47:32
well um thank you ladies for joining me this evening and i want to thank everyone out there i had such a great
47:39
time learning from the miss fabulous danielle wicks and hanging out with her
47:44
as well and we'll definitely bring her back if she wants to come back [Laughter]
47:50
if you say yes it's a commitment i think yes
47:55
we'll make it happen all righty well i will leave you guys to
48:01
create for the evening and i will catch you at the next uh tutorial and or roundup that will happen i believe next
48:08
tuesday so um i guess we'll just hug it out out there in the digital world