Your Cart is Empty

let's make a happy bracelet who couldn't use a little happy right
now okay let's do it all right so you are going to need your original jewel
loom you're going to need some hemp cord i love this one it's so gorgeous i've
already cut two yards you don't have to pre-cut you can work from the spool for sure i have six strands let's bring Oo
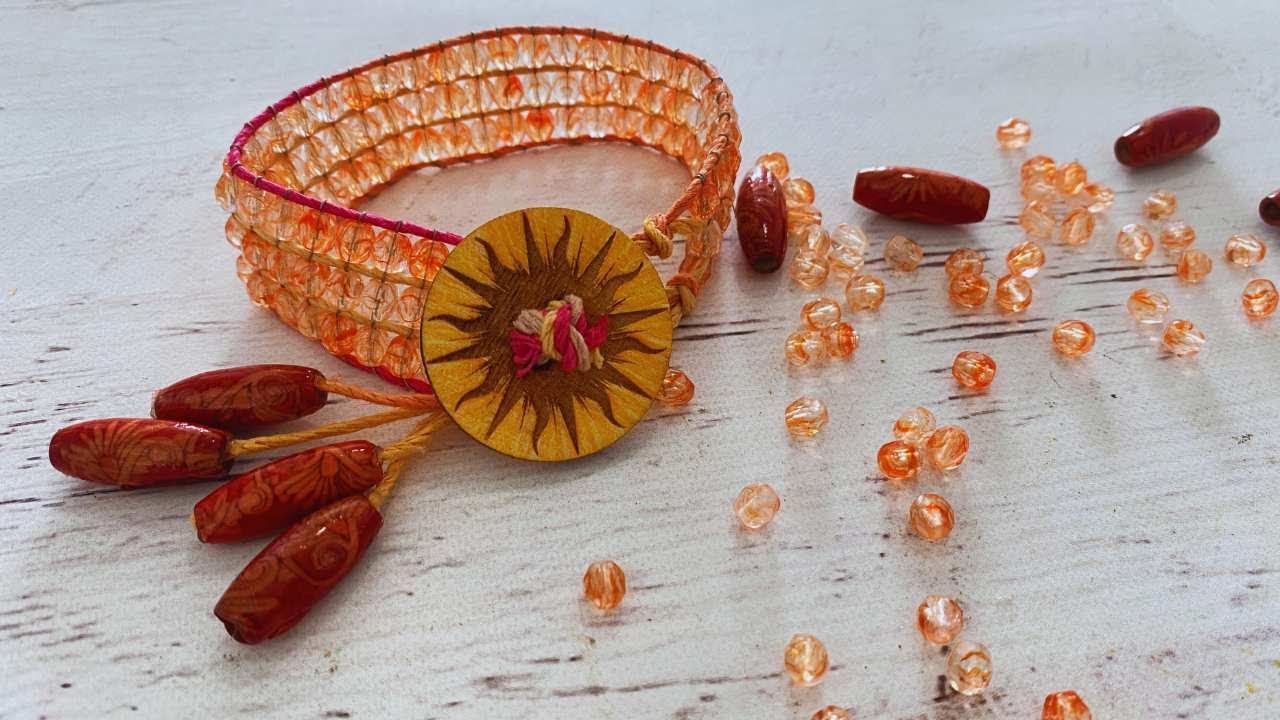
let's bring these up to the camera these are little 5mm gorgeousness happiness sunshine fire
polish beads and I have what else do I have i
have hemp cord oh of course we're going to need a needle and I am using wildfire
i'm using the green i think you just need to pick a color that you feel comfortable with that will match whatever cord you're working with if you
are working with this color combination the variegated hem cord I think the sage
or the green looks great i think you could do the pink i think you could even do the red i think you could do beige
wildfire honestly I don't know if I would do black but I think you could do all of those other colors all right
let's get to it so I'm going to put my needle over here to the side
flat nose just because I like to have them on hand in case I need what I would
refer to as a a third hand some scissors and I did break out my color pencils
because we are going to be um we are we are not playing the
drums we are going to be coloring in our sun our sun button okay so yeah if
you're looking for some fun that's what we're going to do we're going to have some fun with this so I have my metal
rod that comes with the jewel loom and I'm just going to put it in that bottom hole and then I'm going to bring it up
to the top one here and just snap that in so don't ever force it i also like to
like give the metal rod a little wiggle wiggle because I want to make sure that it's nice and secure in the jewel loom
and I want to remind you that this is a flexible plastic not a bendable one okay
super important so the next thing I'm going to do is I'm going to turn the loom over and I've got the back button
it's actually facing my body so this bottom button is facing my tummy this is
my left hand and this is my right hand so I'm going to grab the um hemp cord by Hempique my most favorite ever
and I'm just going to find I'm going to find the end here
again you can work off of the spool but I'm working from a kit and so this was pre-cut um and a jewel loom kit so I
like to just make a little loop to give myself make it a little easier to put
that around the back button give it a nice tight tug we're going to do another
one so I'm just knotting tying it off back
here okay and then I'm going to Yes did you I don't know if you just saw that i
don't know if you just saw that but there was a little give and that that little bit of give can be the difference
between a first really tight warp and one that drives you crazy so always pull
tight and pull towards your body so I've got the cord in my right hand my left
hand is holding the jewel loom and I'm just going to lay the cord down and then
I flip it okay and I'm just letting it rest into one of the
grooves then I'm going to pull that down and I just eyeball it because I'm
not using the entire width of the grid so I don't need to stress out about like oh is it in the eighth one up here and
the eighth one down here i just eyeball it and keep the
tension right because I want that first warp to be really nice and taut i turn
it around wrap it around that back button and these are super tiny little
guys they're like what I said they're like 5 mm so I think I'm only going to skip probably two one two i think that's
enough so they're not they're not going to need too too much room wait a minute
one maybe I'm going to One two three yeah let's see for giggles I'm
going to bring one of these guys into the picture oh yeah you're a little bit chunkier than I thought let's skip three
let's do that so one two three and then I'm going to
wrap it around this back button and [Music] again skipping
three okay that's a lot more than three that's okay though we'll fix
it one two three so I got to just scooch it over a little and we're going to bring that
down and again one two three flip it wrap it around the back bring it back
up and I hear snorty snorts that's Marlon Brando okay one two
three one two three one two three okay good news so you want to do one more
warp than you are going to do beads so I'm going to do three beads across for this project so I need one two three
four warps okay so then once again flipping it over and then the
thing I love about the hemp cord is it's so thick it like locks itself you know
in there and so it's not as hard to like get a knot sometimes when we're trying to knot our
wildfire it's um a little challenging just because you know it's thin
right so okay let's scooch that over oh my gosh you guys the fog the fog
horns are going off and I am a sucker for the fog horns and I don't really
know why they're going off um it could just be that one of the
ships is coming into port and so maybe they're like talking to each other but
it's so dreamy i don't know about you but let me know i don't know if you
can Can you hear can Oh they're really sounding
[Music] it wow i don't know that I've ever heard
and you know what i'm going to say that's not a fog horn that is like a ship horn that's crazy cuz I mean the
port is like a couple of miles away maybe they're celebrating something
am I missing out on a party okay let's get back to business
here all right so what I'm going to do next is I like to take my pointer this is my left hand this is my
pointer that would be my finger i like to put my pointer
on on the grid and there it goes again that's so weird okay and then what I'm going to do very carefully is I'm going
to remove the rod i'm actually putting pressure on my belly which is not in the
camera and I'm just going to pop that out okay so don't once again don't ever
force it in and don't ever force it to come out one of the things you could do is you could always rotate your loom if
you're having a hard time getting the rod in and or out it's really kind of bizarre how how that actually works but
it does okay so let's talk about the
warp that's nice okay that's really nice and you know what i want to give you a tip hold on hold that thought i'm gonna
walk over here really quick and I want to show
you okay you see you see i'm going to refer to this like this is like the
belly right like the the loom is warped right now and we've got the like the belly and it says jewel loom and it's
got my name and it's got my patent and all that good groovy stuff right so the
distance between that area all right and the warps should never be more than
let's get our sewing tape measure in here
okay so it should never be more than 2 in so if it's more than 2 in you are
putting a ton load of stress on your jewel loom to to be more like you know
just you're just you're you're put you're bending it too much and again it's a flexible plastic not a bendable
one so again the belly of the jewel loom and the top warps here should never the
distance should never be more than 2 in let's do that again
okay awesome sauce all right so we're going to put that to the side and
believe it or not I've been standing this whole time because I really wanted to make sure we got everything in here i'm going to move some things
over and I'm going to sprinkle some
sunshine from my little heart of course I saw this heart and I had to buy it cuz
it's blue and it's a heart okay so let's get to business
um like I said I've already put the uh green wildfire on my
needle and what I'm going to do everybody kind of starts their process a
little bit different and that's cool you It's It's what I love about weaving it's what I love about the Jewel Loom i feel
like you can work with the Jewel Loom in this what I would call you know this
straight up and down uh position uh other people like to go side to side i
taught a class one time at jewelry television and was walking around and people had their loom like this in front
of them and I was like "That's so cool." And they got to the same place and so all was well in the world so you can do
it uh however you feel most comfortable the Juloom police are not
going to come get you all right so one of the other things that's really important when you are starting your
project so I'm just attaching the wildfire and I just did with like one little one little knot on the far left
warp you want to make sure that um you position yourself so that you have
plenty of warp threads up here at the top and plenty of them down here at the
bottom in order to you know make your loop for your bracelet closure and to
also add your wood button what I have found for my six inch wrist is that I
start to bead like right right under that hole where we had the um where we
had the metal rod okay so what I'm going to do is transfer the needle and the thread over to the
left side of my body over to the left side of my hand or the left side of my
hand the left hand that was one too many words
okay so now what we're going to do is we're going to take the needle and thread that are in my left hand this is
my right and we're going to come under the warps okay so the needle is coming
under the warps and again we're going to be doing um three beads across and so one and I'm
a scooper two three and what that means is like see how I scoop and some people
like go in for the kill like they got their needle and they're doing I don't know what is that the pancake toss not
sure but however you feel comfortable is how you should do it there's not a right
or wrong way it's just I don't know i've been a scooper and um that's all I
know all right so let's We just picked up those beads and we let them fall all
the way to the end and now we're taking and we're popping them up in between the
warps this is so going to be a pretty bracelet and we're going to take the
needle and the thread and we want to make sure that we don't catch the hemp
cord okay because you want the needle to glide over the warps but you don't want it to pierce the
cord and then I just hold also please pay attention as to my little hand dance
that I do with the loom you know you'll see me transferring where I all of a
sudden I'm holding the belly of the jewel loom down and then I'm pulling with my left hand
uh with the wildfire to get like a nice little snug tug there now on the first
row and the last row I like to go back in and this is the only time where I'm
like going under the warp and back through the beads and just
for I just feel like it's like for giggles right it it helps to
keep helps to keep the um that first row like
snug okay so you could see how the needle's coming out underneath right and
then and then I get back into position and it's the only time that I I do that
twice and it's really just to secure the first row so that it doesn't move see
how it really kind of keeps it nice and um secure i've got to get these tools out of my way we're getting caught over
here and then I'm going to go back through and again I'm just taking the needle i'm going
back through and then see how I take my right
hand now I'm working with a one millimeter hemp cord it's pretty darn thick um I love 1 mm hemp cord like love
it all day long i'm not opposed to.5 which is thinner i just really like the
one it's more sturdy so needle and thread are back in the left i'm gonna
come under the warps and pick up three more
beads so scooping them up this happens to be um just a strand
um I think I've got six strands down here on the table and so you know I'm not making a
pattern i'm just making a pretty vibrant um bracelet
and again see how I'm taking that right hand and I just transfer it and I'm holding the belly so I just do this
dance it's how I do it the the loom is plastic okay it's plastic it's super
lightweight it's portable it's going to move i actually had someone kind of give
me some grief about it moves i'm like well Sunshine it only weighs like I
don't know what 5 ounces or something come on now it's going to move it wiggles like it's mama so you could you
could work on top of um oh gosh what is that stuff called contact like the stuff
you line your shelves with in your kitchen does anybody even do that anymore i don't know but um or like you
could put blue tape painters tape on its bottom and you know smush it down you
could you know basically like a non-skid surface or a non-skid product if you
really felt like you needed it to be um in position the other thing is you know the jewel loom stand is great it turns
it into an upright loom and so you could always use that so there are there are
ways but just remember it's a lightweight she's a lightweight okay
it's not like one of the woodlings so I just you know the process is the
same right we're going under the warps we pick up the beads um if they won't go
in like you know like straight across don't don't fight with it just get them
up and in there all right and let your needle go through and then we'll adjust
and I like to like take it a little slow and then I'll tug because there's nothing worse than having a little bit
of a ribbon of wildfire sticking out at the end and there's like no way to resolve
it and it's a bummer so you just want to really pay attention to
that so yeah I'm just going to keep scooping these up um you know once you
get your rhythm down and you've done a few of these you should be able to knock them out within an
hour which is great because they make you know such a beautiful um gift for
yourself gift for um somebody else your bestie gift for a teacher
um we actually have I have a starter kit that includes these materials the beads
um the hemp cord and the loom and you know depending on when you're watching
this it the color could change but the concept and the quantity is typically um
similar and so you know we go through a lot of them and so basically I'll get
like a screaming deal on some beads and then I'm like "Okay I have to share these with my community." Um and it
allows me to you know put together a starter kit that's like really at a great price so that you can make your
first bracelet oh look how
pretty so pretty okay
so you know and then at some point too right it's like mesmerizing and this is
just where you zone out and chill and then I have to remember that I'm I'm taping and say something every once in a
while but it's so calming so you get to see like how I'm
I'm going to bring this up to the camera see how the needle is on top of the warps that's really important
um if the needle's not on top of the warps and I were to pull my my beading thread um when I got to the end here
they would drop they would drop off so no bueno
so whatever was going on it stopped so I'm I'm just wondering cuz I I think now
that was a ship so um we get the we get
the uh Dell the Dell ship with the Chaita Chaita
bananas they come into port i just want to make sure that I'm
actually Yeah I wanted to make sure I wasn't like uneven but it's looking good
okay so yeah so we we have a port we get like a ton of the cars like all the new
cars come into port here and um it's a pretty busy port and
today sounds like sounds like something was going
on yeah this is good and you know if you're making um if you're making
projects for a boutique maybe you do craft fairs you know this is a good little project
um you know with with a good price point i mean you know I'm always one to I want
you to look at your time you know think about hourly rate
and cost of goods you know you want to make something if
you are selling jewelry and you need to know your you need to know your customer right like
who's actually attending what's their um you know what are they willing to
spend and it's okay not you know one of the biggest lessons is to learn that not
everyone is your customer right so like for instance like say you
switched up these fire polish and they were as actually like Swarovski like you would never sell this bracelet you know
for Gez i mean I think S Swarovski beads are kind of hard to find these days i'm
going to scooch this in a little um so yeah so you want you know your the
cost of product and and how long did it take you i like to work backwards too in
business like take like a big number and then divide it by all kinds of
different you know divide it by an hour divide it by a day divide it by 365 days
divided by 12 months it kind it really helps like if you work backwards like you know and
then it can help you like oh that that's my daily rate okay okay well if that's my daily rate how many how many hours in
the day like if you work like say just let's say for giggles like oh I want to
make 300 bucks a day and 300 oh gosh I can't get to my calculator what's easier
um let's do 500 500 500 a day divided by eight right
what is that is that 40 i think that would be 40 bucks right
or am I not good i'm not I I'm not good at math without my calculator um but you
get the gist so like you would take your daily rate and then you would divide it by the hours that you worked in that day
and then um you could have a better idea of the value of your time and I think
it's something that especially us us ladies we forget that our time is
valuable you know and and that goes for everything that goes for our our home at
home managers i always used to you know cuz I I ran my home i ran my
child's life like a lot of us you know when they're in school run the house
running the business so and I'm just mentioning that mentioning all that because like if like
I said if you do if you are somebody that does craft fairs but if you're you know hanging out and doing this with
your bestie or on your own um just for your own enjoyment you don't need to know
math i mean it's good to know math but you know what I'm saying all right so
yep so even at an angle see how that one wanted to go in at an angle see all that empty space so I never force it to go
all the way across um I'll fix it in the end here and I did not mention how many
yards of wildfire I started with but I usually do um two really generous yards
to start with
oh this makes me want to like buy a coral something like a coral top
or I don't know something pretty and these would be gorgeous
earrings too holy guacamole
at first glance when I when I got the screaming deal on these beads I was like "Yeah see send them." And then I I saw
them and I was like "Oh okay they're pretty." But now that I'm beating with
them I'm super stoked about them i mean come on now look at how pretty that
is what does that remind you of i'm trying to think
[Music] now that I've said the word coral of course you know I'm fantasizing about
snorkeling in Mexico in a coral reef
cuz that's not happening do you like to be in the water
like I when I Okay I like to be where like in the Caribbean when I can see the
water because I want to like see what's in the water [Music] um I I love being on the water i love
being on a boat i don't necessarily like to be in a
situation where I'm in the water and I don't know what else is in the water but I will say when I went to Mexico I did
go snorkeling and um and that was super
cool super super cool but you could see i need to see i don't want any
surprises some people those people that like swim in the water and they can't see and I'm like "No
no we are not doing that." But you knock your socks off
just want to make sure yeah looks like we're still in the camera so yeah I've got um I've
definitely got some more to do here so I'm I'm going to make a
full I'm probably going to do a full
six full six inches i think I might have to go get another one of my bracelets
and cuz it might only be like five something that I want to do so so rule
of thumb is typically your your the way that you
finish your bracelet is typically going to add um another inch so like
theoretically I have a six inch wrist and so you know
um am I going to am I going to
um get another inch out of adding the closure and and that's usually what happens i'll
bring in some Well we're going to finish this bad boy but I didn't realize I was going to like
this so much it's so funny has that ever happened to you you're like you know I'm
liking these beads i I don't know if I'm in love but I'm liking them and then you
work with them and you're just like oh these are so
cool and super super pretty this also reminds me of if you're you
know familiar with the west landscape like when you're
driving when you're driving through like
Arizona you know and you've got all the um the gorgeous red
rock Vegas this would be a fun a fun
Vegas bracelet
whoops this is um a great way to teach a new person too by the way you know
you've got a bead where it's big enough where the person can see it and um you
know you you could see just by the way I'm handling everything like how you know the ease of it all right so
this would be a really great way to um if you wanted to teach
somebody just like I'm teaching
you oops
i know it's so peaceful right now i just want you to enjoy that
too because I could think of things to say but sometimes it's nice just to
focus on the soulful dance you know of like going back and forth
and I um you know I definitely believe that the jewel loom
is where you need to start and I have a video where I talk about a lot of the
other looms what I say about the baby jewel loom is that if you are just like
you know I am not sure I am not sure at all that this is going to be my jam but
you want to try it then I would say you know the baby jewel loom is the way to
go just because you know you don't have to do the metal rod it's always in its
warped position and you could kind of you know see if it's a rhythm that that you
like and if it doesn't work for you then you haven't spent probably I think I
think after you buy the baby jewel and you pay for shipping in the US it's it's like under 15 don't quote me on that
because postage is always changing but the baby loom itself
is like um under 10 and so and that's my site you know that's the Jewel Loom home
right you can find the um the jewel loom and baby loom at well you can't find the
baby loom in the mass market i think Amazon has it so if you're a Prime
member then you can get um what you call free shipping
okay I'm just going to for giggles bring [Music] in let's see where we're at
here okay so we got we got some more rows to go but not too too many
so I'd love to have that sewing tape measure on hand it's flexible um I think
I have like three or four laying around it's always nice to
have wower this is really gonna be
pretty pretty pretty oh I have a super cool um I have
a super cool dress it's like a tie-dye dress but
like not obnoxious it's like pretty it's um like
a burnt orange it's got some like brown and um Does it have yellow it might have
like a little burnt yellow in it this would look so pretty with
that i always try to match it
up we still got a good shot here wow look at that all the sparkle
sparkle
sparkle whoops okay I think I still have a
couple more to do so you can see what I say we started off with six
strands of beads so more than enough definitely could
make some earrings um get some headpins and just you know put some of
these guys on a headpin give yourself a loop add um an ear wire and call it a
day so as of right now I think we're about like 35 minutes in or so
and you know definitely like I said once you get your groove and you're not trying to videotape
something all right let's I don't know if we did enough but let's for giggles where are
we okay oh I went a couple that's okay so that's a full six inches i'm not
going to worry about it i'll wear it a little bit loose so we're on the last row and
remember what I said i like to I like to go under so I'm going under the loops
but back through the beads and sometimes I cheat i'll go if I can't get under the one
millimeter but I do want to make sure that last bead gets caught and it did so
here's the needle is under and again I just do that for
extra you know extra security
and so we're just going on
top okay and then what I'm going to do to tie off is I'll just go back through
a couple rows
and y nice okay and then I'll come through
here and I'll see how I'm bringing the needle up and out of that one
bead okay and then I'm going to tuck the needle in there grab the
warp bring it through put the needle back through that loop and then there's a little knot
and then I'm just going to take the needle and push it to the back and then that knot will go with the
needle awesome sauce perfect so there's the deliciousness prior to
taking it off so I'm going to bring my scissors in and I'll trim that closer i just
don't want to take a chance let's get some stuff out of the way here and I'm going to turn the loom
over and I like to embrace the beads with my hand especially if they're glass
right so look how I I sandwich put my pointer is now on top and my
thumb is on top of the back of the jewel loom so you see that how I'm holding it
and then I'll come over here and we'll just cut this off
okay nice nice all
righty that was so cool oh let's see here's that piece i think what I want to
do if I were a bead where would I be where would I be
it should be right over here but I'm not seeing it well that's weird i think I
was just traveling and it must be somewhere where is it okay whatever i'll
find it so the wildfire burner is awesome so what I'm going to do is I'm just going to nip that off and then I'll
go back in and burn that um burn that off that's so weird where is that thing it's usually right by me okay whatever
um is that that's not going to move okay yeah because I sewed that and I also
want to get this tail out of the
way all right so now what you have to do is decide let's
do let's do a little a little coloring so this is like
an orange this is a Baltic birch button and you could seal it with
some resin if you wanted to like some Mod
Podge oh this is making the sun really the design it's making it pop really
well
okay and then I'm going to bring in some yellow
just like sun rays right so that was
orange this button makes it really easy to Ooh that's so pretty i don't know if
you could tell how pretty it is on let me finish and I'll bring it up to
the Okay look at that oh that is so
sweet okay so what we want to do is one end is going to accommodate the
button and the other end is going to have the loops and
so in either case we want to go ahead and we're going to pinch these two warps
together and then we're going to take their little legs
here okay and I'm going to bring my scissors in because I want to get that knot really
close and some Yeah there we go then I'll push it you know pinch it down like
that very carefully i'm not really aggressive with it i I'm really
careful and we're going to do the same thing [Music]
here okay and if it looks uneven just separate the warps and then pull them
separately and what I can already tell is I'm pretty sure I'm going to I'm going to do my button on that
end so let's cut
those loops and and this is a good example of like how I thought I was
centered on the loom and I could have actually like come down a little bit more because you see how little bit of
warps I have on this end and like how long they are on that end so yeah I I
didn't I didn't start down enough um and sometimes I mean I should have known
better so I have no excuse i just listen to what I say not
what I do so it's not a deal breaker it's it's
okay but it just makes life a little easier when you have you know the equal amount on each side to make your loop
and to thread your your um button so yeah having this
There we go yeah I just want to get you know get a m get that
knot oh we almost made it through without a bark but guess what that's
life okay so I'm going to go ahead and take the
um Okay I'm hoping that this goes as planned so you see how I came up and now
I'm going to go down and then for giggles I'm going to hope that it works out for me to
do sometimes the warp gods are in my [Music]
favor sometimes not so much so let's try for
giggles so scooch these guys
over come on big daddy so it wants to
like um
O oh my gosh really why are you being such a
booger cuz we're taping and and it's like I'm not going to be Okay
so what we're going to do and this is fine too
we're just going to do this okay that's all we're going to do and
then we're just going to do a knot and it's going to look super cool either way it's not a deal breaker oh actually okay
i'm I think I actually like this better because this is like going to be like a really cool piece in the middle here oh
that looks really pretty that's really okay that's how come you wouldn't work for me you knew what you were doing the
knot knew the knot knew okay so I'm just tugging on that and I don't like to cut
anything until I know for sure that my bracelet fits um and so what I have to
do now is I put it on my wrist oh so
pretty and then I try to figure out like okay well how big of a loop am I going to
need so it's kind of a little fumbolina but with practice it all works out so I
can because the the goal is that you want it to fit you know have a nice fit but you've also got to get this button
back through whatever size loop you make so I feel like this is good because then
I'll I'll try to get myself out like a little Houdini okay that worked yeah that looks
about right so then I'll pinch that all together and then typically this works
out and I'll get all those little legs and then all of this just is like
be patient go slow don't be in such a hurry and then for giggles before I pull
that really tight let's just make sure yep awesome
[Music] and [Music]
again okay so
tug tug tug and tug nice all right and so
I'm feeling good now that I can I can cut this do I need another let me see
for giggles i'm going to see if doing this one more time looks kind of
cool okay I totally love that now I might go back in actually with a little
white glue just for giggles and like sneak it in with a toothpick
um just to make sure it doesn't come undone so I'm going to trim closely but
not all the way until I do do that and not for nothing I don't have a problem with this either but yeah I definitely
want to go back in and just kind of kind of finish that oh my heck all
right let's put it on so cool oh my goodness and you know you can
come back now too and you could add um well you would need a a bead that had
some bigger holes cuz cuz this is not going to thread through thread through
is that the right word the fire polish beads that we're using they're not they're the hole is
not big enough in other words oh my gosh you guys look where we at where we at
with time 47 um 47 minutes and 47 seconds and that included you know just
like really walking it through and stuff so again once you get your rhythm down and and you know um how to put all of
this together you could whip these out very quickly so yay oh my gosh quick and
easy the way we like it so yeah so again we used our we used
our Jewel Loom she is just a baddie i'm telling you she's a baddie we've got
some delicious Hempique hemp cord which by the way I'm an affiliate of Hempique
and um when you use my code you save 10% um and I'll put that in the body of this
video wildfire i just can't get enough of it i've been using it forever and a day i
love love love Wildfire uh this is the 006 it happens to be in green um we've
got some fire polish beads again if you buy the kit
um the kit comes with the fire polish the hemp cord and the button
oh yeah that's what it comes with yeah okay what else did we do what else did
we do i think that's it and we used um markers and here's the marker
set here's the marker set yeah they're they were delish right so a very easy
project not a lot of stuff and you have a really super cool bracelet
i hope you enjoyed this i'm really good at answering so like if you leave a
comment I will definitely respond um if you haven't subscribed oh my gosh I'd be
so grateful if you did and what else could you do you could like this video you could like it you could share it you
could subscribe to the channel you could visit jeweloom.com to get your goodies and you'd be supporting um a small
business and and um currently cuz he's still alive making this uh video my
little French bulldog Marlon Brando that everybody loves my little my little appendage as I call him he likes to
sleep on my legs okay I am loving this i hope you love it as much as I do and um
I hope our time together was was worth your time i appreciate you i really do
let me know if you have any questions and um do all the things okay have fun